Conclude Apps Customer Support Quickstart
Get started with Conclude Apps for customer support in Slack and Microsoft Teams from our web UI.
Start here
In this guide we will cover:
- How to sign up for an account
- Getting started from our web UI
- Installing a Conclude app
- Configuring a Conclude app
- Creating your first ticket
- Optional Zendesk integration
Step 1: Sign up for an account
- Select Sign up at the top of this page to get started and follow the prompts to complete the authentication process
- If you see the user dashboard instead, it means that you have already added Conclude to your workspace (go to Step 2)
During authentication, you’ll be asked to grant permissions for the platform you’re connecting – Slack or Microsoft Teams. The screenshot shows the Slack consent user flow as an example. If you’re connecting Teams, you’ll see a similar prompt from Microsoft.
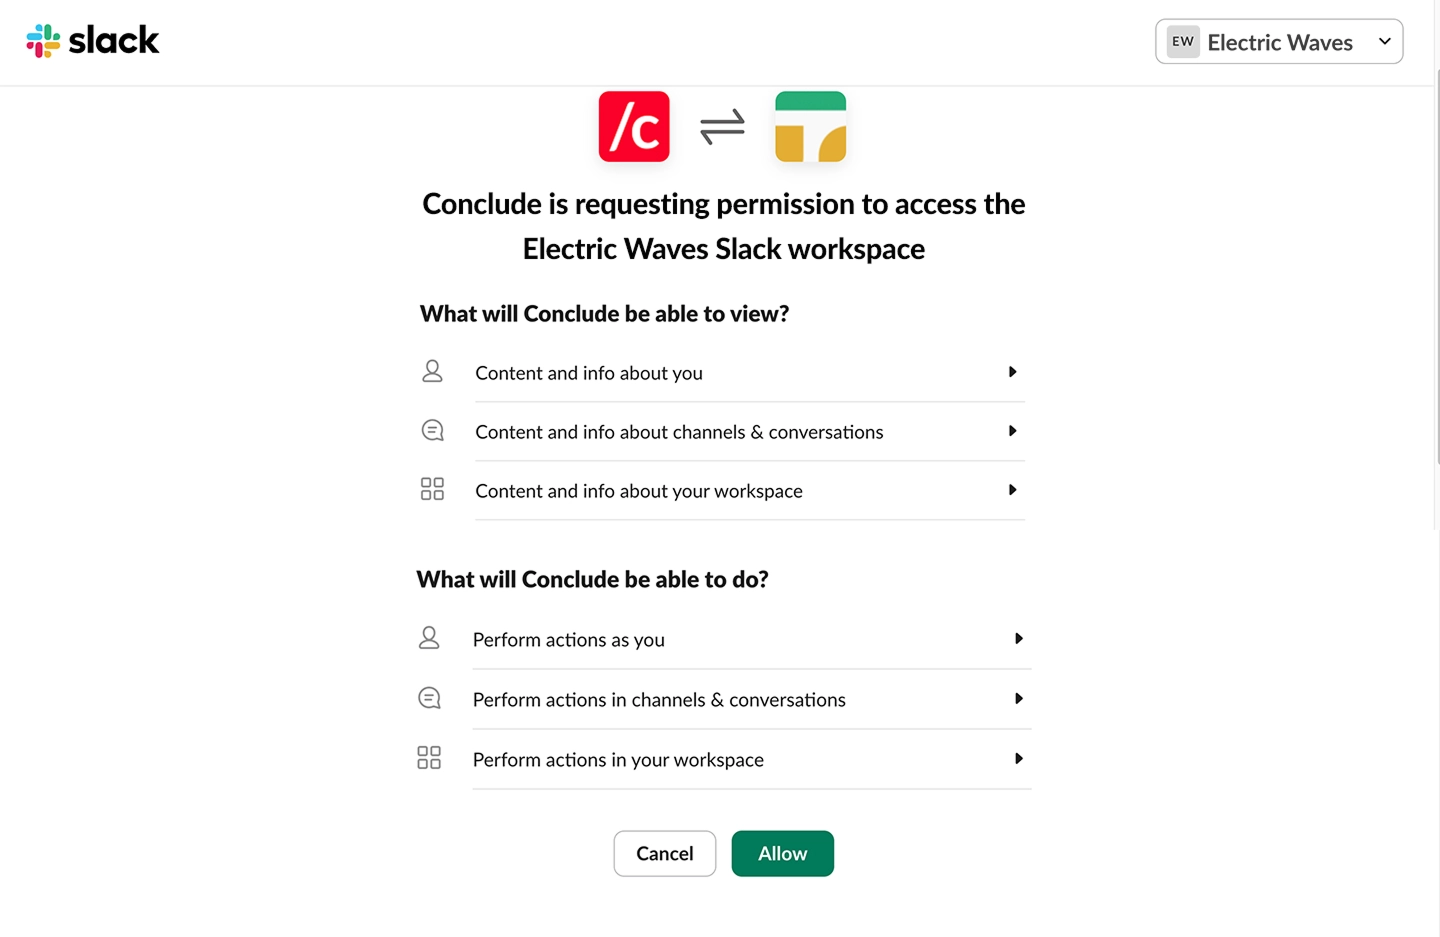
After clicking Allow, follow the prompts to set up an account for your organization. Once that’s done, you’ll be able to access Conclude’s web-based UI.
Step 2: Get started from the web UI
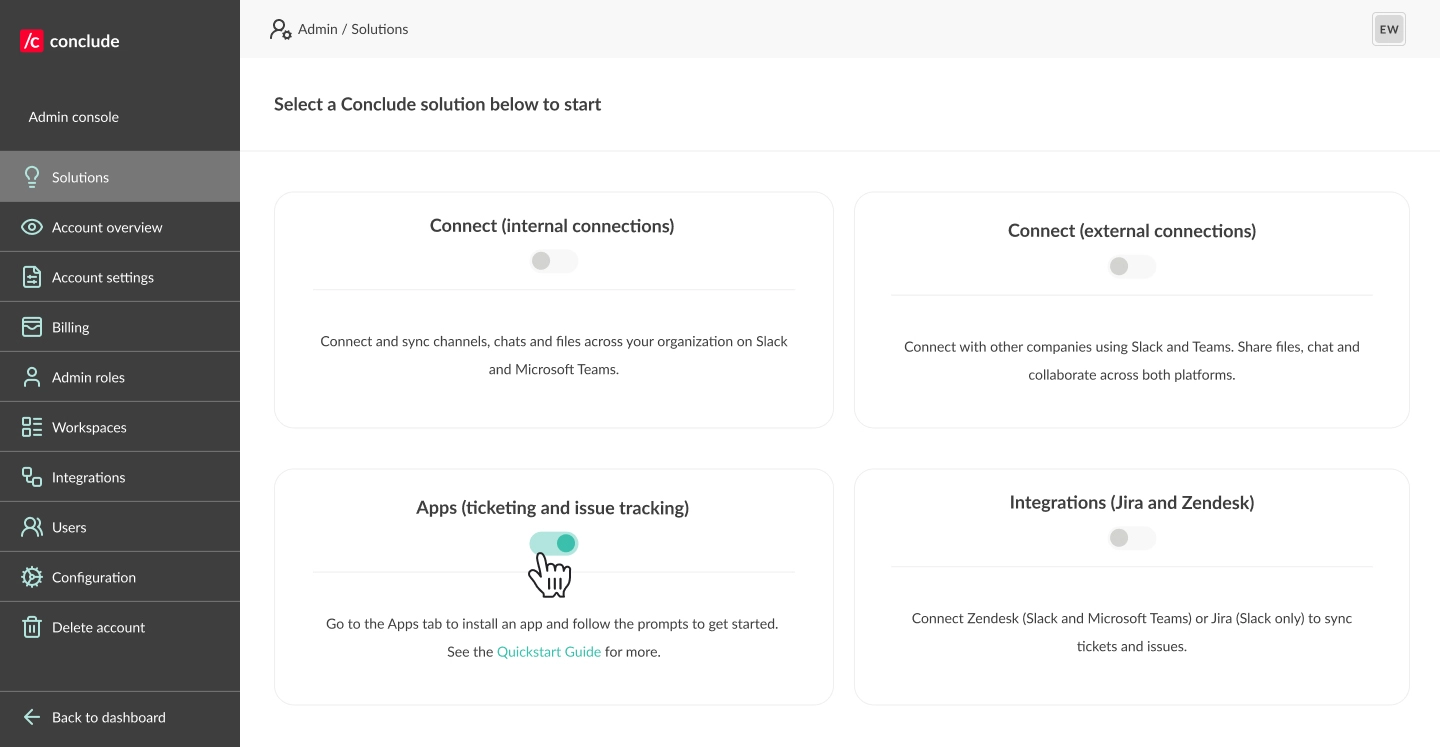
As an admin, you will see an overview of the Dashboard (available to all users) and can navigate to the Admin console located at the bottom left of the sidebar.
To activate Conclude solutions, click Admin console > Solutions. To enable Apps (ticketing and issue tracking), toggle the switch on.
Step 3: Install an app and invite users
Apps can be used to open tickets with external customers, so you will need to have a shared customer channel ready for the app installation.
- Once you have enabled Apps (ticketing and issue tracking), in Solutions, a new section called Apps will appear. Click Back to dashboard to navigate to this section
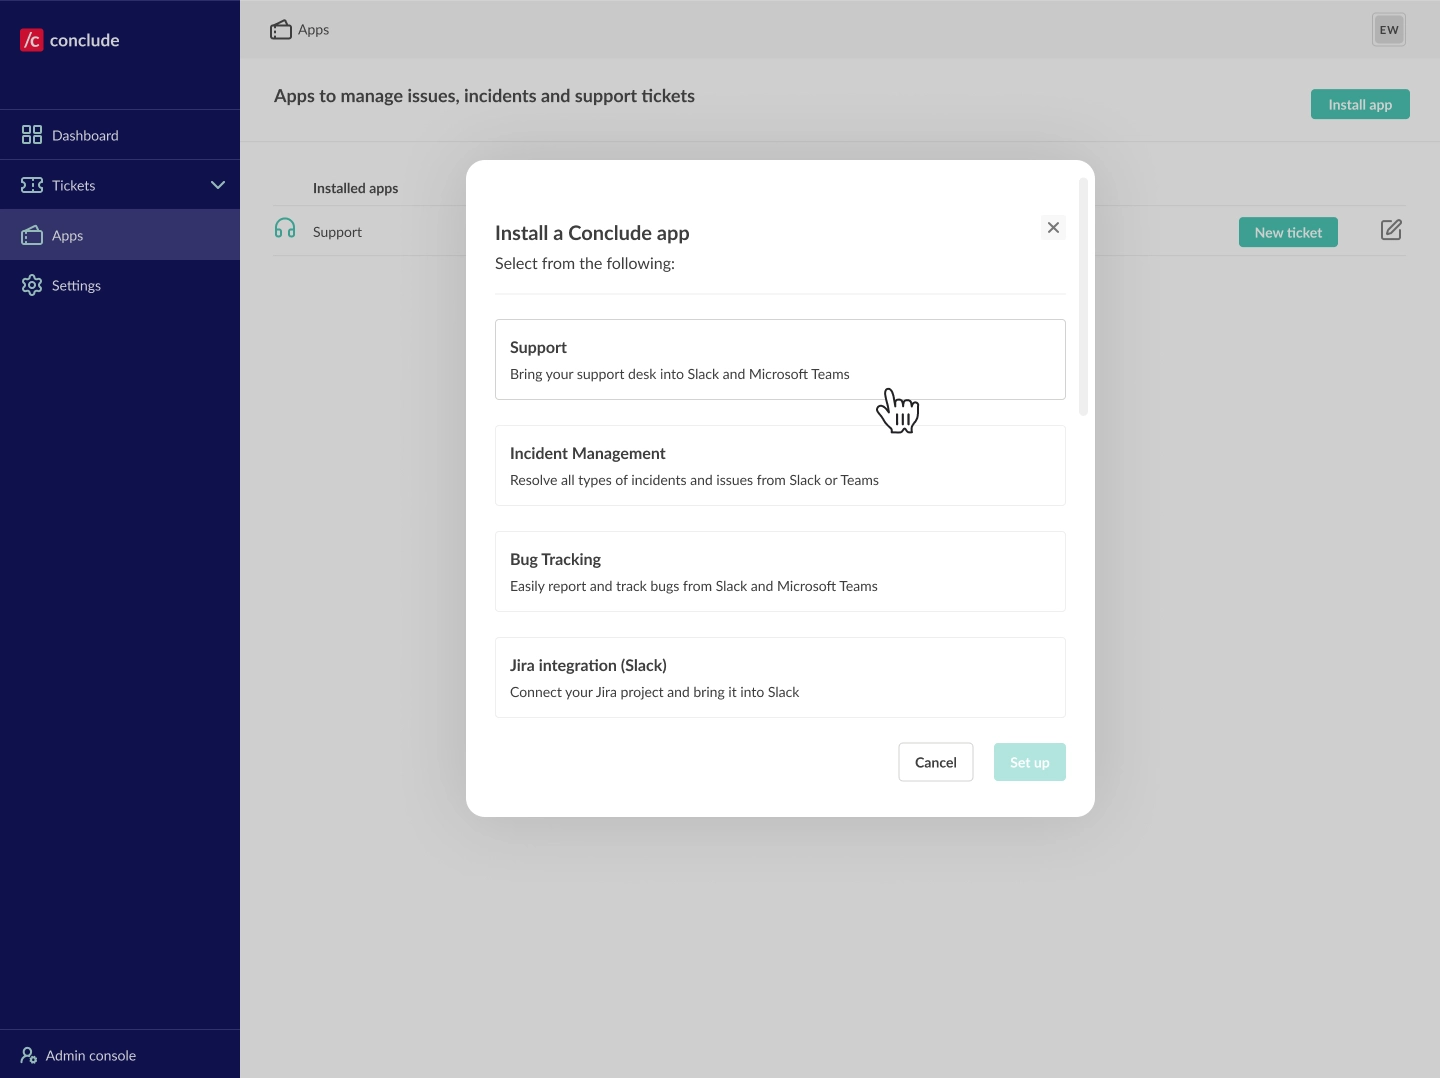
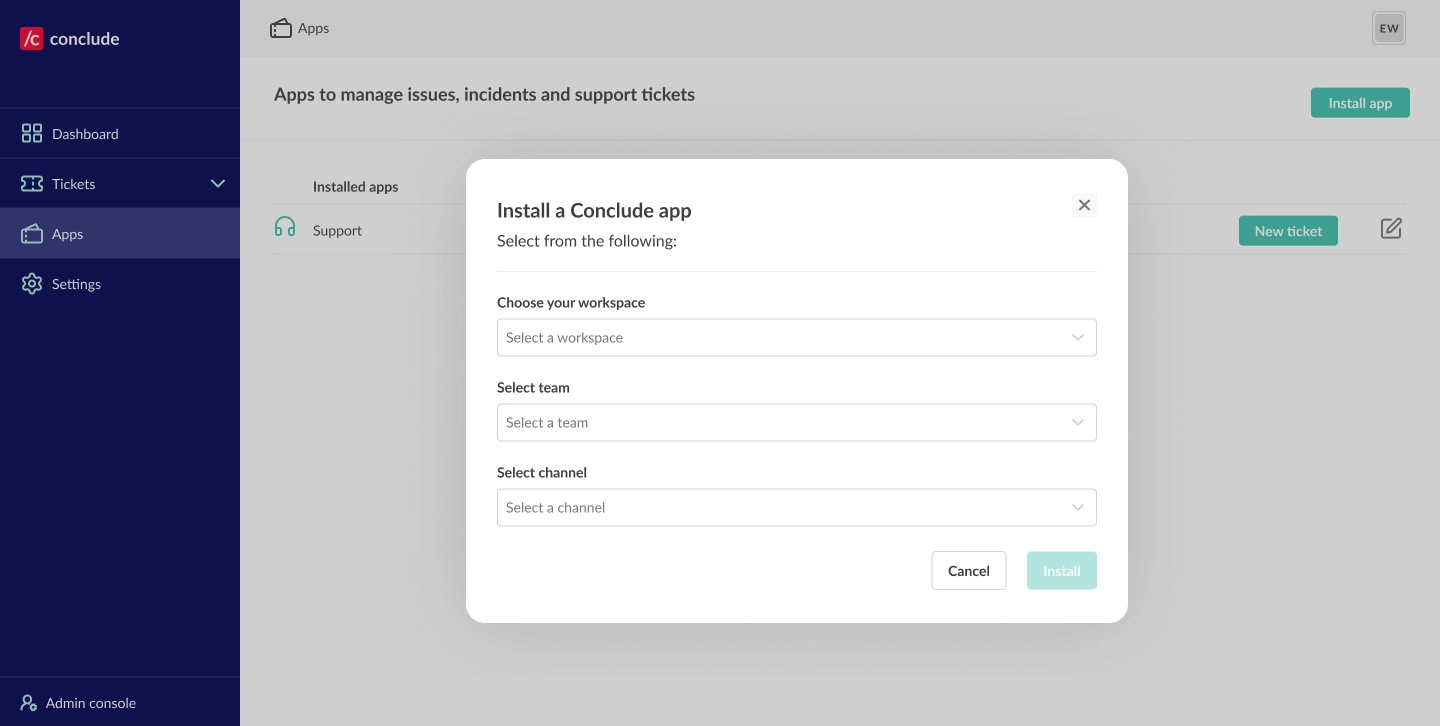
- Navigate to the Apps section and click the Install app button in the upper-right corner to begin
- Select the app (we are using the Support app in this example) and click Setup
- Next, you will choose the workspace from the dropdown menu, the team, and then the shared customer channel
- If you don’t have a shared customer channel yet, we recommend creating one (see the steps below)
Slack: How to invite external users
Create a shared channel
- Open Slack and log in to your workspace
- Click the plus icon next to Add external people in the sidebar
- Select Create a channel
- Name your channel and adjust the settings to public or private
- Click Create
Invite external users using Slack Connect
- After creating a shared channel, enter the relevant email addresses and follow the prompts to send invitations
- Once the invitations are accepted, they will be added to the shared channel
Invite external users as individual guests
- If you prefer to invite single guests instead of using Slack Connect, click on the channel name to open the channel details
- Go to Members and click Add people
- Enter the email addresses of your external users and select Invite as guests
- Follow the prompts to complete the invitation process
💡 Tip: For each customer or external user group, we recommend using a different channel. Everything that happens in the channel is visible to all members.
After creating a shared channel, return to the Apps tab in the dashboard and continue with installation.
Microsoft Teams: How to invite external users
We recommend inviting external users as Guests for a simpler setup, more reliable app installs, and fewer cross-tenant issues.
Invite external users as Guests
Add external users to your Team to give them access to channels and files like regular members (with limited permissions).
- Go to your Team > Manage team > Members > Add member
- Enter the external email address and click Add
- They’ll receive an invite and appear as (Guest) once accepted
💡 Guest access must be enabled in your Microsoft Teams tenant settings.
Step 4: Configure your Conclude app
Once installed, you can start to use the app straight away (go to Step 5), or you can customize it.
To edit your app, go to the Apps section of the sidebar and click the Edit icon (pencil) on the right, next to the app you want to configure.
This will open the Settings tab for the selected app.
Customize your settings
Conclude offers multiple ways to configure and define an app’s behavior.
- General settings – configure the app’s name, enter a short description, and determine who has access, among other things
- Roles and access – assign an owner, specify which people and channels will be invited, and which channels will receive notifications
- Review settings – decide who reviews incoming issues and set up any exclusion criteria
- Attribute fields – configure existing attributes or add new ones
- Severity settings – enable and configure severity levels (this is especially useful when tracking incident metrics)
- Text settings – customize different text fields, including the Launch button and Owner label
- Email settings – allow people from outside your team or organization to send emails directly to the app. AI email summarization and translation settings are also found here
- Zendesk settings – integrate the app with Zendesk (visible if this solution is enabled)
- Jira settings – connect to Jira and configure your projects (visible if this solution is enabled)
- Expert – view or edit the YAML source code of any app
- Delete app – lets you permanently delete an installed app
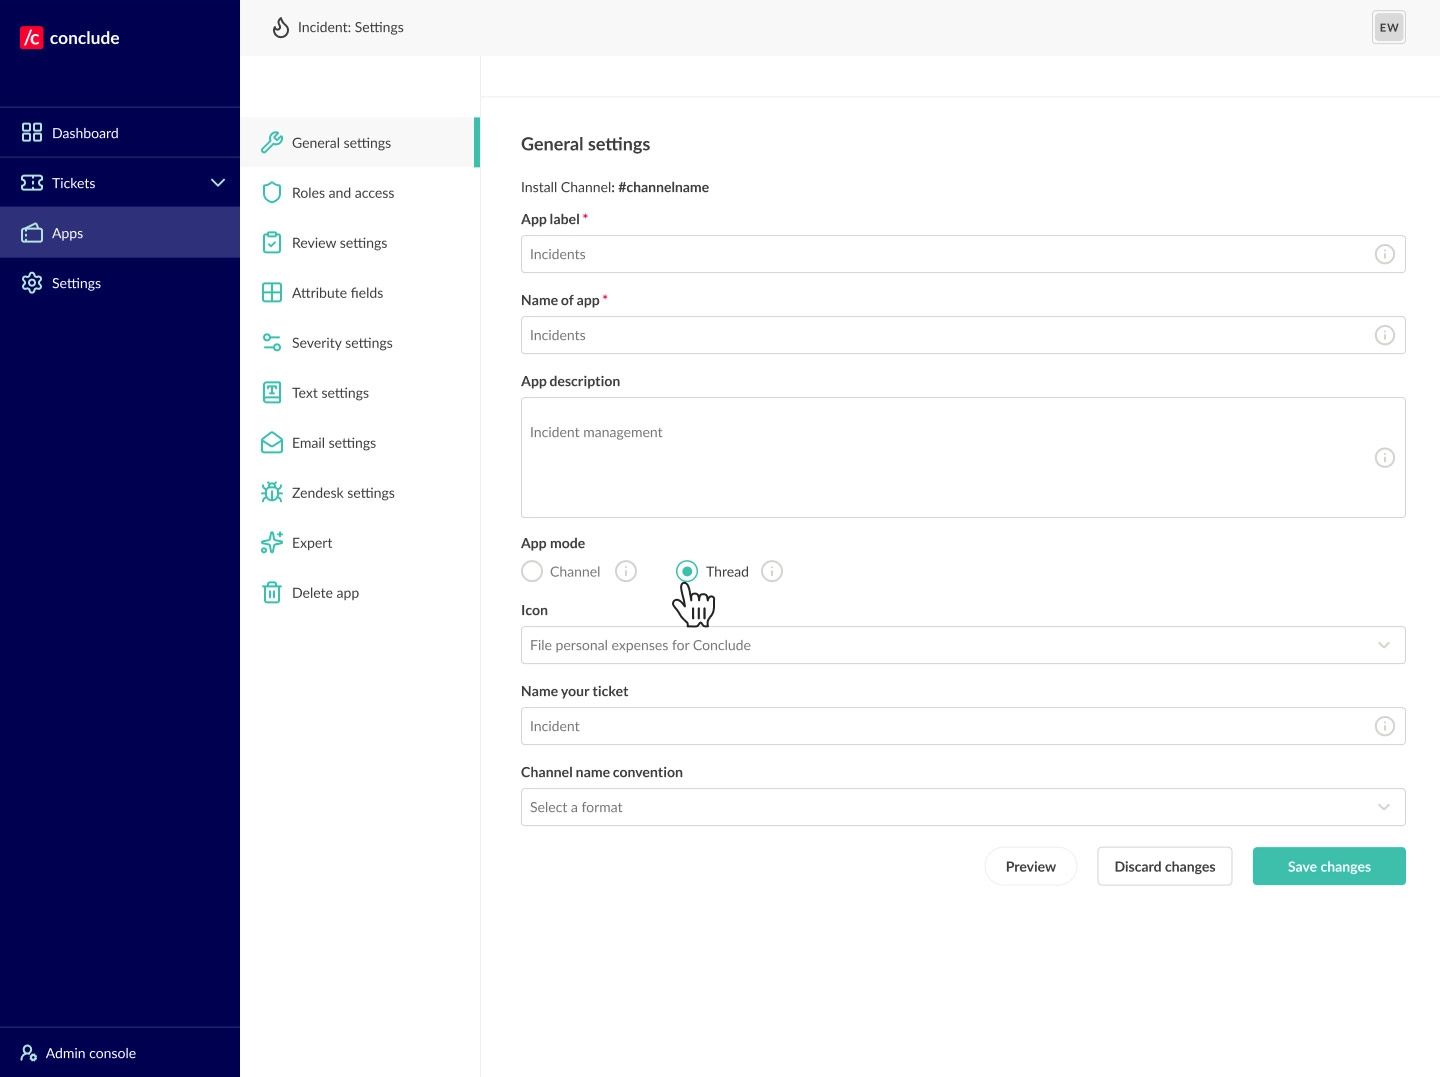
💡 Set the app to thread mode in Slack
When using Slack for external ticketing, you can change the App mode under General settings from Channel to Thread. This is recommended.
In Thread mode, each new ticket is opened as a thread within the main channel – use the ticket emoji to open a new thread – instead of creating a separate channel for each ticket.
This helps to keep your UI clean and organized. In Microsoft Teams, tickets are created in thread mode by default.
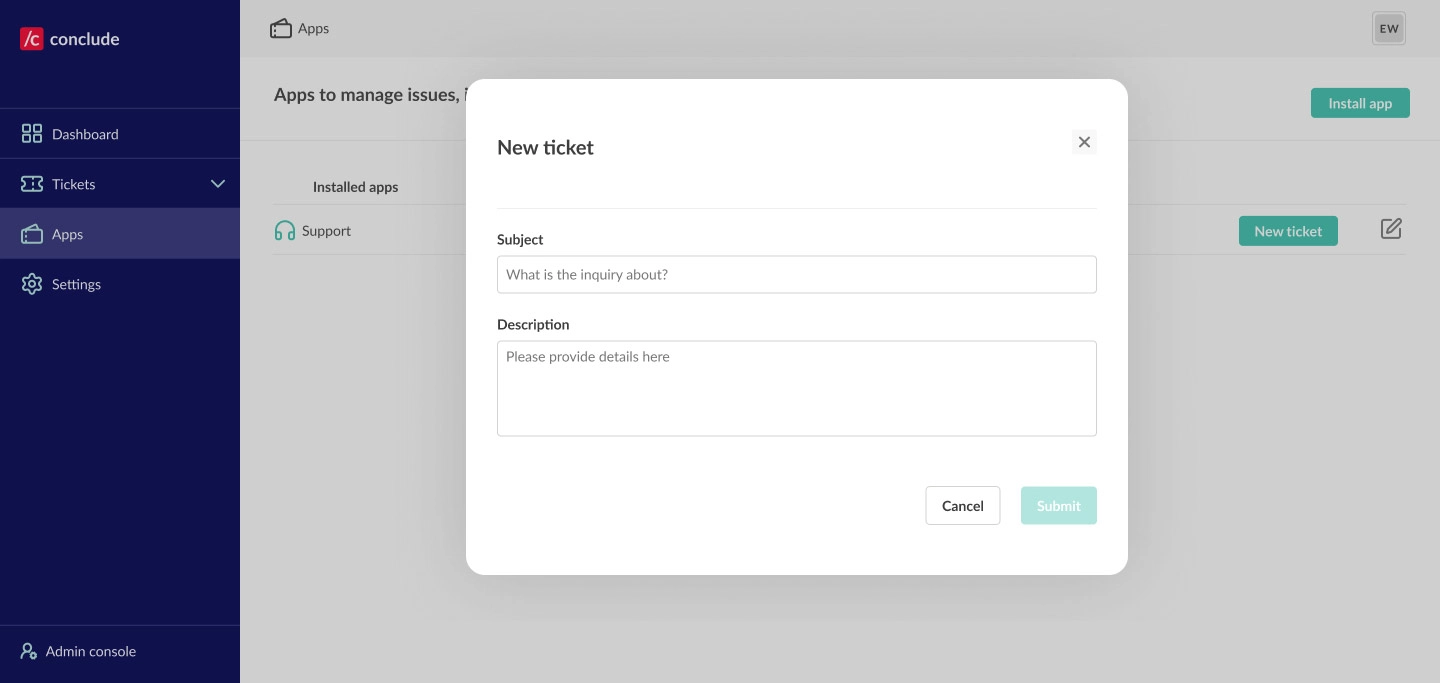
Step 5: Create your first ticket
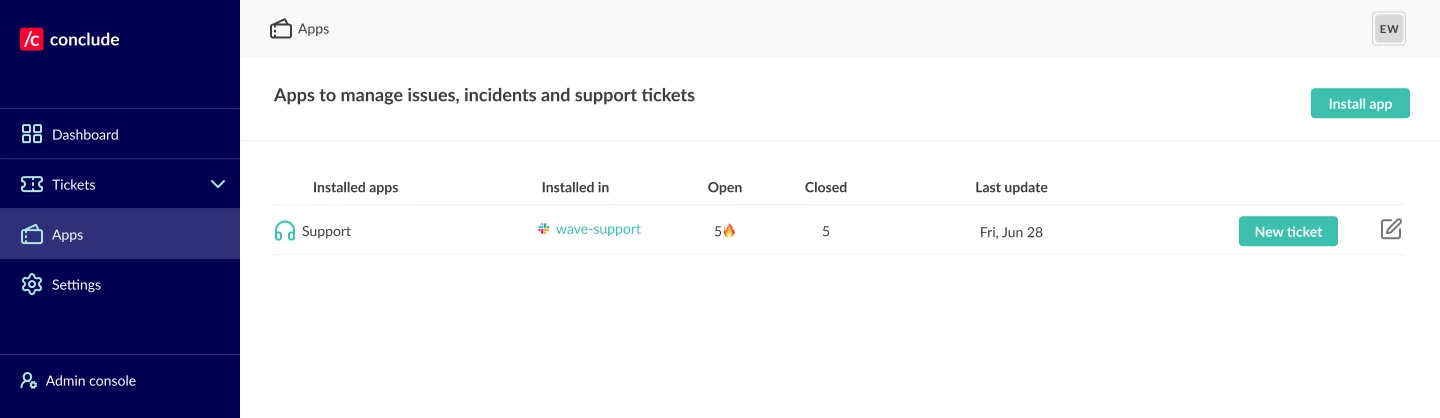
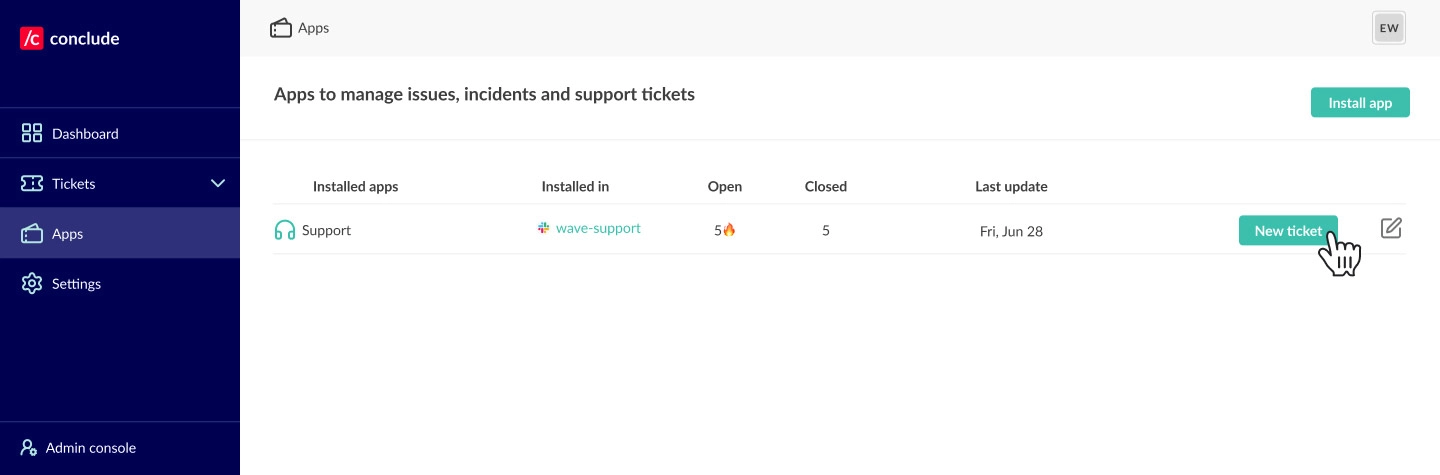
In this example, anyone who is a member of the #wave-support channel can open a ticket. To launch an app from the web UI navigate to the Apps section, select the app you want to launch, e.g. Support, and click the New ticket button.
💡Tip: tickets can also be opened directly from Slack or Teams once Conclude is installed in that workspace. See our other Apps Quickstart Guides for more information.
Next, give your team more details and submit the ticket (you can edit and add more details later).
Adding more details from the dashboard:
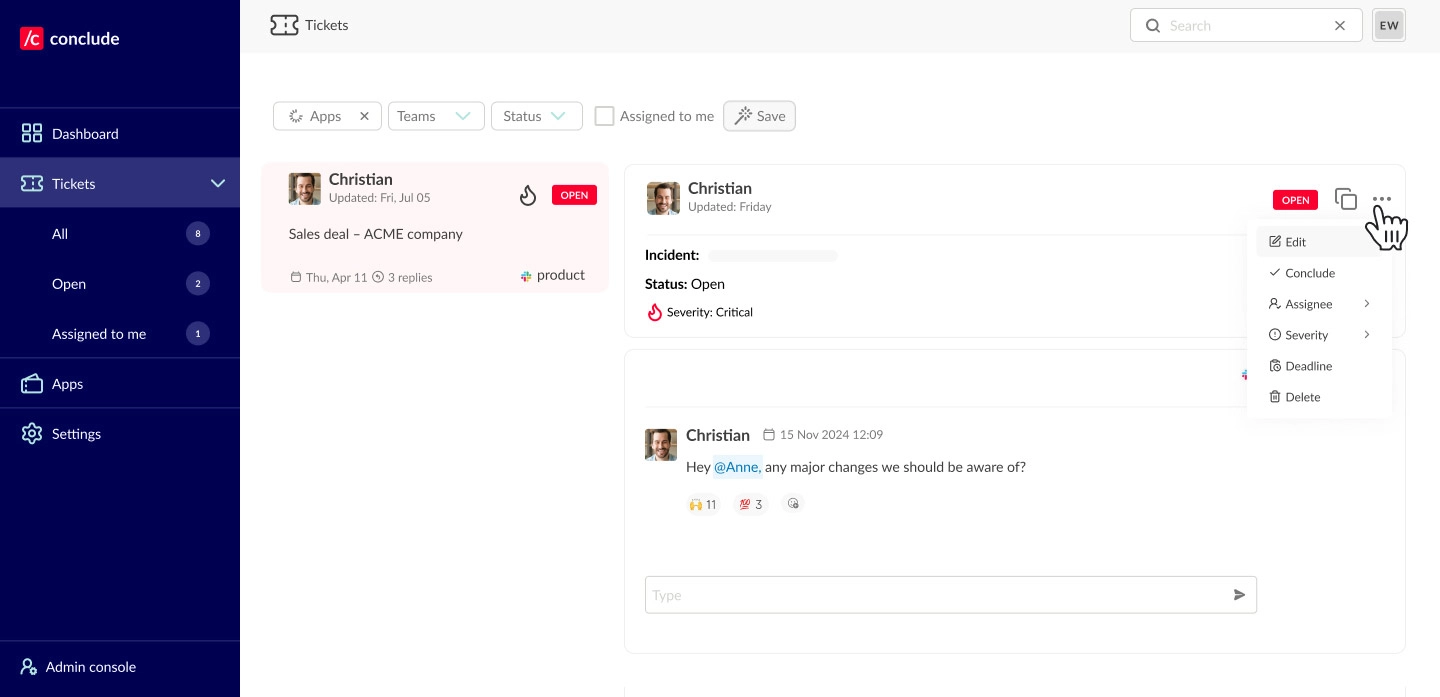
- From the web UI, navigate to the card – you will find all your cards under Tickets
- Click the three dots in the upper right hand corner and select Edit to make any changes, including who the ticket is assigned to
Step 6: Connect Zendesk (optional)
Follow the steps below or see our Zendesk Integration Quickstart Guide for more information.
Connect Zendesk in the Admin console
- Under the Solutions tab, toggle the Zendesk integration switch on
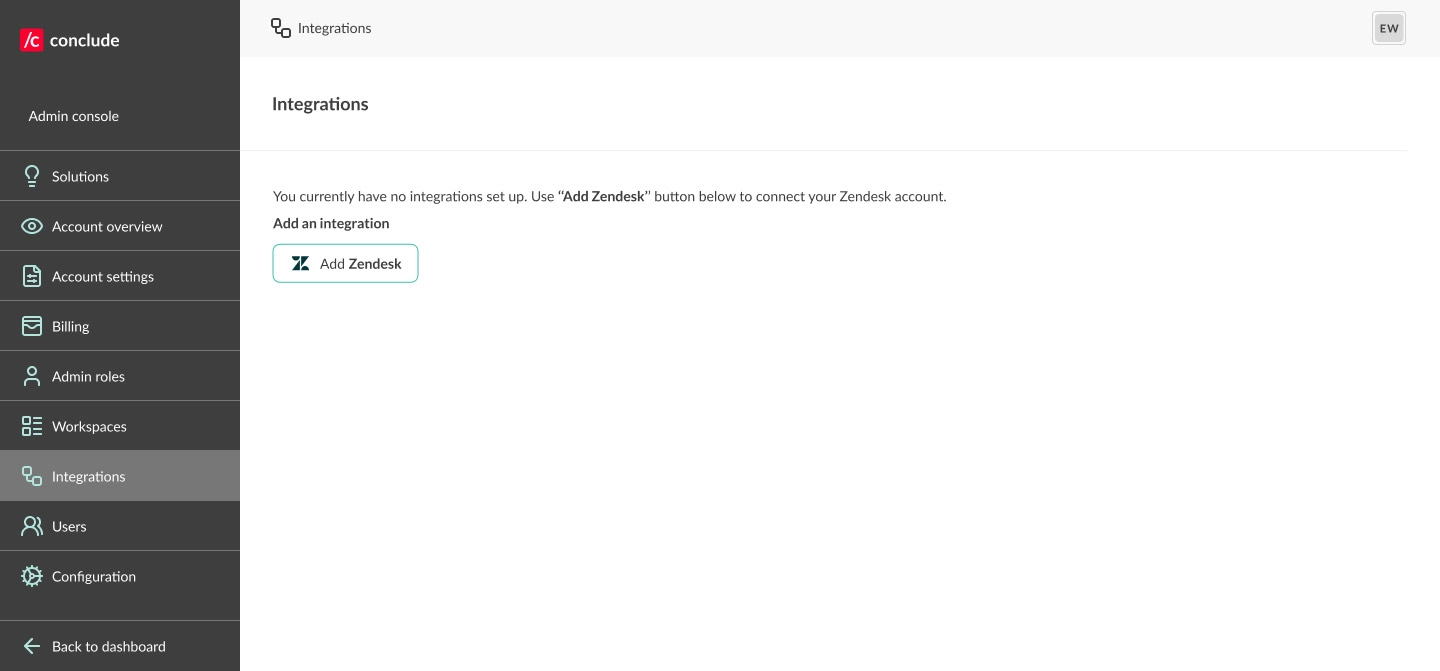
- Next, go to Admin console > Integrations > Add to Zendesk
- Enter your Zendesk subdomain (add only the part before .
zendesk.com) and click Add integration - When prompted, click Allow to grant permissions; you’ll see a confirmation when successful
Configure the selected app
- Go to Apps, click the edit (pencil) icon next to the app you want to integrate with Zendesk
- Open Zendesk settings, check Integrate with Zendesk, then Save
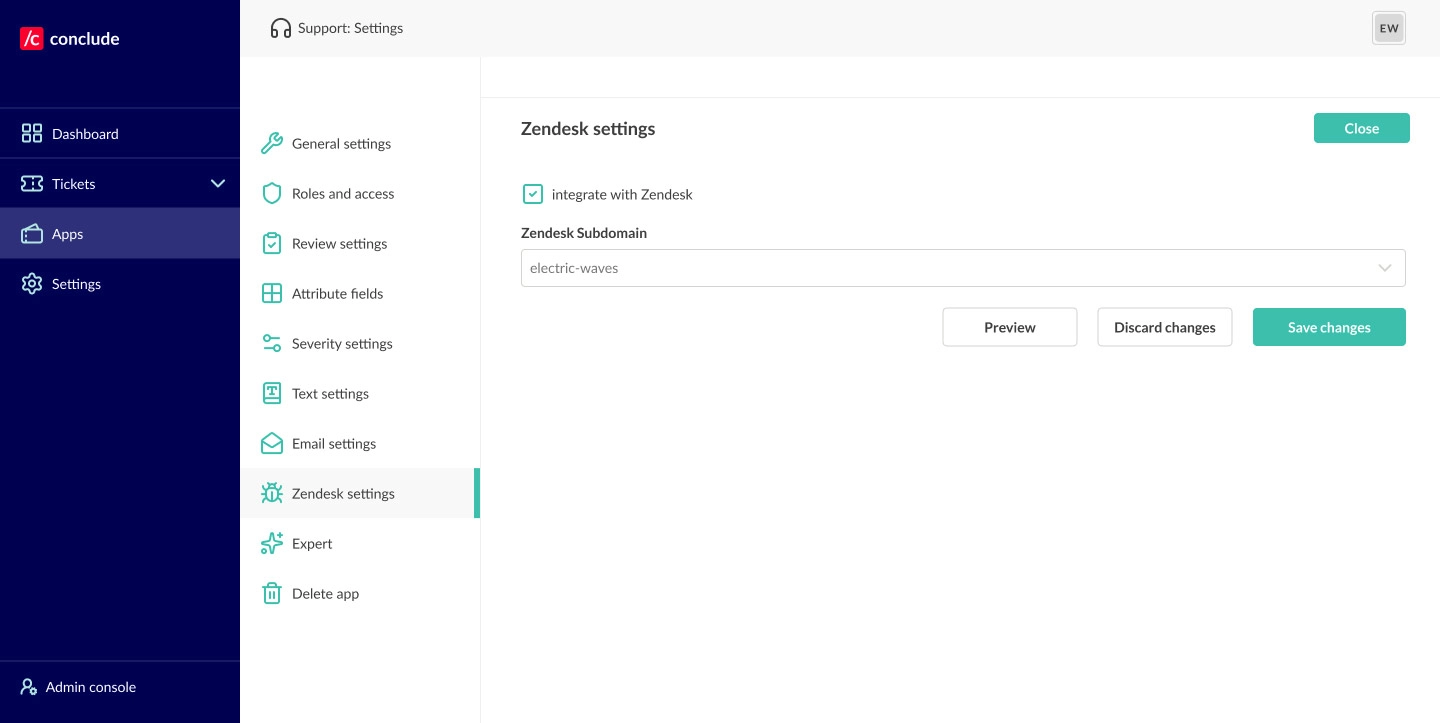
- The channel where the app is configured will now sync with Zendesk
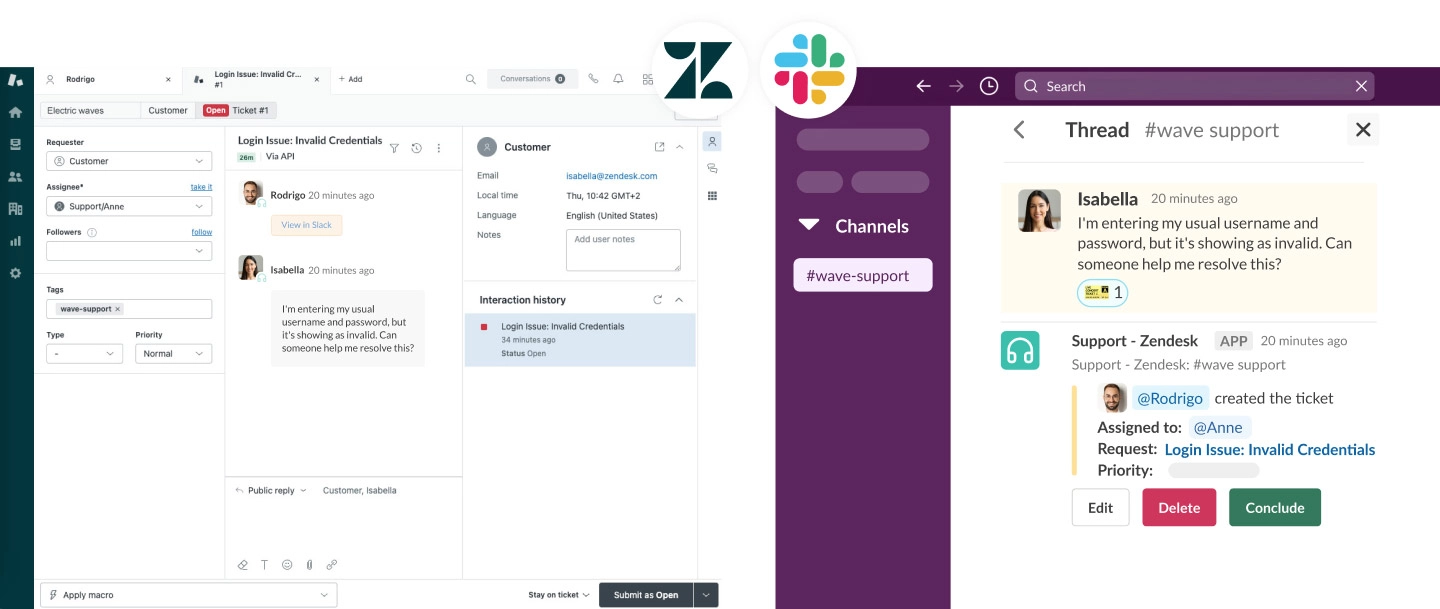
- When a ticket is created in Teams it will be automatically mirrored in Zendesk and vice versa
- When a ticket is created in Slack, it will be automatically mirrored in Zendesk and vice versa
- From Slack, using the ticket emoji on any message in a shared customer channel will open a ticket as a threaded message (see example below)