Apps Slack Quickstart
Start here
In this guide we will cover:
- How to sign up for an account
- Getting started from Slack
- Installing a Conclude app
- Configuring a Conclude app
- Creating your first ticket
- Concluding your first ticket
Step 1: Sign up for an account
- Select Sign up at the top of this page to get started and follow the prompts
- If you see Home instead, it means that you have already added Conclude to your Slack workspace (go to Step 2)
💡 Tip: If you cannot add Conclude to your Slack workspace, check with your team admin.
Once you select Sign In you should see the following:
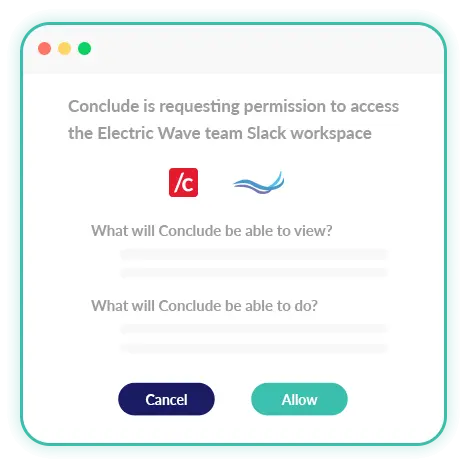
If this is the first time you are signing in, after selecting Allow, you will be automatically directed to the Dashboard (Conclude’s web based UI).
- If it’s not your first time signing in, you have the option to open Conclude in Slack
- From the Dashboard, you can also select Conclude in Slack from the sidebar and continue with Step 2
Step 2: Getting started from Slack
Once you’ve installed Conclude, you will see a welcome message with some instructions on how to run and install your first Conclude app.
From here you can go directly to Step 3 Installing a Conclude app.
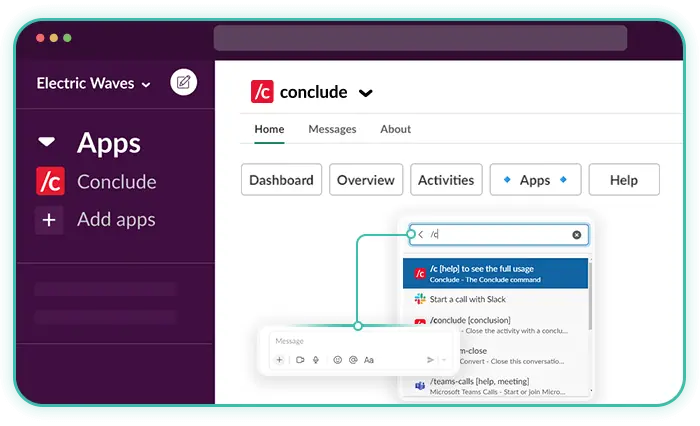
Conclude Home
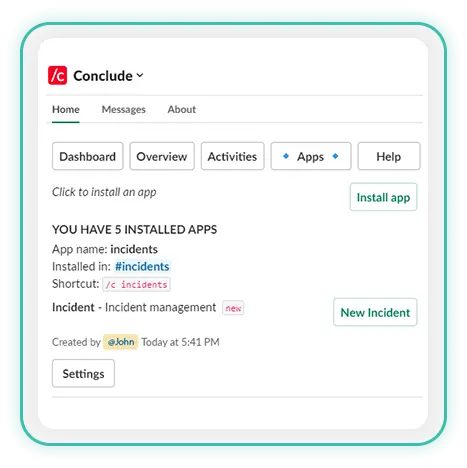
This is your command center in Slack where you can install and run apps, and view recent tickets.
Conclude Home has five sub-menus: Dashboard, Overview, Tickets, Apps, and Help. As you start to use Conclude, you will see information populated here.
Here are three ways to navigate to Conclude Home:
- Click anywhere you see the Conclude logo, or;
- Select Conclude from the installed apps on the left-hand side, or;
- Type
/chome to bring up a link to Conclude Home
Step 3: Installing a Conclude app
There are two ways to install a Conclude app from Slack:
- From the Apps section of Conclude Home by clicking Install App or;
- By running the quick command
/c app install
💡 Tip: every command starts with /c . If you get stuck at any point, try using the command /c help. You can also find the quickstart guide under the Help section.
For either option you will see a list of our most popular apps:
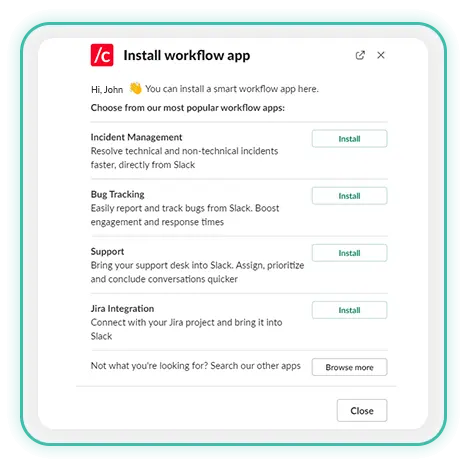
In this example, we are using the Incident Management template:
- Select Choose an existing channel to install the app, e.g. #incidents, or make a test channel by clicking Create channel.
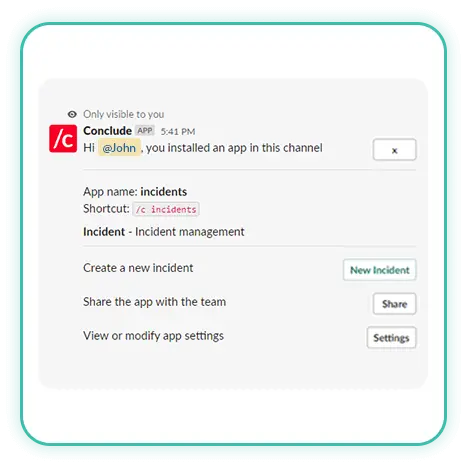
- Next, click Install. Conclude will display a message that only you can see
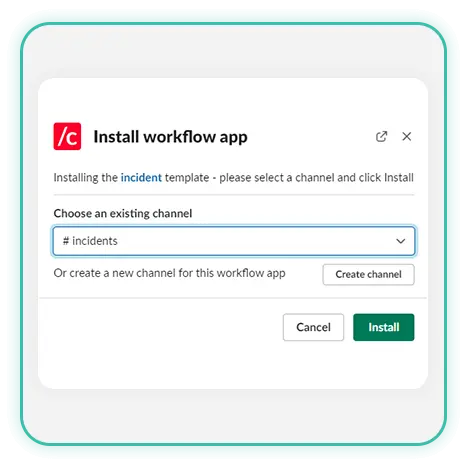
💡 The channel where you install the app is the primary channel e.g. #incidents, so any new tickets created from this channel will open up in a separate channel, organized by number. These channels are archived when the incident is closed.
Step 4: Configuring a Conclude app
- Share lets you announce to the channel that you have installed a new app.
- Settings will take you to Conclude Dashboard > App Settings, where you can customize the content and behavior of your app (see below)
Conclude offers multiple ways to configure and define an app’s behavior.
- General settings – configure the app’s name, enter a short description, and determine who has access, among other things
- Roles and access – assign an owner, specify which people and channels will be invited, and which channels will receive notifications
- Review settings – decide who reviews incoming issues and set up any exclusion criteria
- Attribute fields – configure existing attributes or add new ones; this includes Severity settings – enable and configure severity levels
- Text settings – customize different text fields, including the Launch button and Owner label
- Integrations – this is where you can see and set up email settings (including summarization and email translation), and connect a Jira project or Zendesk integration – see the associated Quickstart Guides for more
- Expert – view or edit the YAML source code of any app
- Delete app – lets you permanently delete an installed app
Step 5: Creating your first ticket
In this example, anyone who is a member of the #incidents channel can report an incident.
There are several ways to create a ticket in Slack:
- Type /c to see a list of installed apps then click the New Incident button
- Navigate to the channel and type
/c newto create a new ticket - Go to Conclude Home > Apps and select New incident
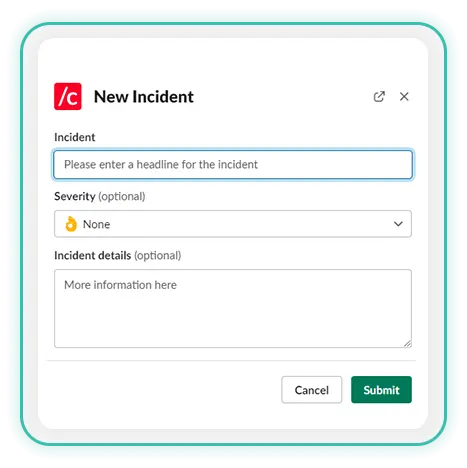
Create the ticket and add some more details, then Submit the incident (you can edit and add more details later).
What happens next?
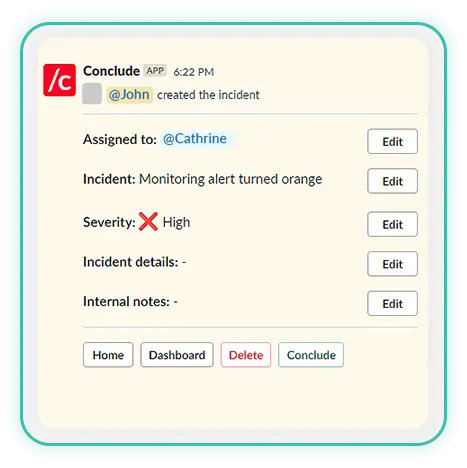
- An alert is sent to the channel e.g.
#incidents - A dedicated channel for the ticket
#_incidents-1is created. Other incidents created from the primary channel will get their own dedicated channels i.e.#_incidents-2,#_incidents-3, etc. - Everyone from the
#incidentschannel can see the new ticket
💡Tip: Rename the channel using the command /c rename _type-new-channel-name. We recommend using the underscore as a way to keep tickets grouped together.
Adding more details
- Navigate to the channel e.g.
#_incidents-1 - Select the row you want to edit e.g. Assigned to and Edit using the buttons on the right
- Otherwise, send a message to the channel with any additional information (optional).
Step 6: Concluding your first ticket
After the issue is resolved, the ticket can be concluded. The Slack channel is archived but still remains searchable from the Dashboard.
To conclude a ticket:
- Select the green Conclude button and leave an optional note about the resolution
- The ticket is closed and the dedicated channel
#_incidents-1will disappear - A message will be sent to the main channel e.g.
#incidents, notifying team members that the incident has been resolved with any relevant details
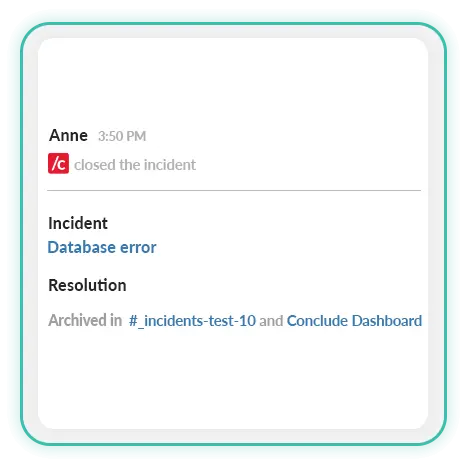
💡 Tip: Use the link to go to the Conclude Dashboard (or Conclude Home > Dashboard) to see a complete overview of all your tickets, their status (open or closed) and severity level.