Jira Integration Quickstart
This guide explains how to set up the Conclude Jira integration for tasks, issues and bug tracking on Slack and Microsoft Teams (Teams in beta).
Start here
In this guide, we cover:
- Activating the solution
- Authorizing the Jira integration
- Installing a Conclude app
- Configuring the app to sync with your Jira project
- Alternative ways to add your Jira account (Admin console)
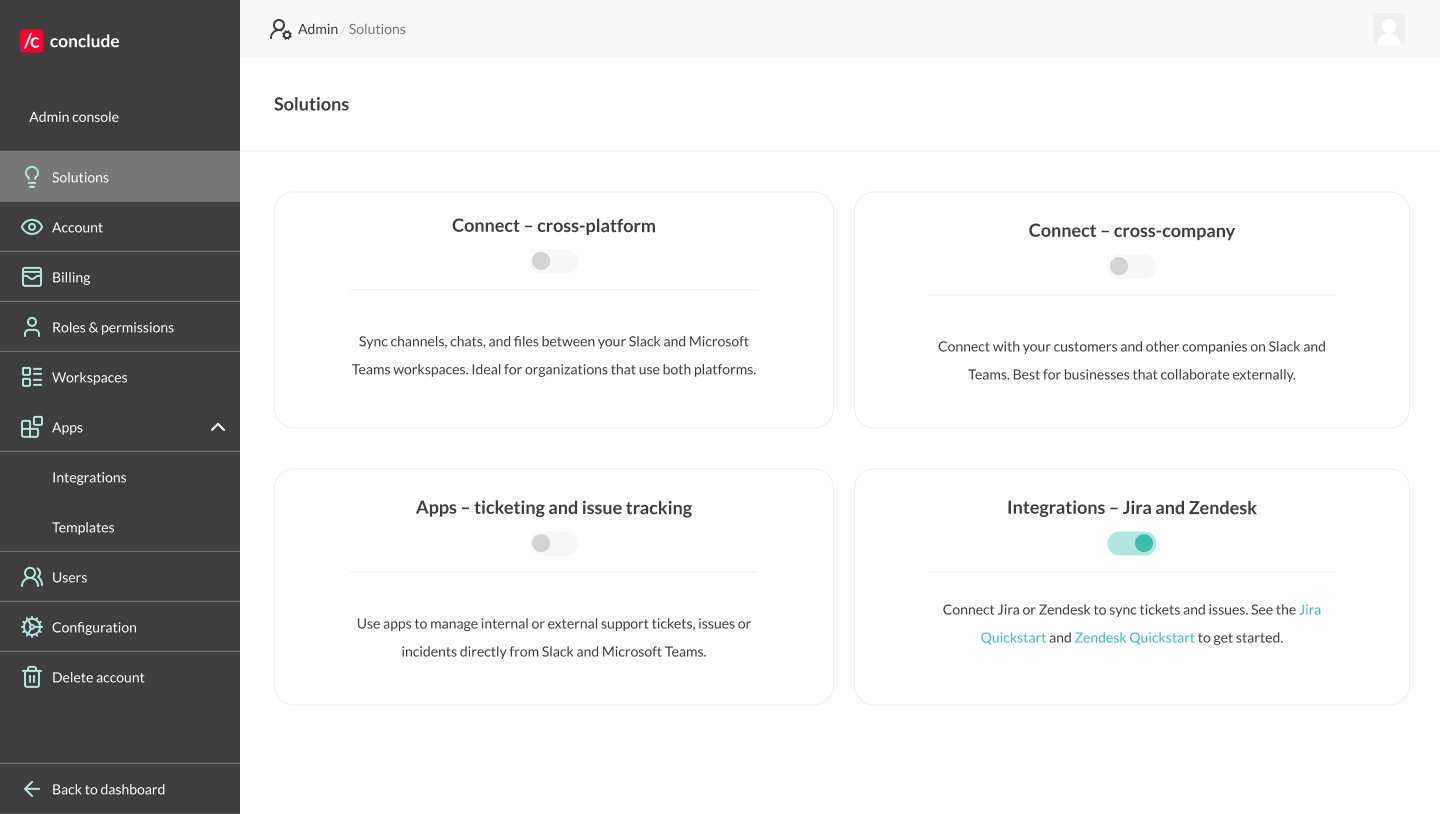
Step 1: Activate the Jira integration
From the Admin console, navigate to the Solutions tab. Toggle the Integrations – Jira and Zendesk switch on. Optional: if Apps – ticketing and issue tracking is not yet enabled, you can either toggle this on now, or it will be activated during the setup process.
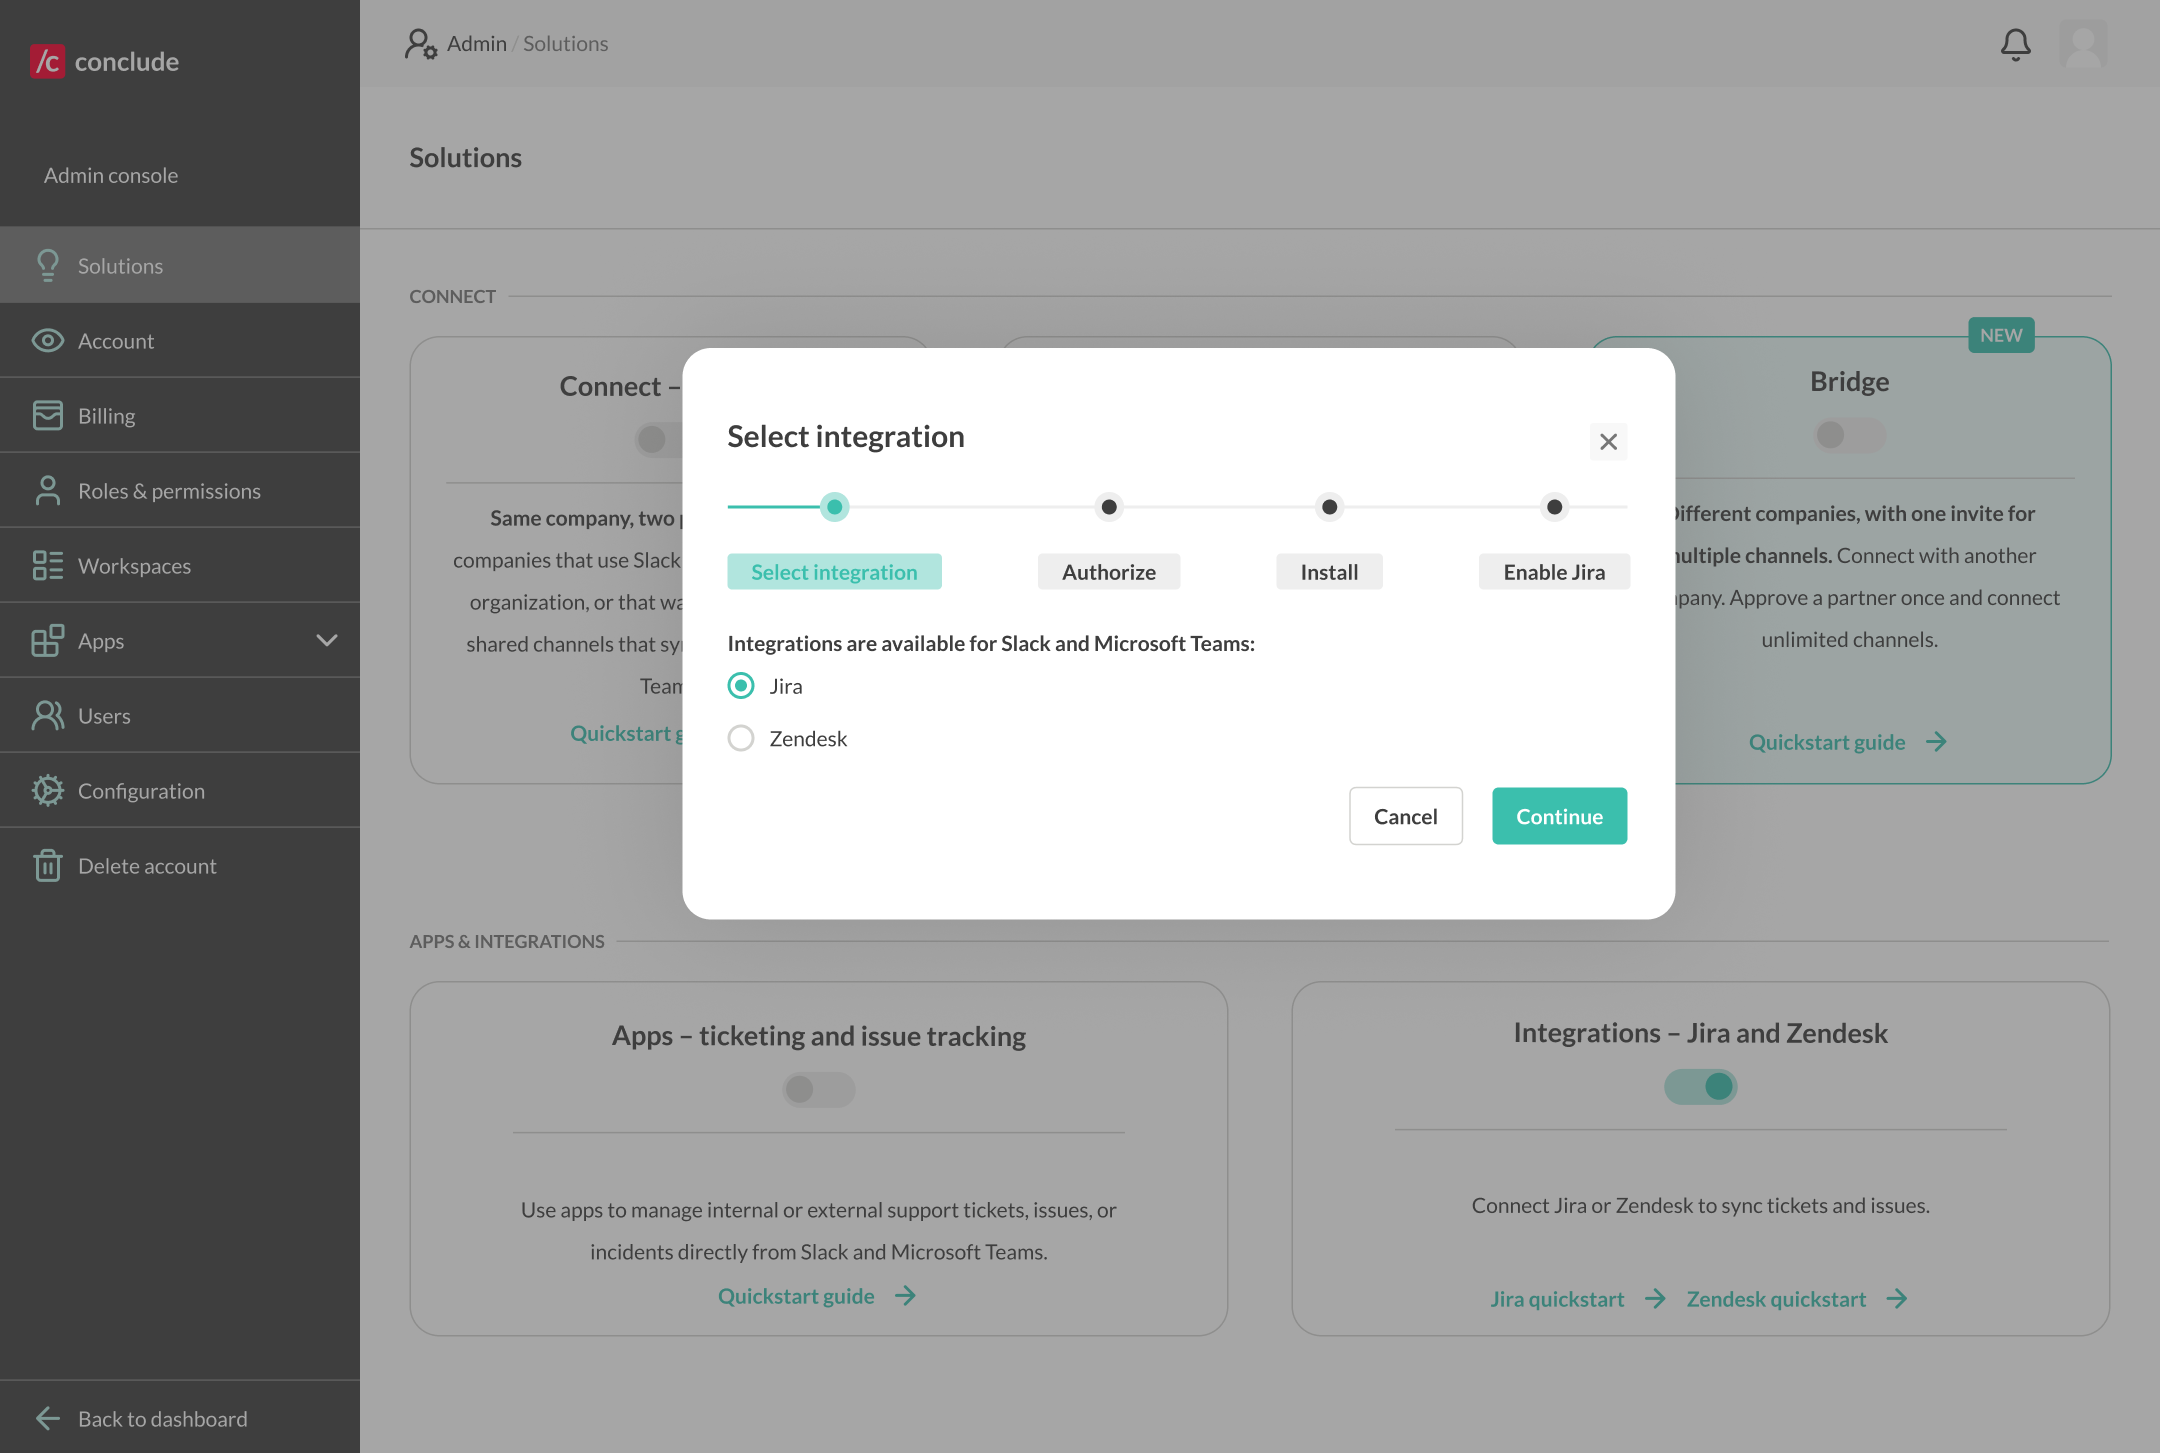
Step 2: Select the integration
After toggling the switch on, a setup wizard opens automatically. The wizard will walk you through four steps: Select integration → Authorize → Install → Enable Jira. Select Jira integration and click Continue. Alternatively, you can navigate to the Integrations tab in the Admin console to complete this setup later.
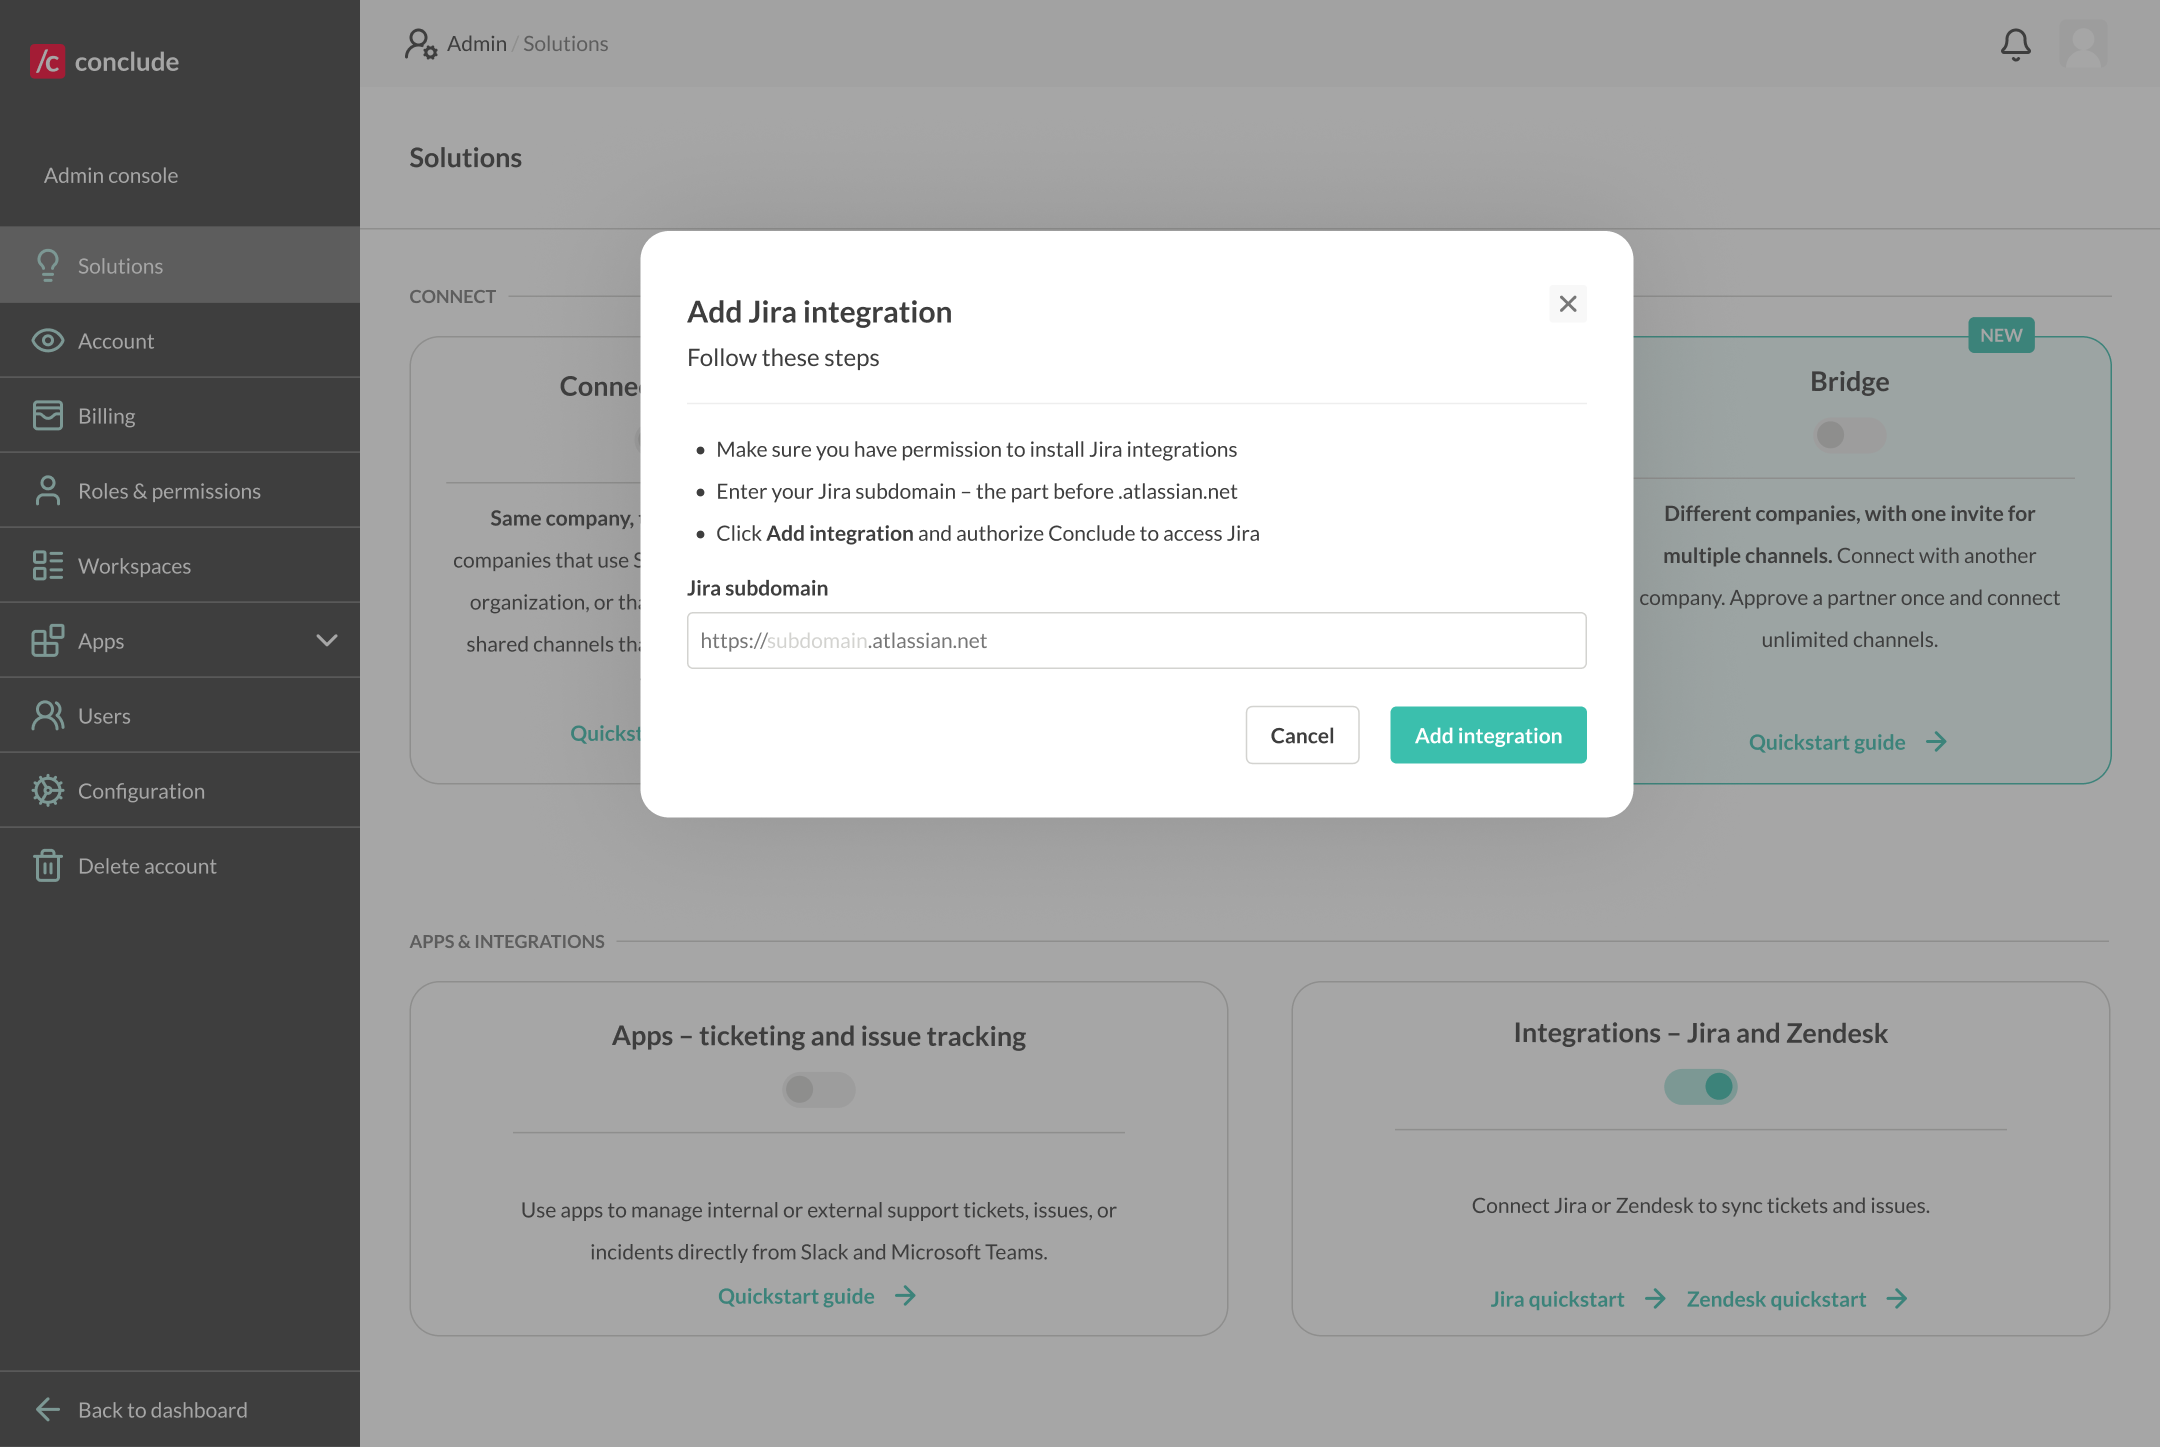
Step 3: Authorize and add your Jira account
In this step, you will be prompted to connect your Jira account. Enter your Jira subdomain – – without https:// or .atlassian.net – and click Add integration.
You will be redirected to Atlassian to authorize the connection. Review the requested permissions and click Accept.
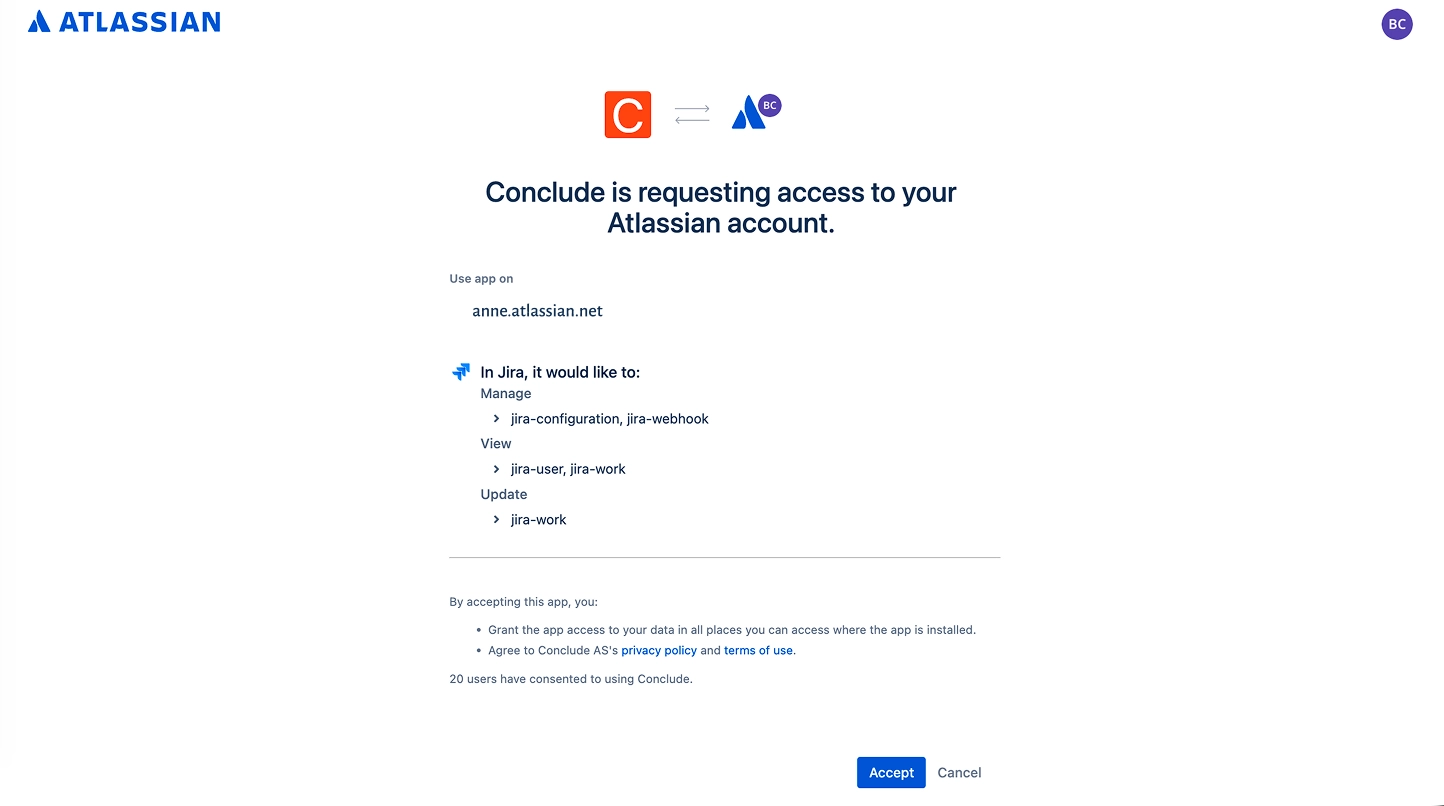
Note: Make sure you have permission in Jira to install integrations before this step. If you have already connected a Jira account to Conclude, this step will be skipped automatically.
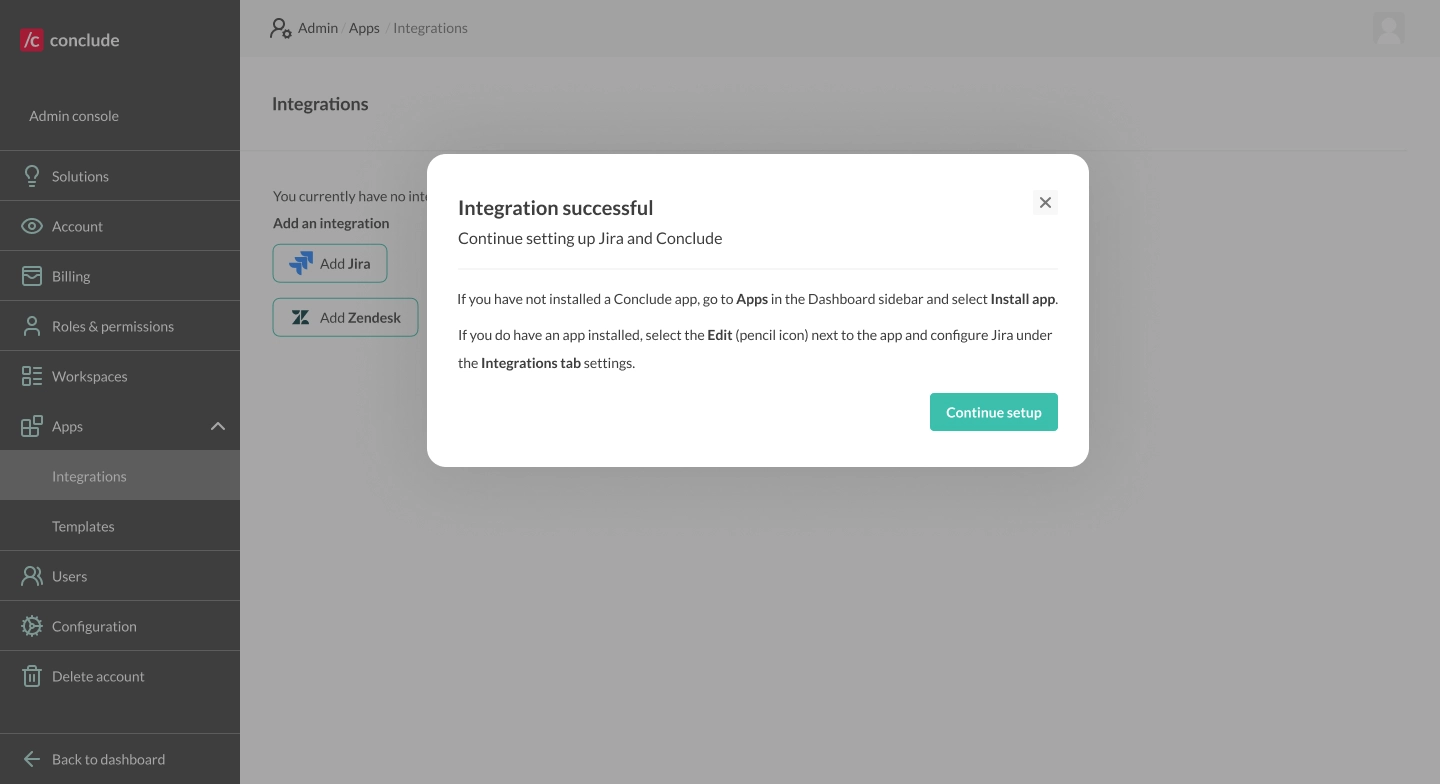
Step 4: Install a Conclude app
After authorization, click Install app to install any Conclude app or go to the Apps section in the sidebar.
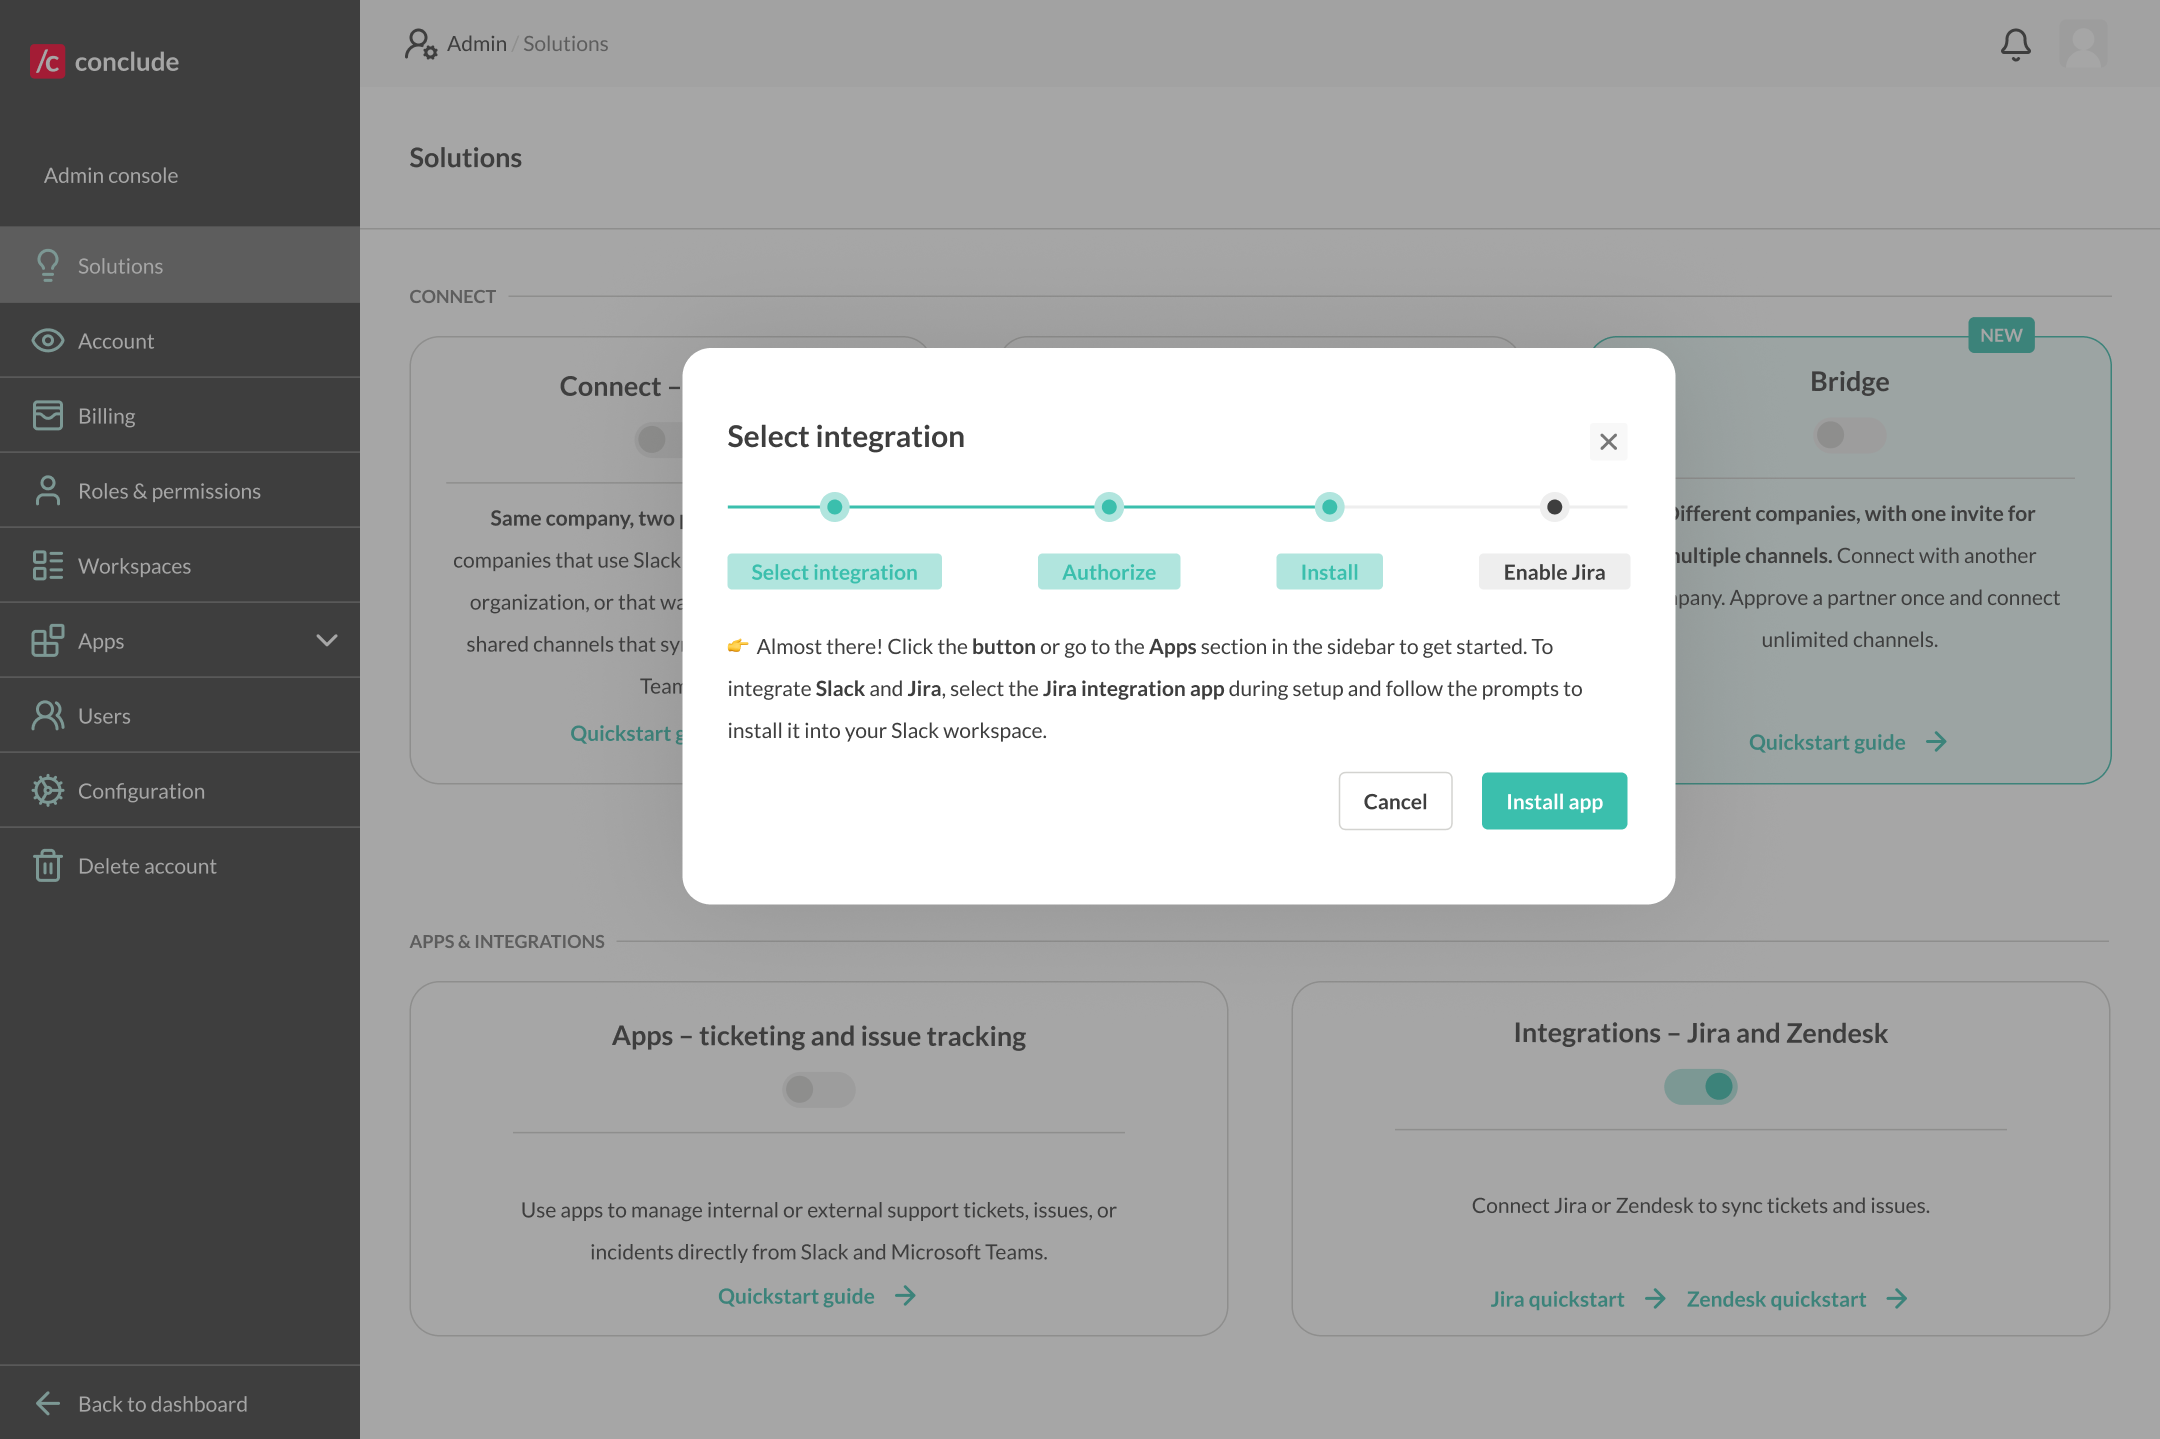
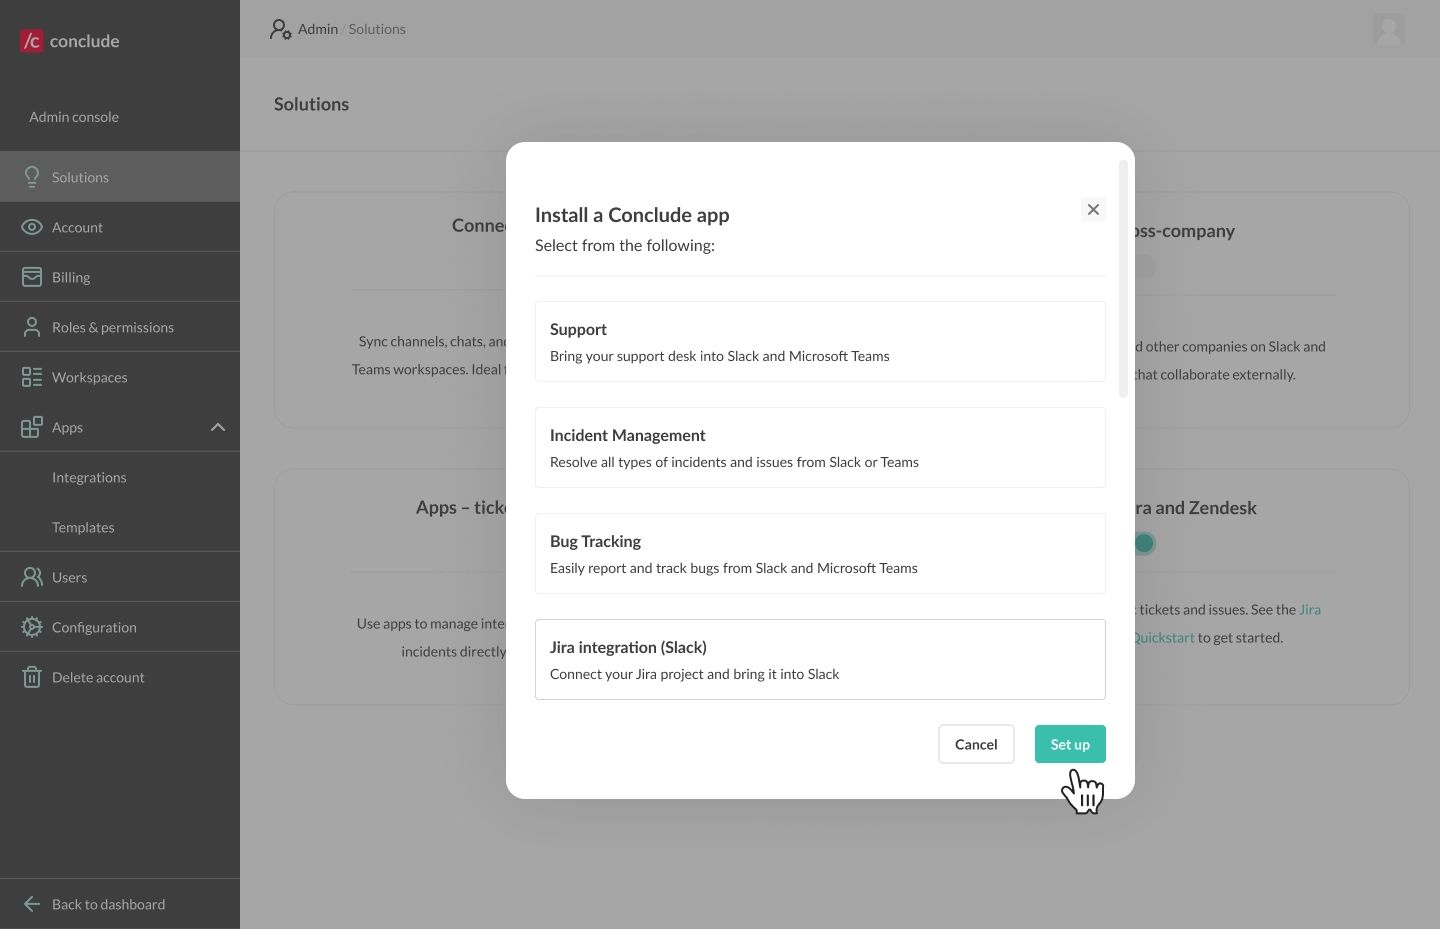
A list of app templates will appear. Any Conclude app can be used to set up Jira, including Bug tracking, Incident management, or Jira integration. All templates are configurable. Click Next.
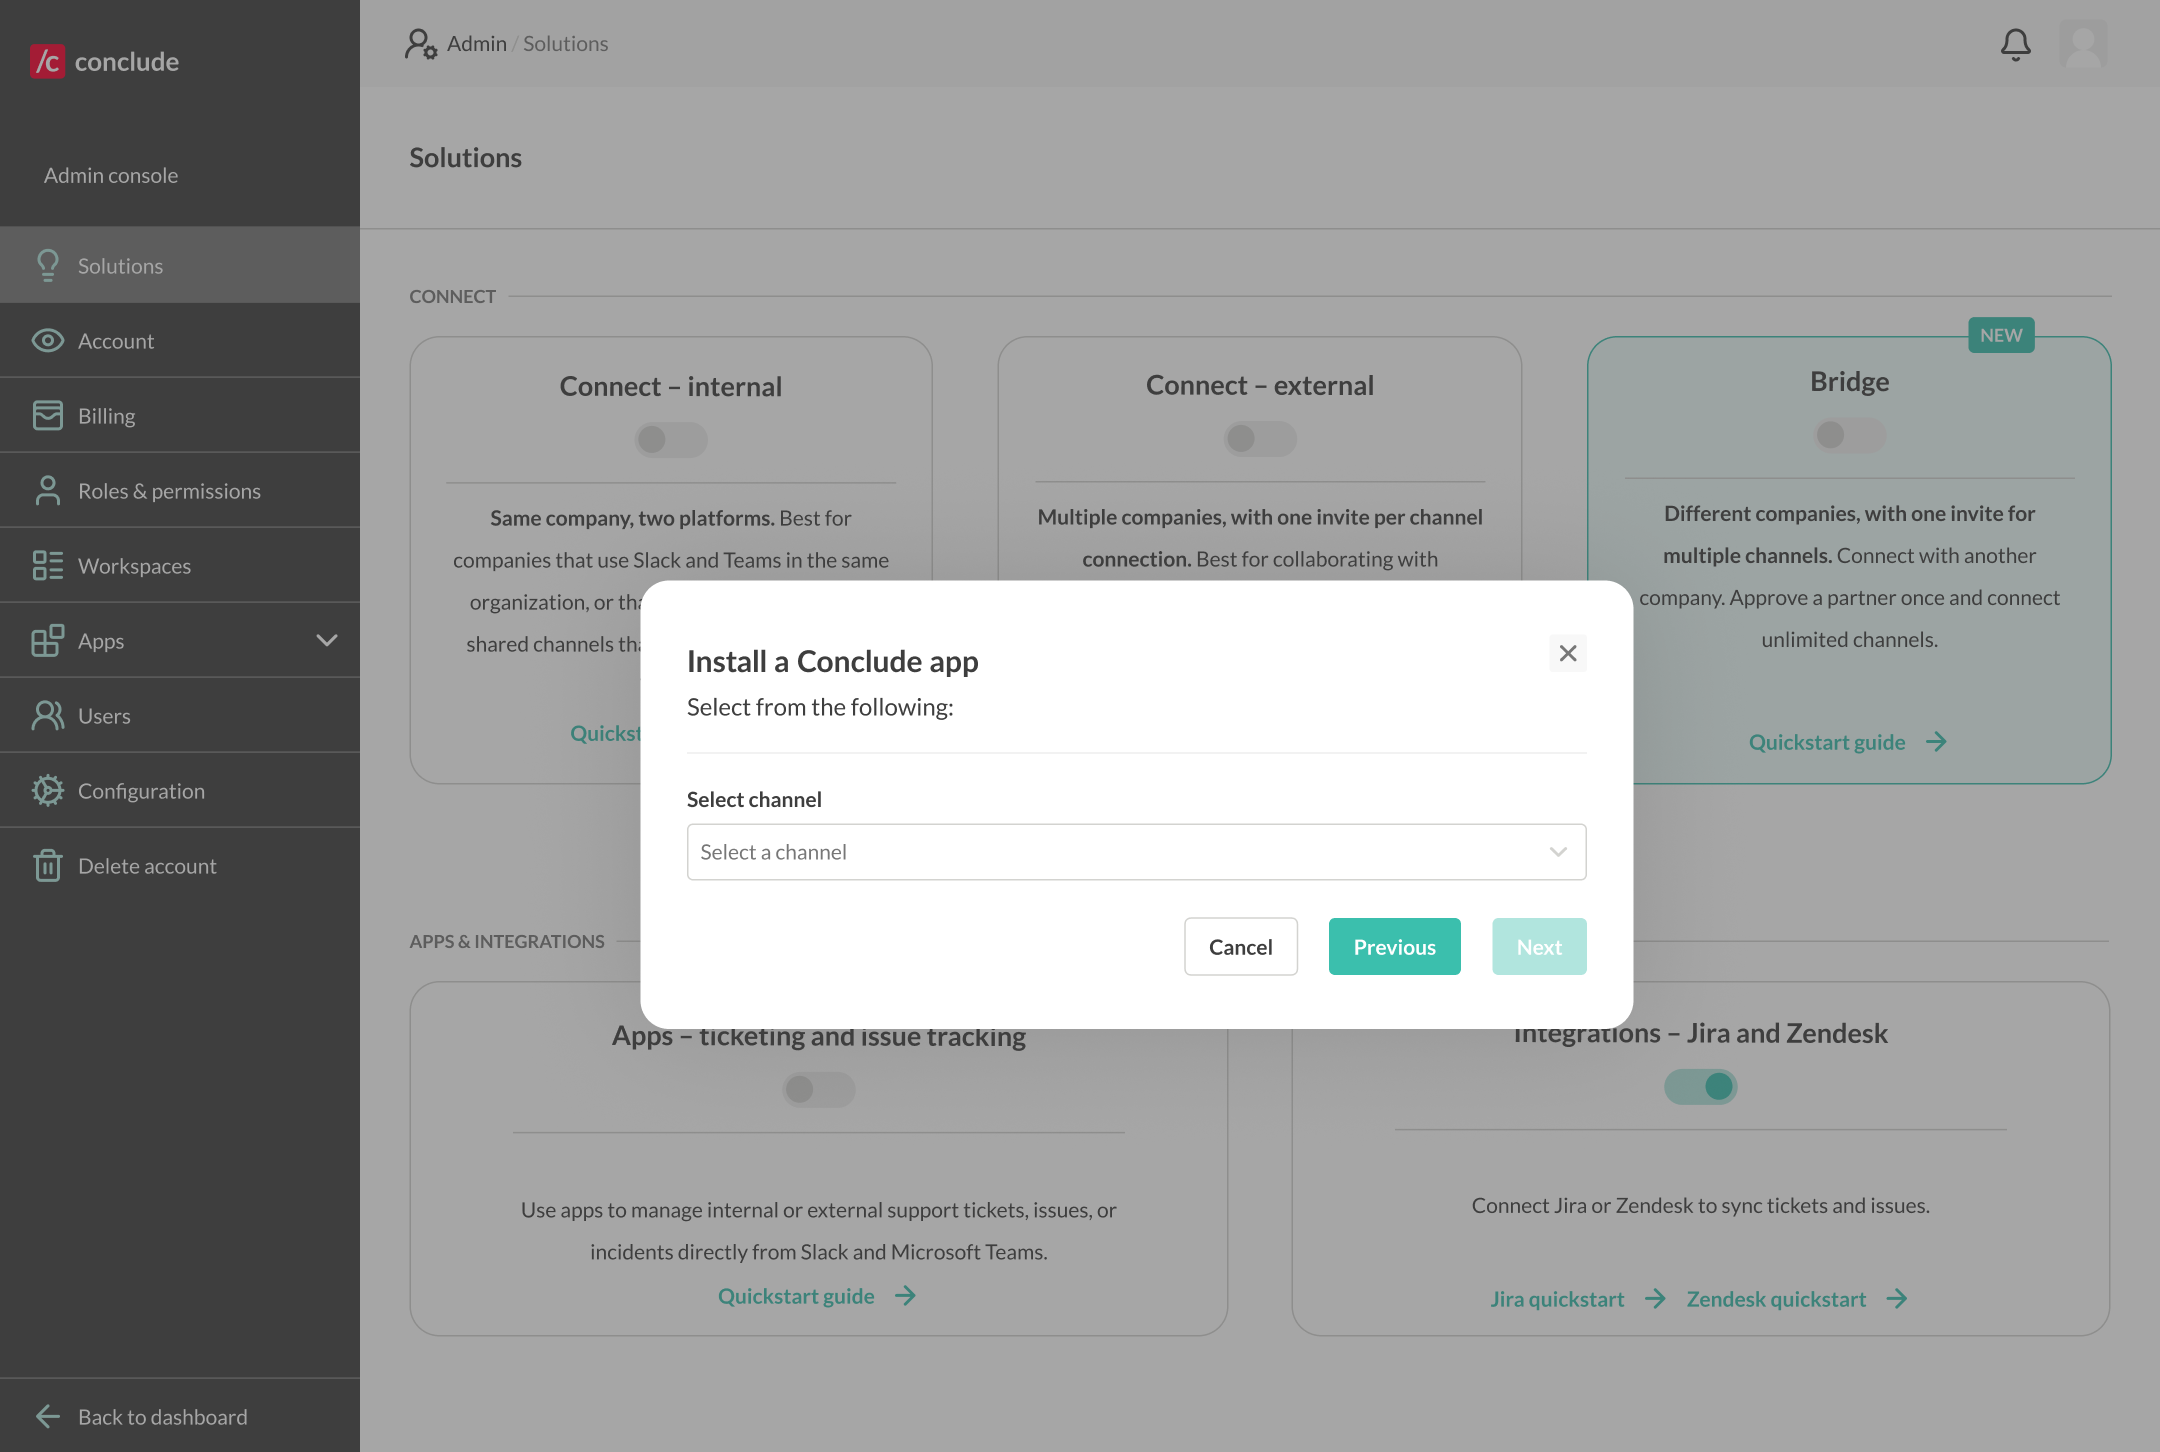
Choose the Slack or Microsoft Teams channel from the dropdown where you want the Jira integration to be active, then click Next.
Once the app is installed, click Enable Jira integration.
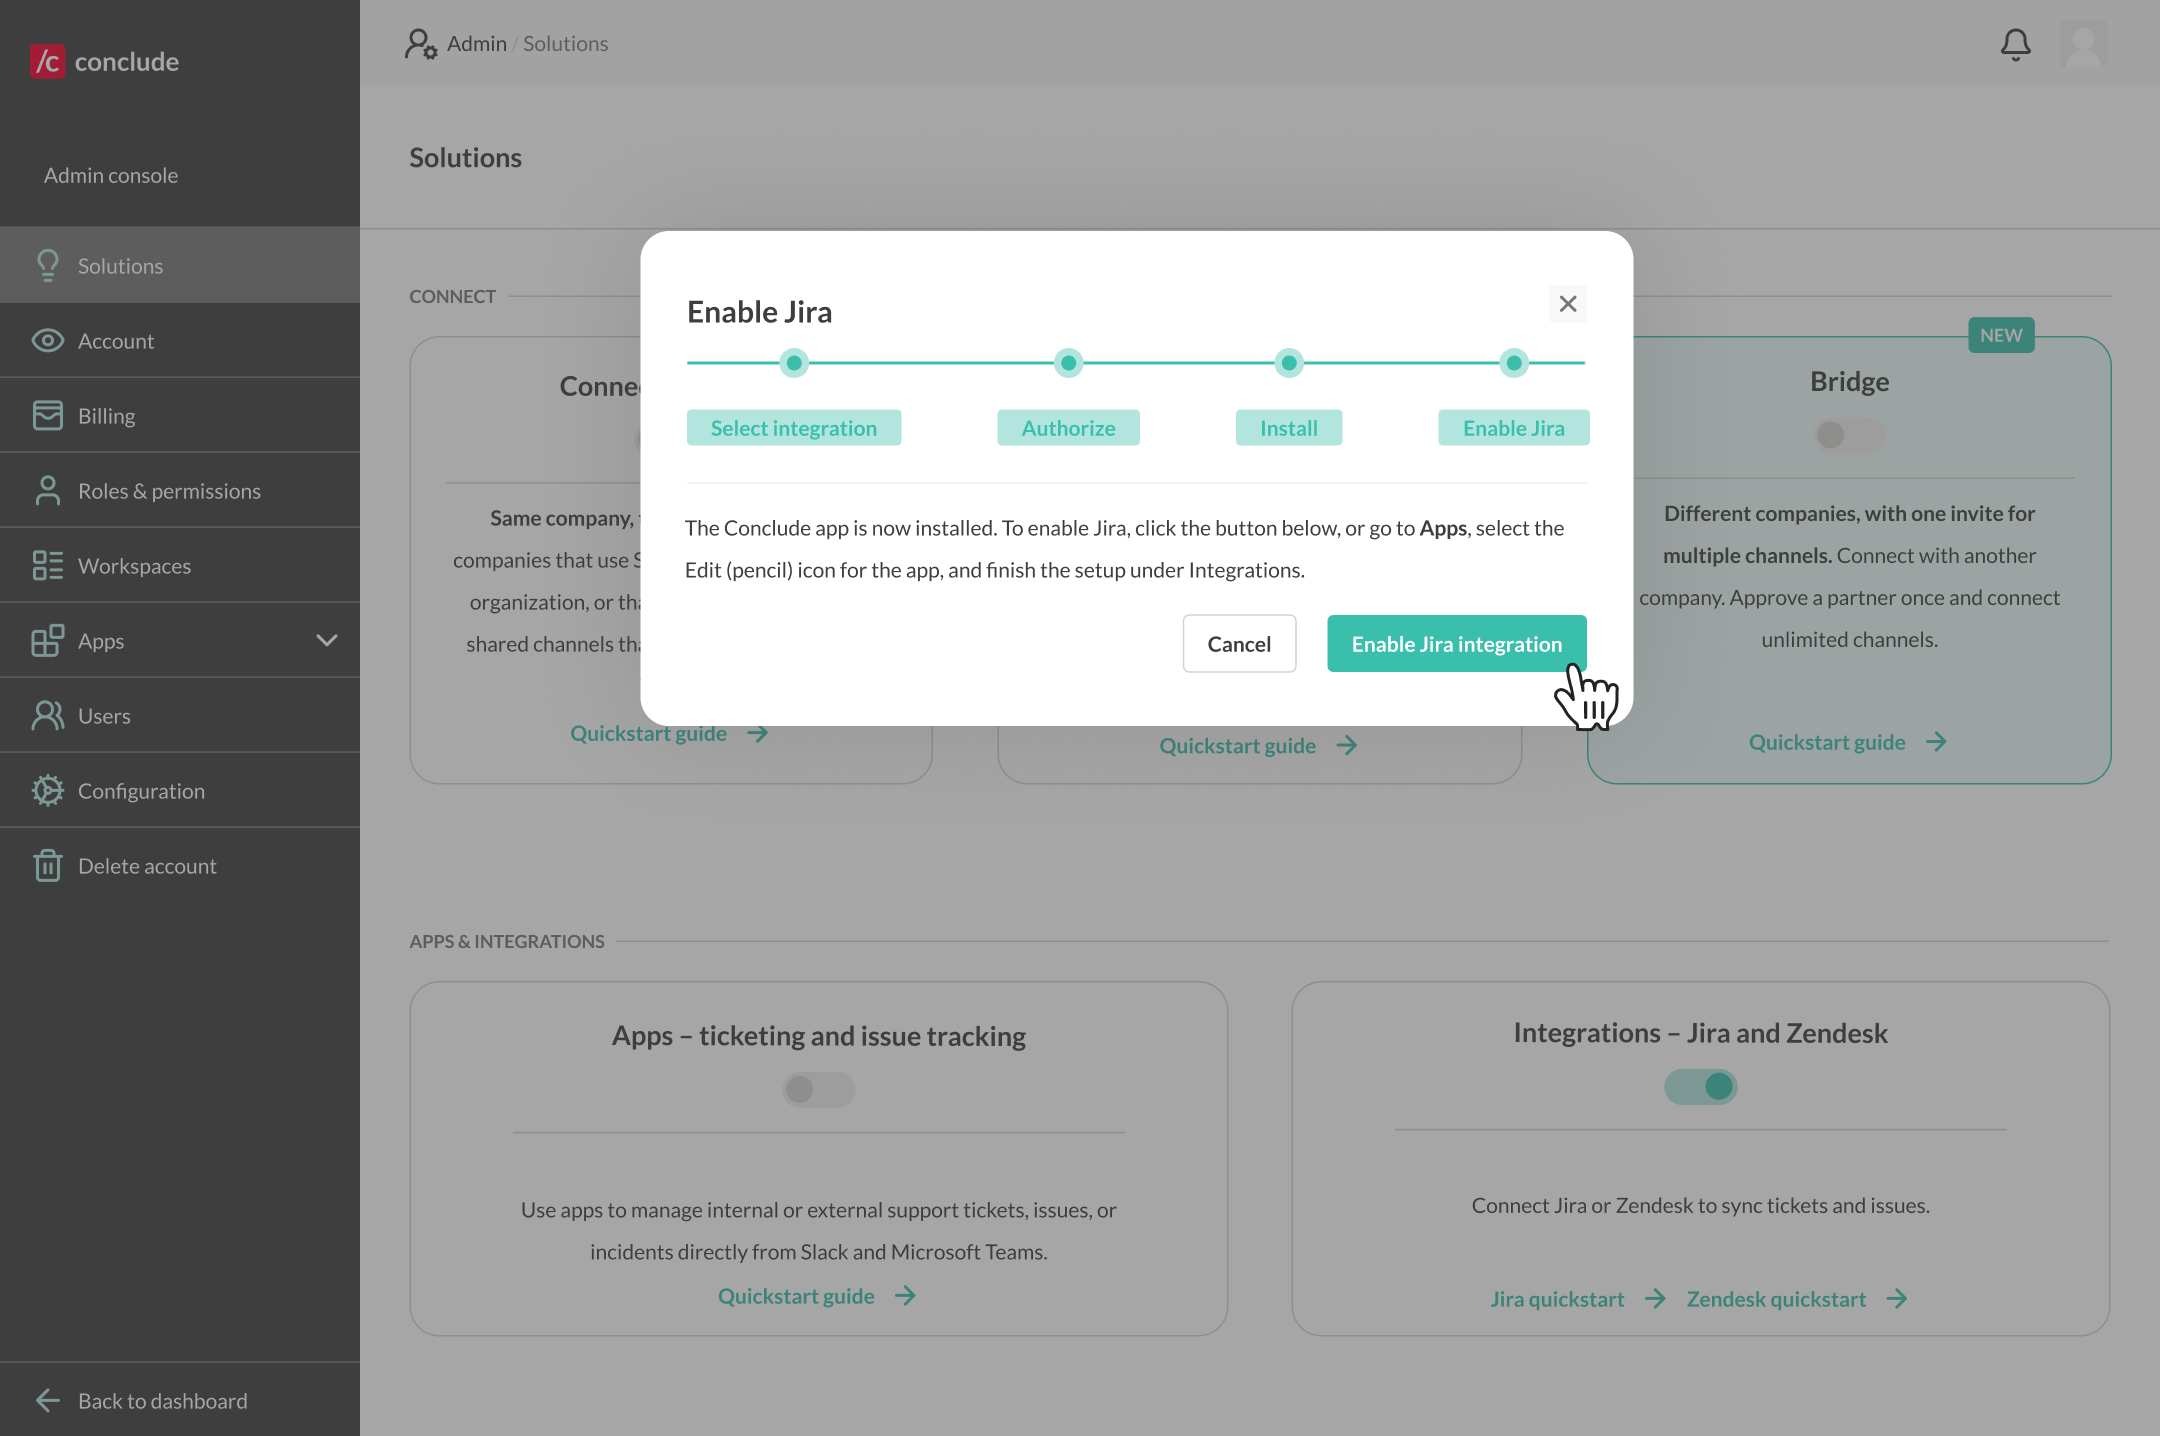
You will then be directed to the Apps section of the Dashboard (App editor > Integrations), where you can set up your Jira project.
Step 5: Configure the app
Once your app is installed, you need to configure the app to sync with your Jira project. Important: if you are not on the Integrations page:
- Navigate to Apps in the sidebar of the Dashboard and select the app you want to sync with Jira
- Click the edit icon (pencil) to open the settings for this app and navigate to the Integrations tab
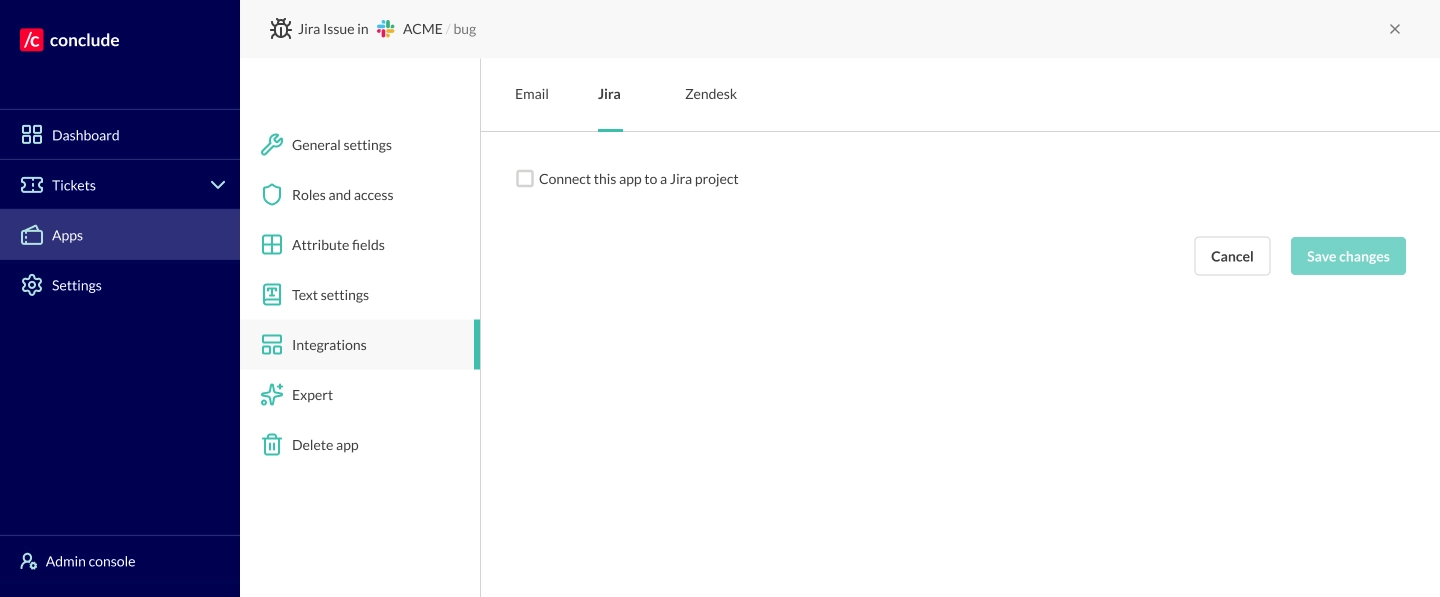
If you are on the Integrations page, follow these steps:
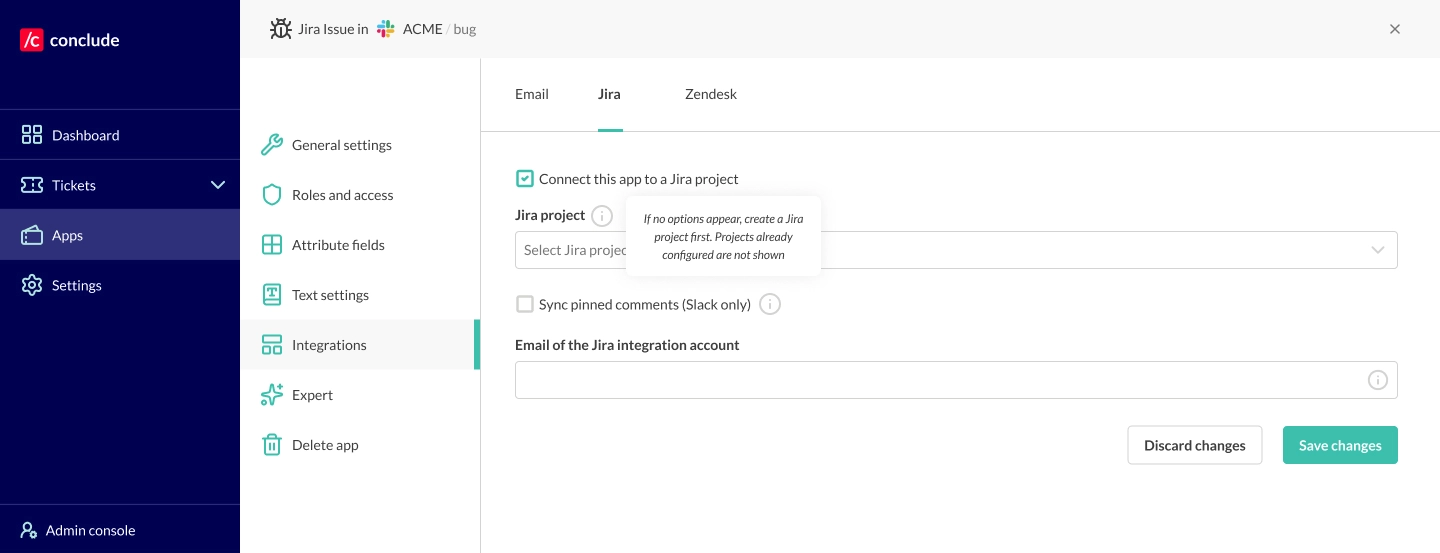
- Check the box Connect this app to a Jira project and select your Jira project from the dropdown
- Projects that are already configured will not be shown in the dropdown, so if the list is empty, please create a new project in Jira to continue
- By default, all messages sync from Jira → Slack and Slack → Jira; optionally, you can select Sync pinned comments (Slack only) to sync pinned messages from Slack → Jira
- Next, enter the email address of the Jira integration account and click Save changes
- The channel where the app is installed and configured will now sync with Jira. Issues created in Slack or Microsoft Teams will be automatically mirrored in your Jira project, and vice versa
Note: We recommend setting up a Jira integration user account that isn’t associated with a specific person. This acts as a fallback account and will post messages when other user credentials aren’t available.
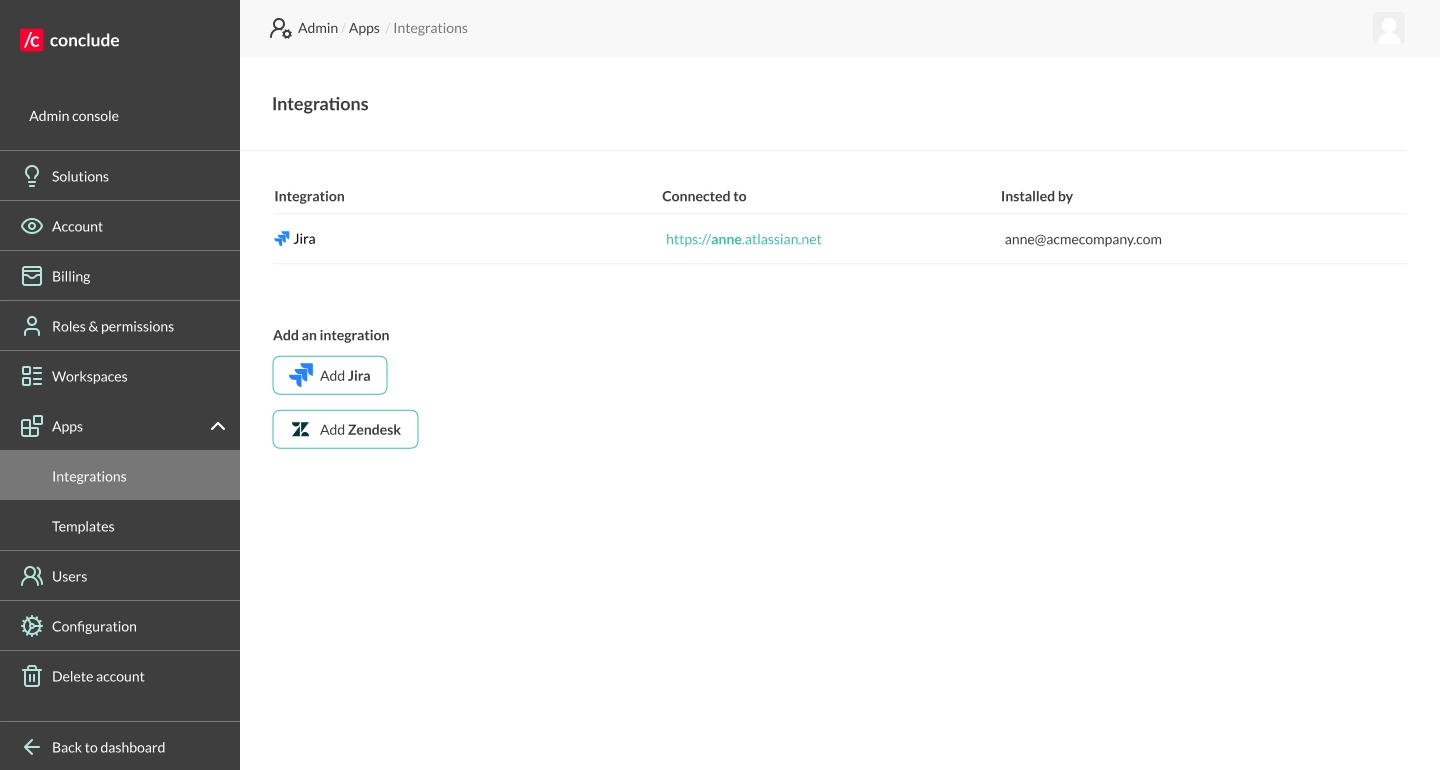
Alternative: Add a Jira account from the Admin console
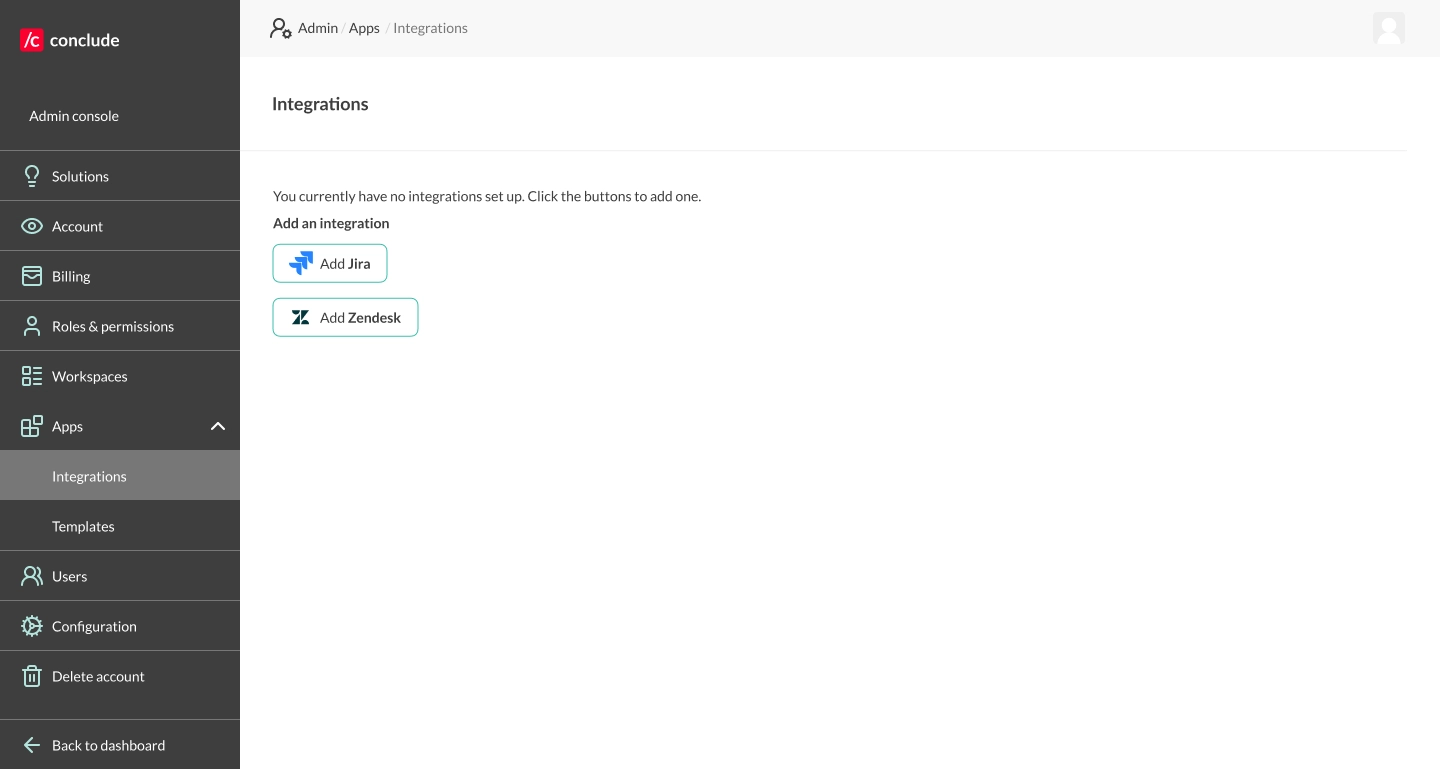
If you skipped the Authorize step during the wizard or want to add another Jira account later, you can do this directly from the Admin console.
- Navigate to Integrations in the Admin console sidebar and click Add Jira
- Enter your Jira subdomain and click Add integration
- You will be redirected to Atlassian to authorize the connection
- Once confirmed, Jira will appear in your integrations list
You can now start using the app. Tickets opened from Slack or Microsoft Teams sync automatically with Jira; continue working from any platform, and all updates and comments will stay in sync.
- To open a ticket from the Dashboard, navigate to the Apps section, select the app you want to launch, e.g., Jira issue, and click the button to open a ticket
- To open a ticket in Slack, navigate to the channel where the app is installed and use the command
/c new - For Teams, you will need to add Conclude to a Team (see Step 3) and then open a ticket