Connect – Cross-Platform Quickstart
This guide will walk you through getting started with Conclude to connect Slack and Microsoft Teams channels and chats across your organization. To connect with external customers and companies, see the Connect – Cross-Company Quickstart, or watch this video for more.
Start here
In this guide we will cover:
- How to sign up for an account
- Navigating the Admin settings
- Adding Conclude to Slack and Teams
- Selecting and connecting teams
- Connecting channels or chats
- How to create direct chats
- Setting up an integration account
Step 1: Sign up for an account
To get started, use the Sign up button on our website or click Get started free. During the sign-up process, you will be asked to select your primary messaging platform: Slack or Microsoft Teams.
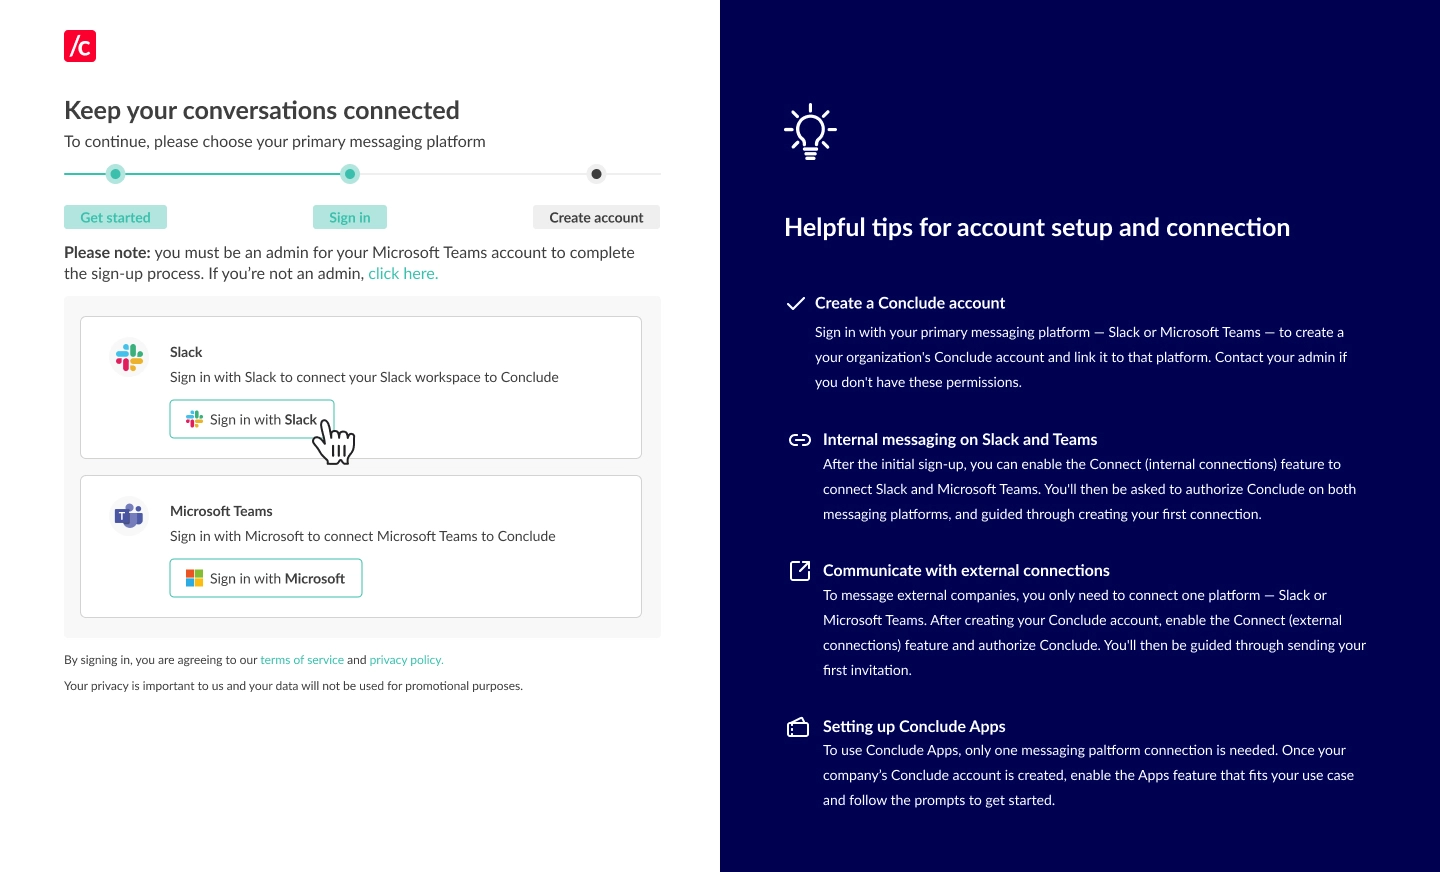
Sign in with your Slack account to access Conclude. This step is for identity verification only — it won’t add Conclude to your Slack workspace. Once you’ve completed the sign-in and authentication process, you’ll see a confirmation that your account is connected.
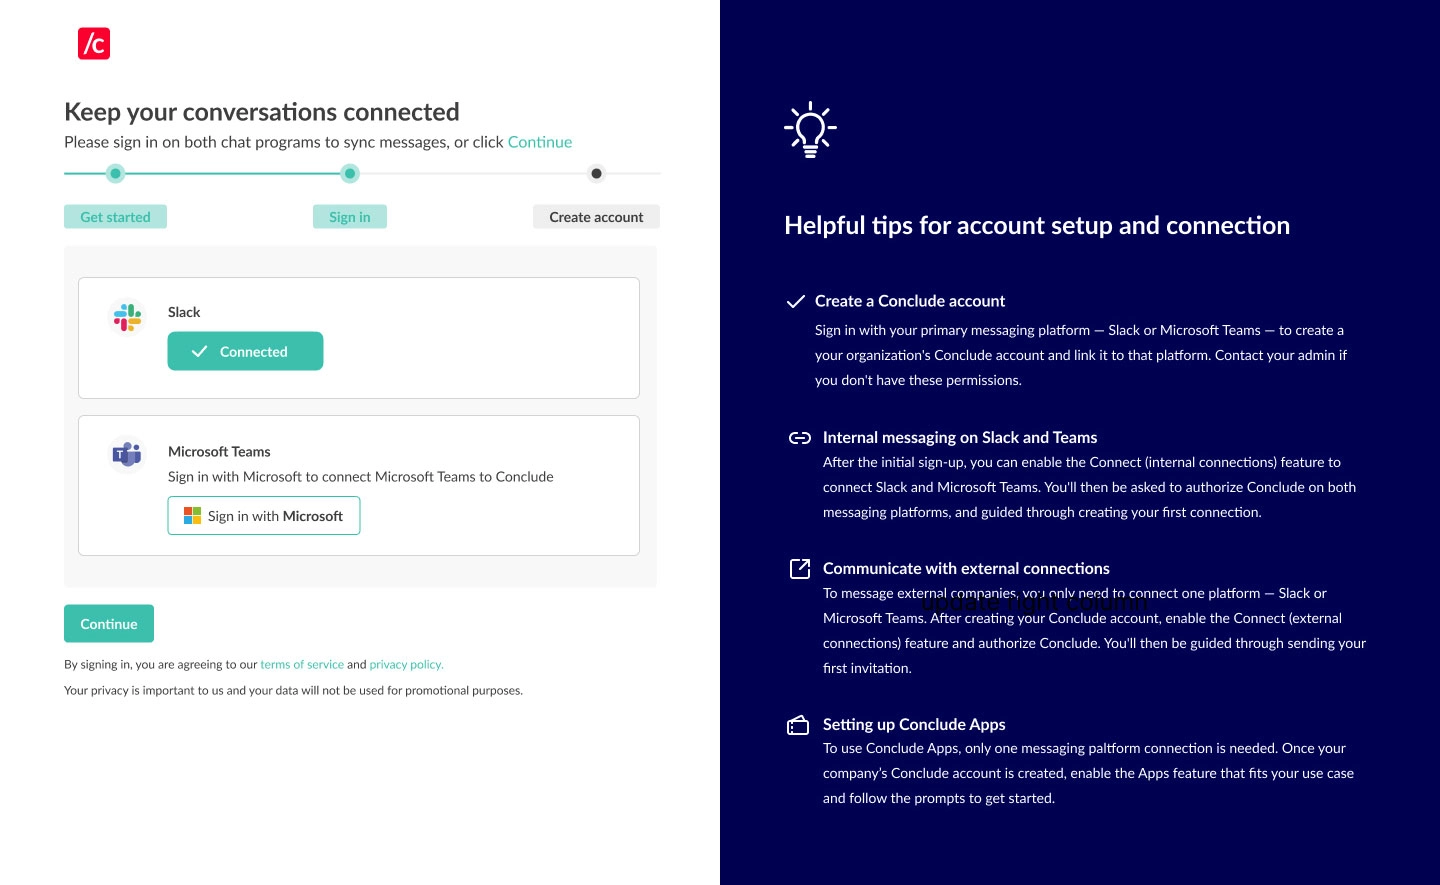
Next, select Sign in with Microsoft to start the Microsoft authentication process. To ensure proper functionality, sign in with the Microsoft account associated with your preferred Microsoft Teams space.
Important: this step is for identity verification only — it does not install Conclude into your Teams environment. You can complete this step right after signing in with Slack, or skip it and connect later from the web dashboard. Once authentication is complete, you’ll be taken to the web dashboard.
Step 2: Enable internal connections in the web dashboard
When you first land on the web dashboard, navigate to the Admin console at the bottom of the sidebar. Find the Solutions tab and toggle on Connect (cross-platform) to enable it.

Step 3: Add Conclude to your Slack and Teams workspaces
When you enable Connect for cross-platform communication, you’ll be prompted to add Conclude to both Slack and Microsoft Teams. This installs the Conclude app on each platform and grants the permissions to sync messages and conversations.
💡 Be sure to complete this step for both platforms to ensure full functionality.
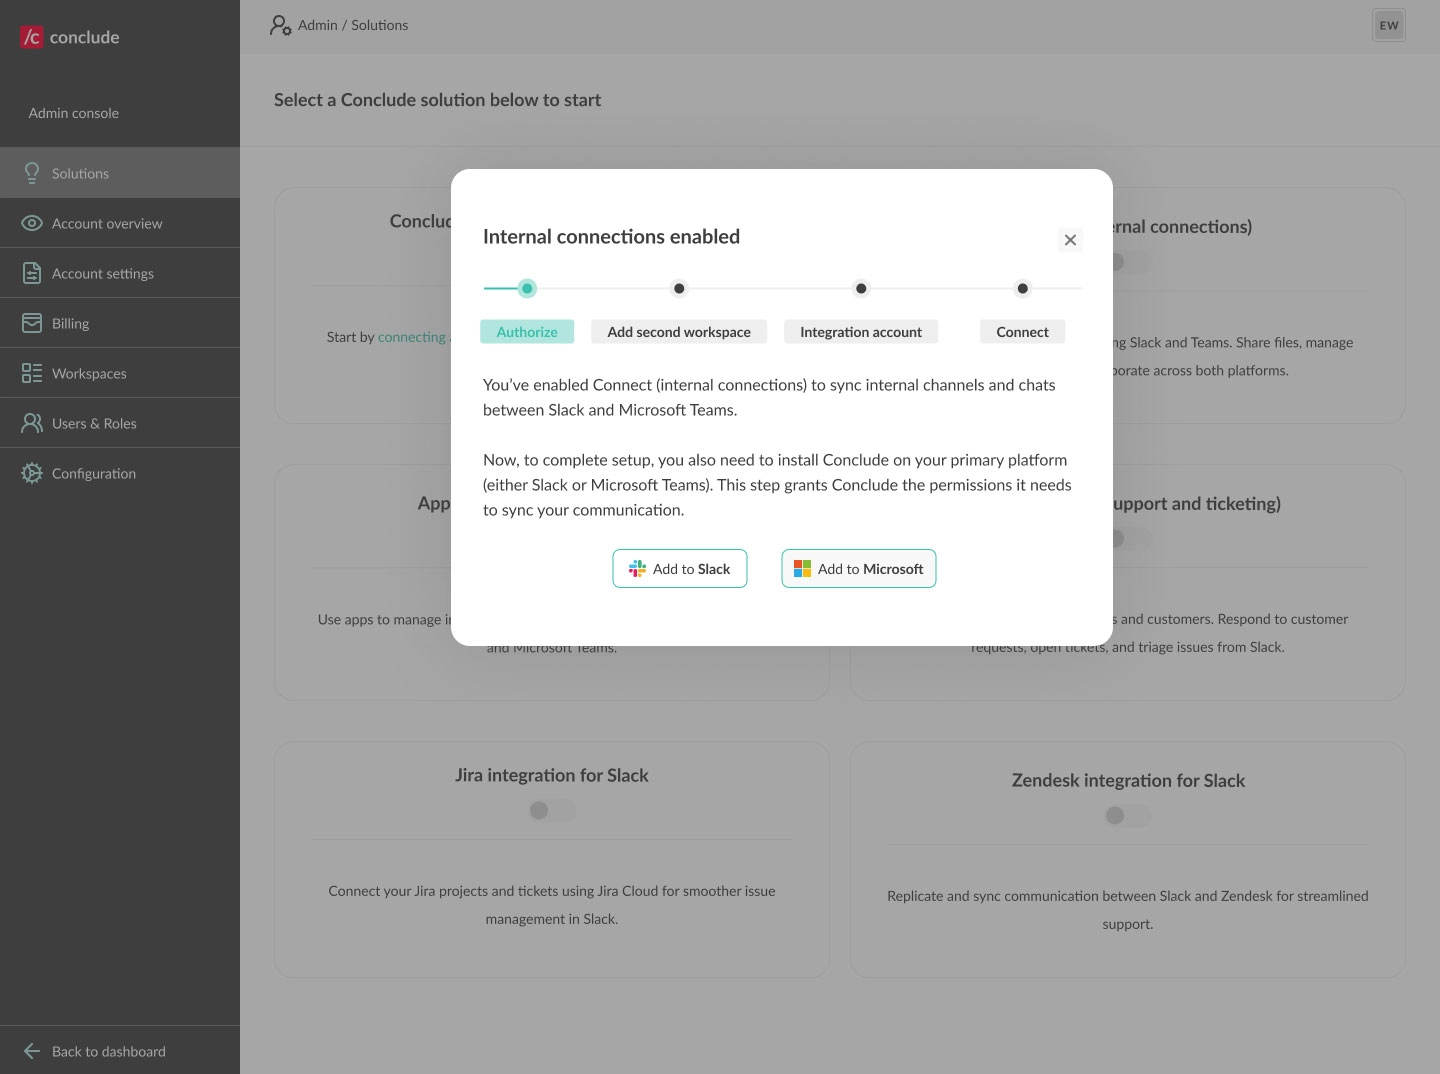
Once Conclude is added to both Slack and Microsoft Teams, you’ll be ready to start connecting channels or creating chats.
Step 4: Select teams and start connecting channels
The Settings section on the sidebar includes User settings where you can manage your personal information. The Admin console is found at the bottom of the sidebar. Here, admins will see the following:
- Solutions: enable and manage all Conclude solutions
- Account overview: shows an overview of Conclude features, including the number of synced channels, active users, and license type
- Account settings: update your organization’s name and other relevant information, such as address and country
- Billing: view and manage your Conclude subscription
- Admin roles: Account Admins and Account Owners can manage teams
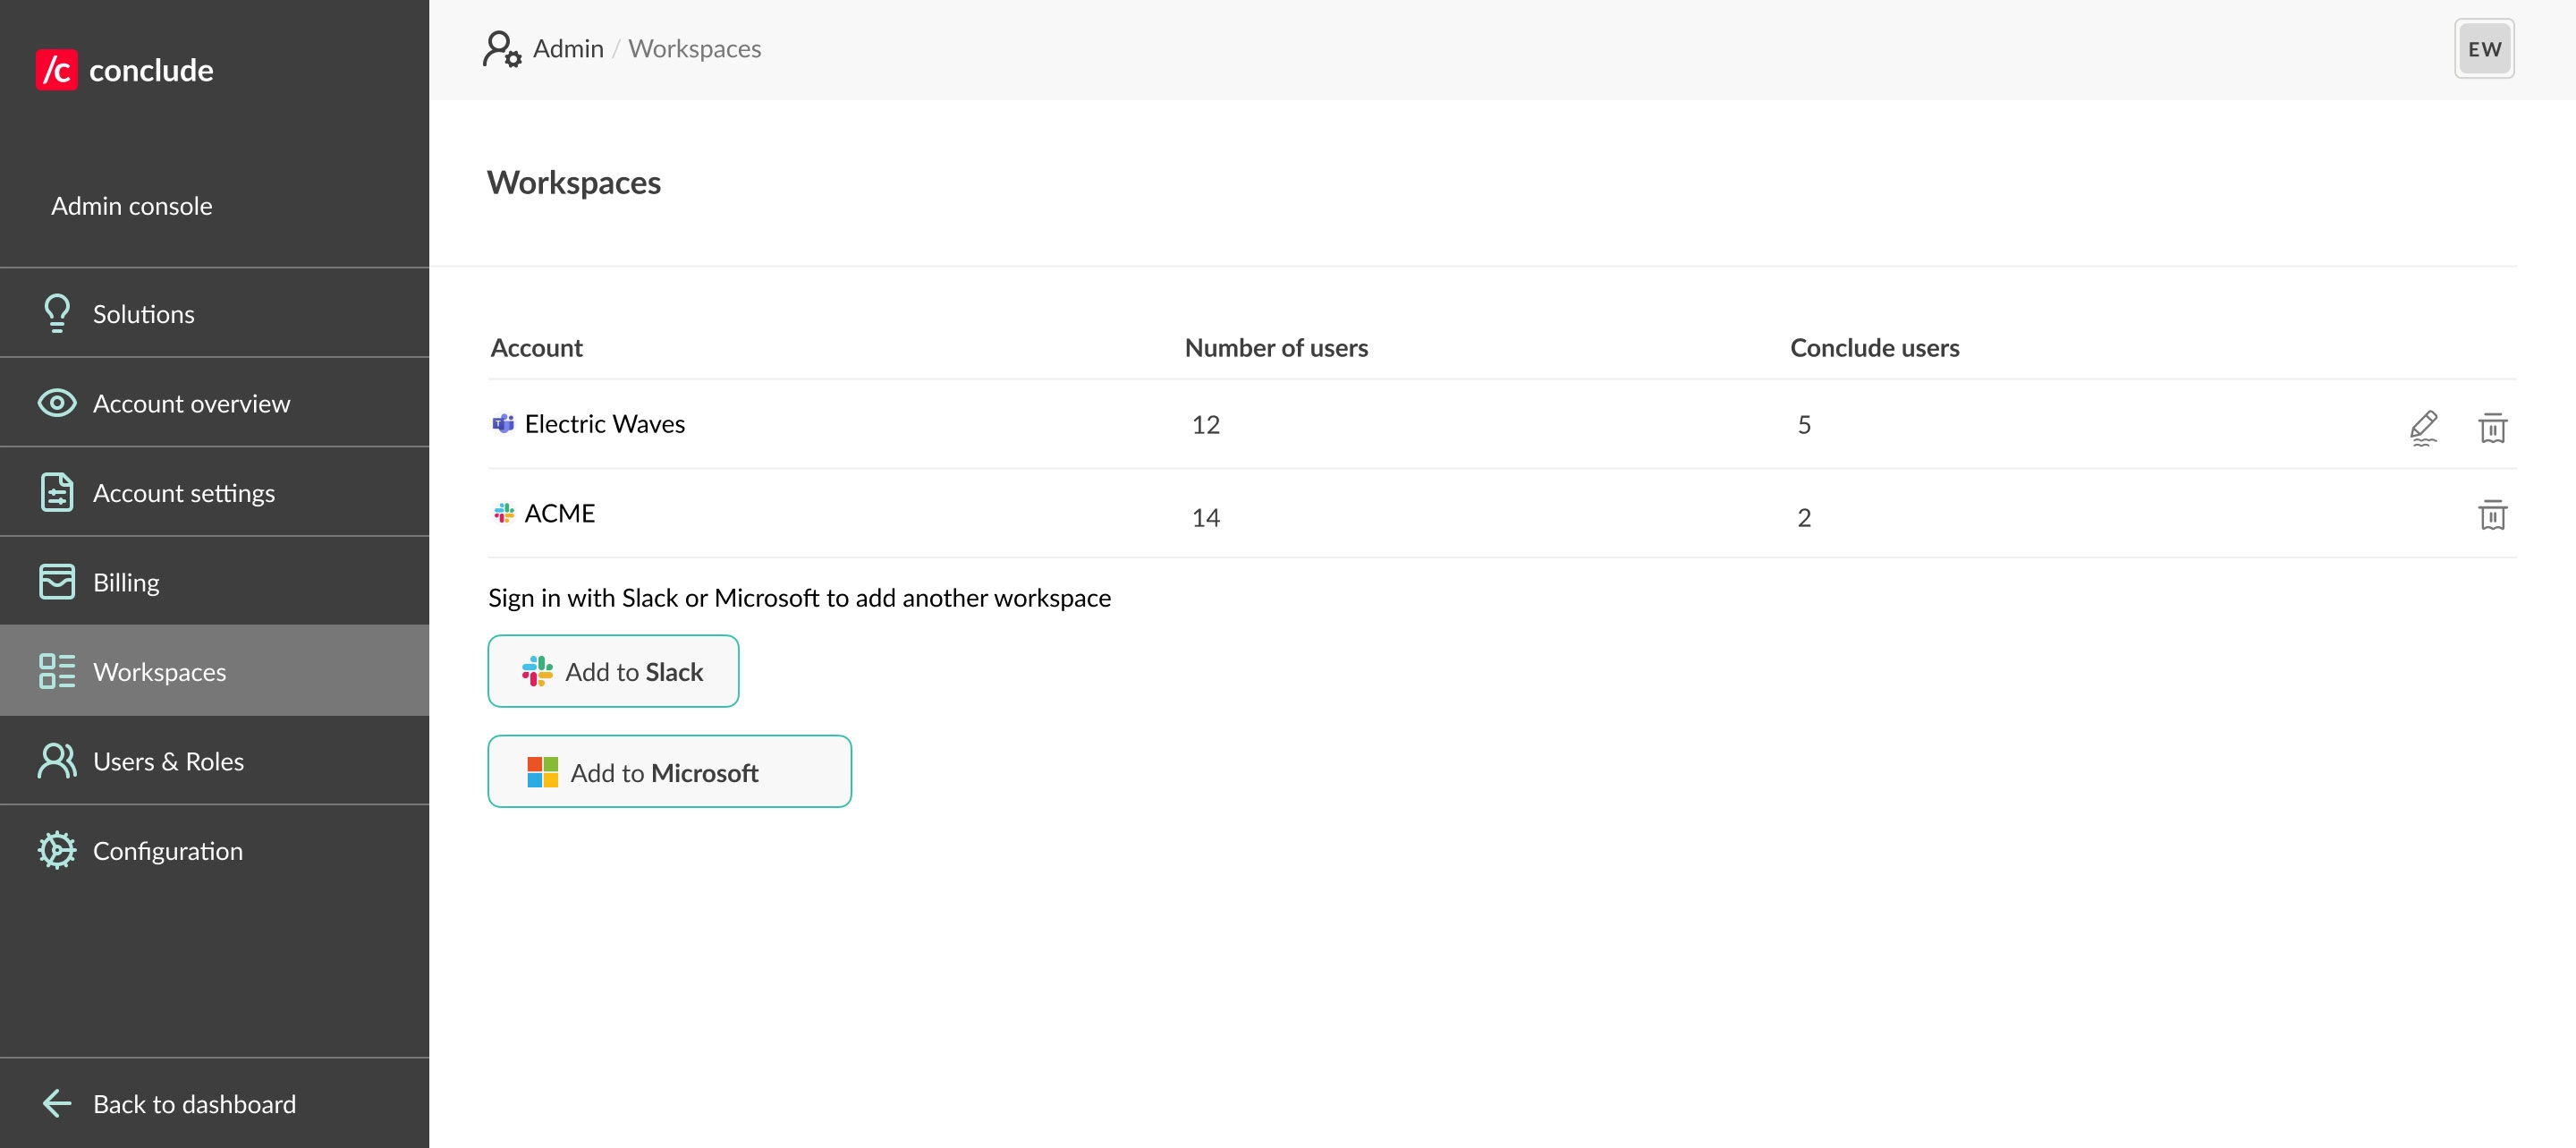
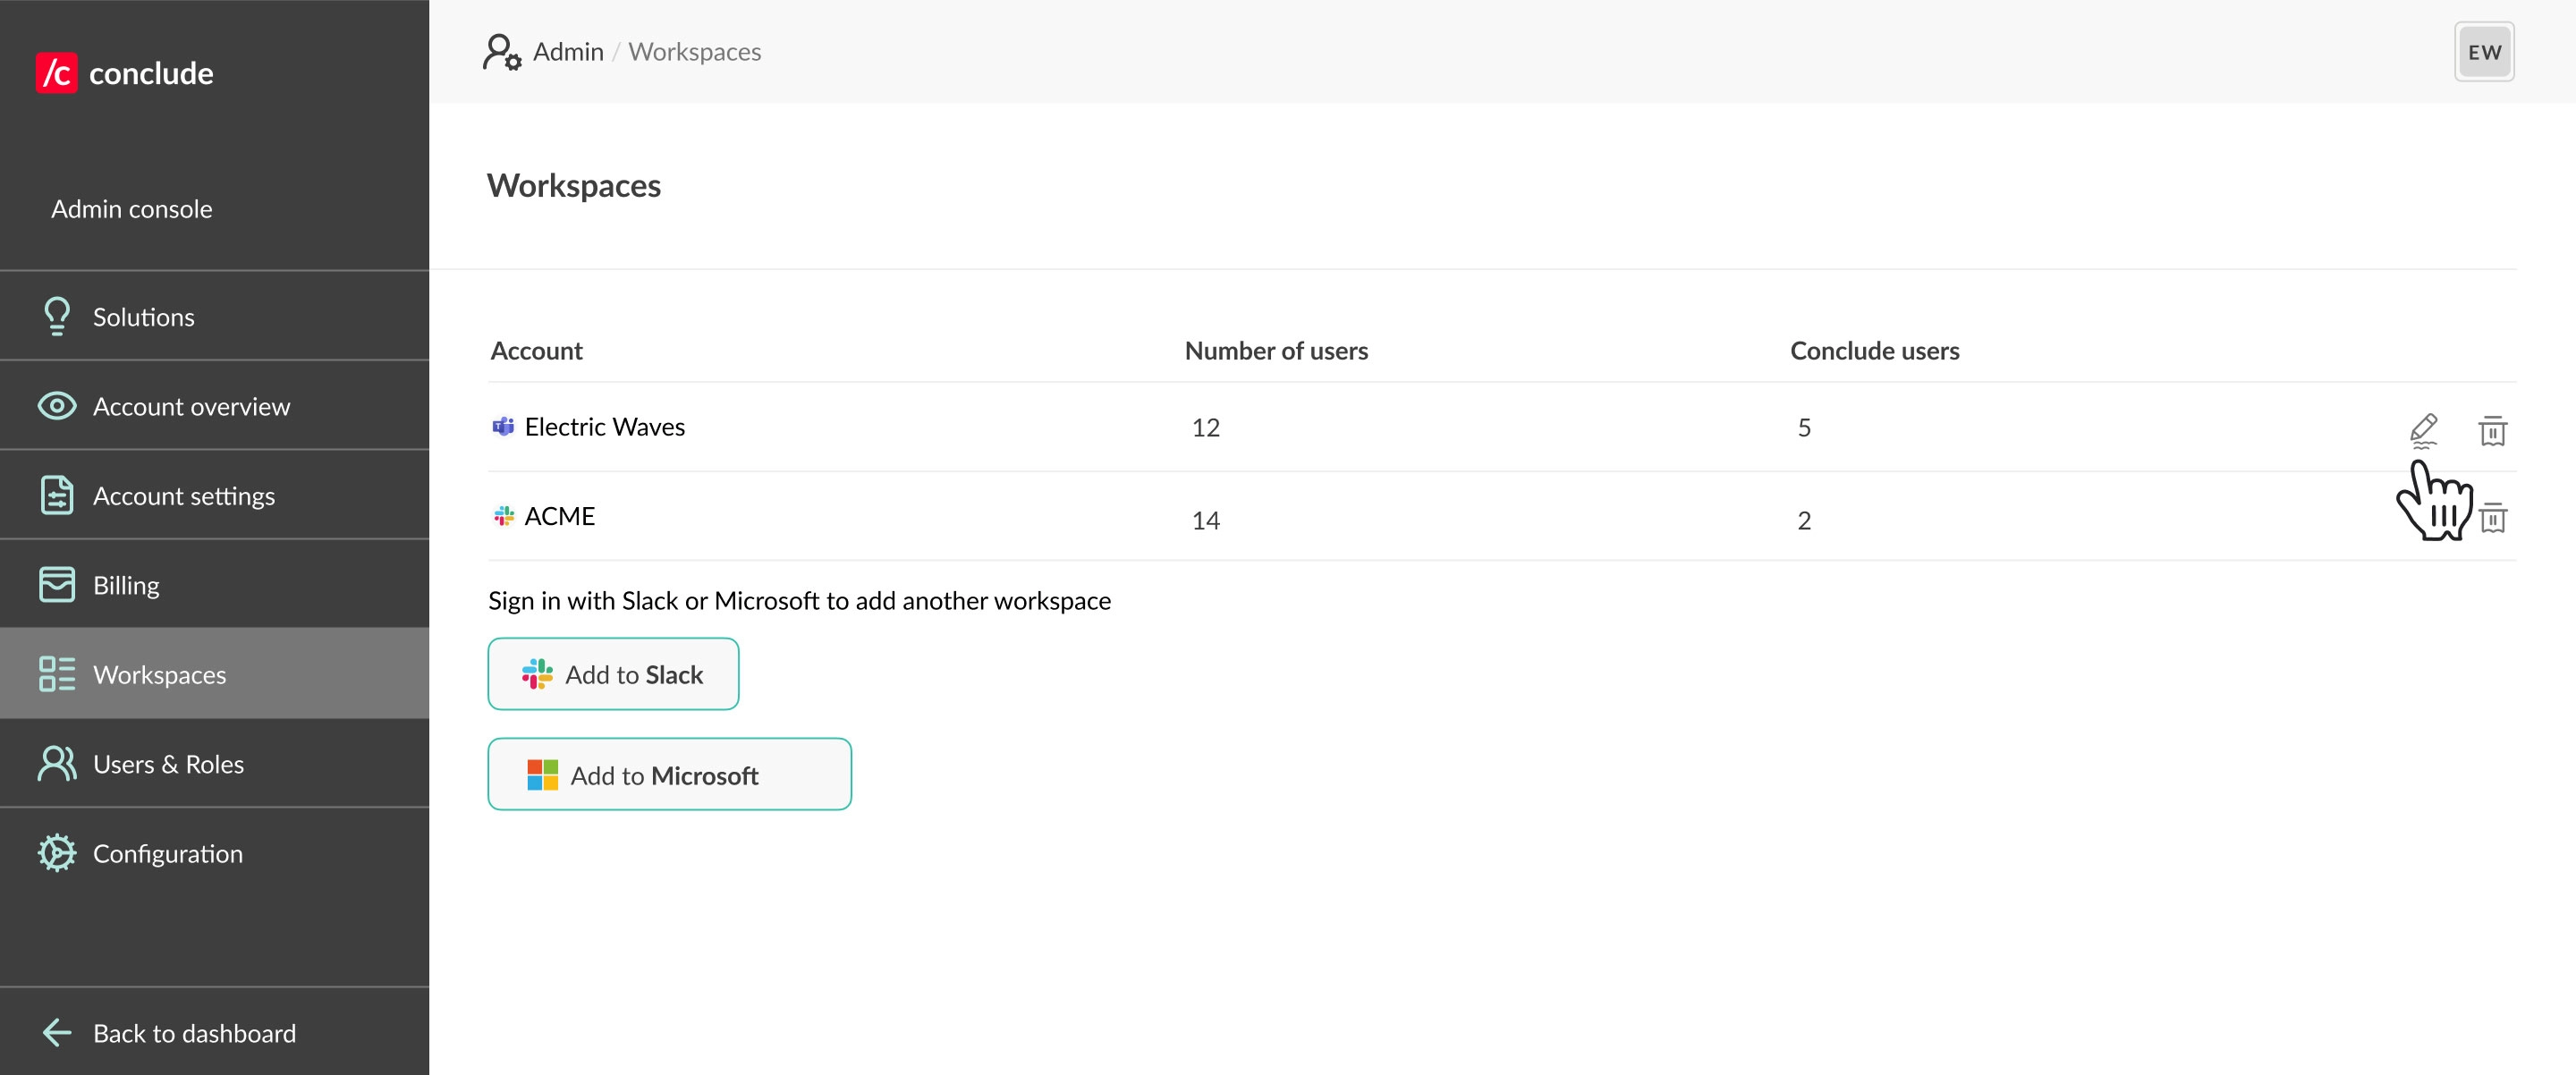
- Workspaces: view and manage different teams and workspaces connected to Conclude. If one isn’t listed, admins can add these by completing the sign-up process with Slack or Microsoft
- Integrations: see a list of active integrations and add more
- Users: see a list of active and inactive users and send reminders to those who still need to connect Conclude to Slack or Teams
- Configuration: manage advanced setup options, including how you sync and manage attachments across your organization
After adding your Microsoft Teams teams and Slack workspaces to the Workspaces tab, click Back to dashboard and navigate to the Connect internal tab to create connections or direct chats.
In this tab you will find:
- Channels: select workspaces and teams across your organization that you want to connect
- Chats: create chats between Slack and Microsoft Teams
Active users
Active users are those who actively participate in connected channels. Being a member of a team or channel (i.e. reading messages) does not make someone an active user. See a definition of Active users here.
💡 Tip: To manage the number of active users, we suggest creating specific teams in Microsoft Teams to connect with Slack channels. This approach helps limit users to specific teams that are connected to the Slack workspace.
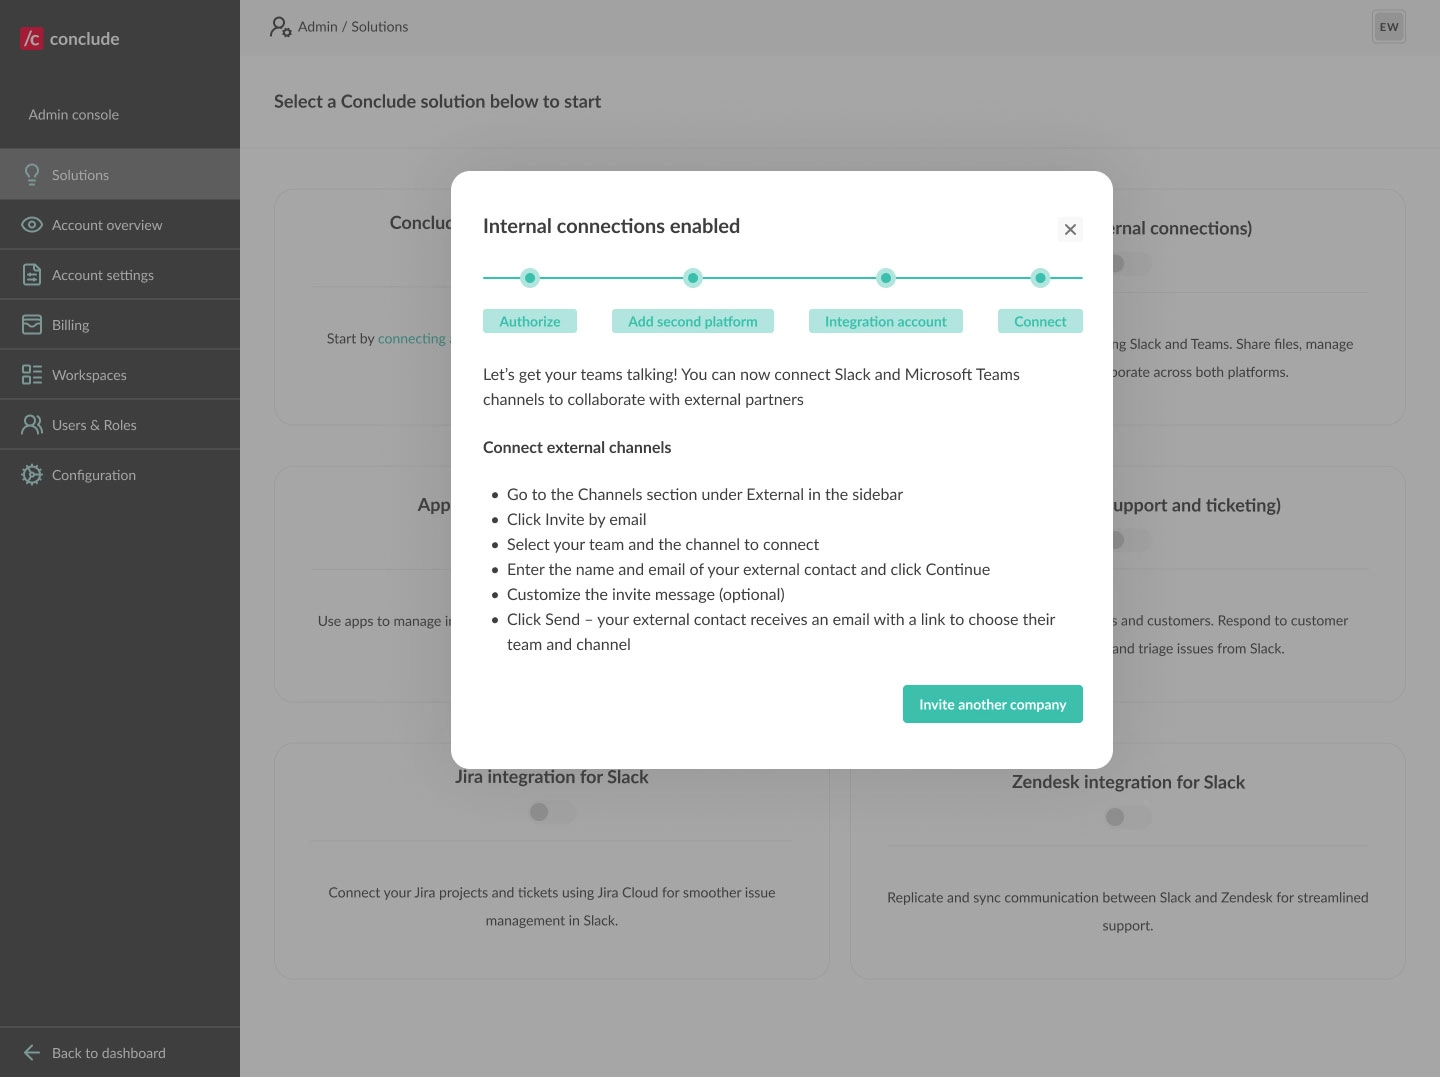
Step 5: Connecting channels or chats
Within the Channels tab, you can now select and connect channels or existing chats from different teams.
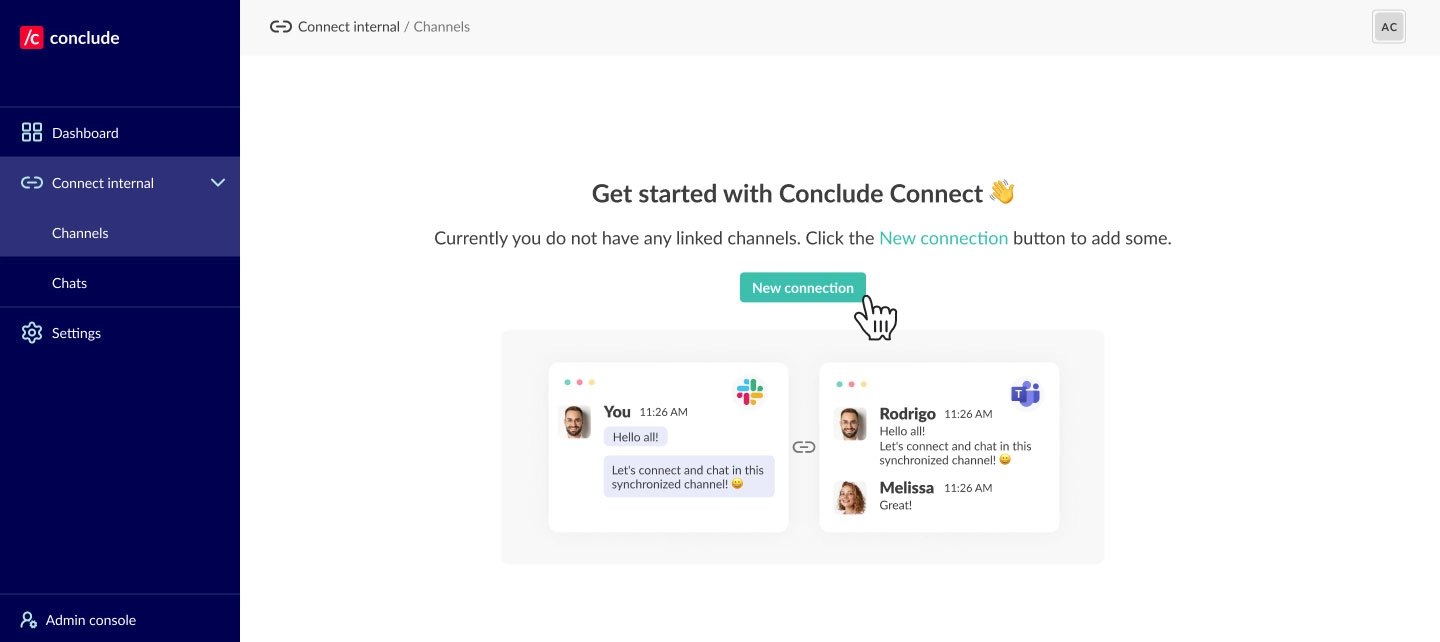
- Go to the Channels tab and click New connection
- Choose the Microsoft Teams teams and Slack workspaces you want to connect
- Next, select the channels or chats to connect
- In the Select team dropdown, you may see entries like [Teams account name] Chat. Selecting this will display any available Teams chats that can be connected to a Slack channel
- Once your selections are made, click Create to establish the connection
After setup, all communication will sync automatically between the connected Microsoft Teams and Slack workspaces.
Step 6: Creating new chats
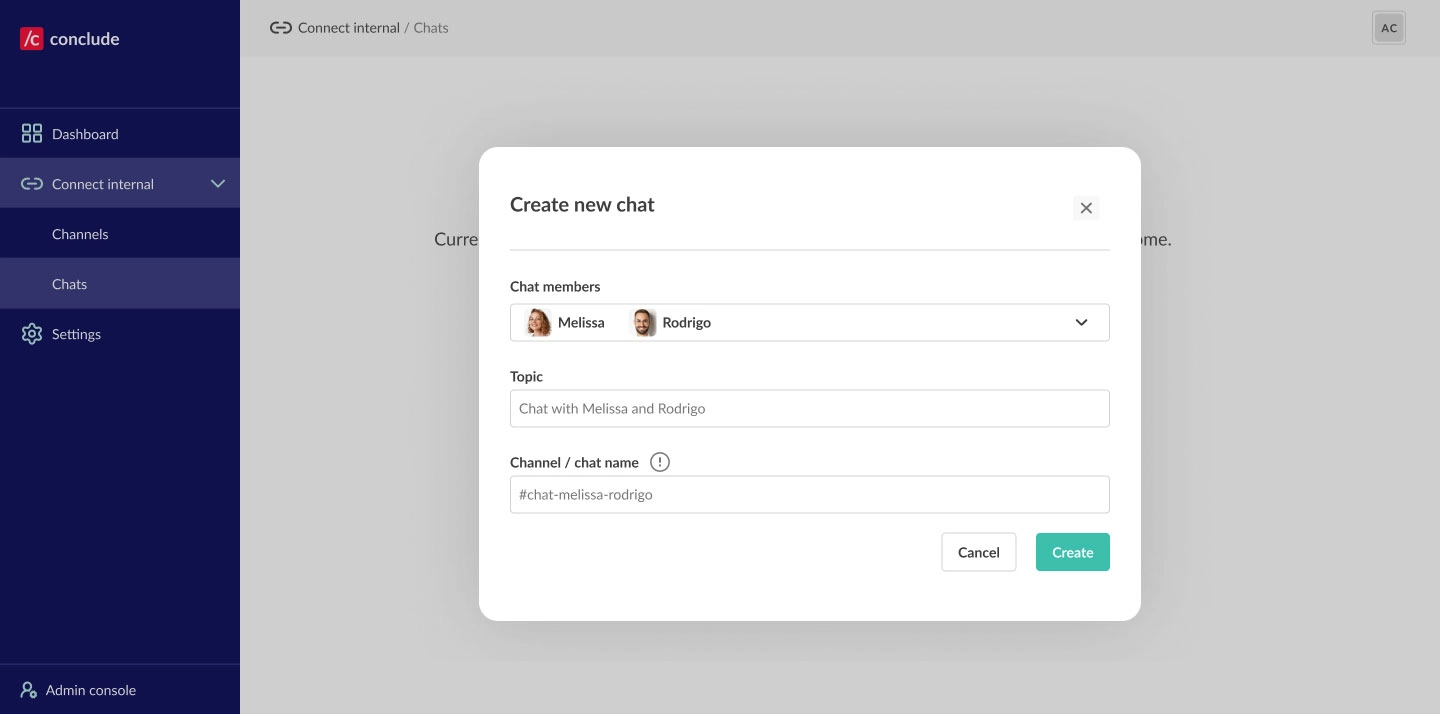
Navigate to the Chat section under the Connect internal tab on the sidebar to create direct chats for private messaging with team members on either platform.
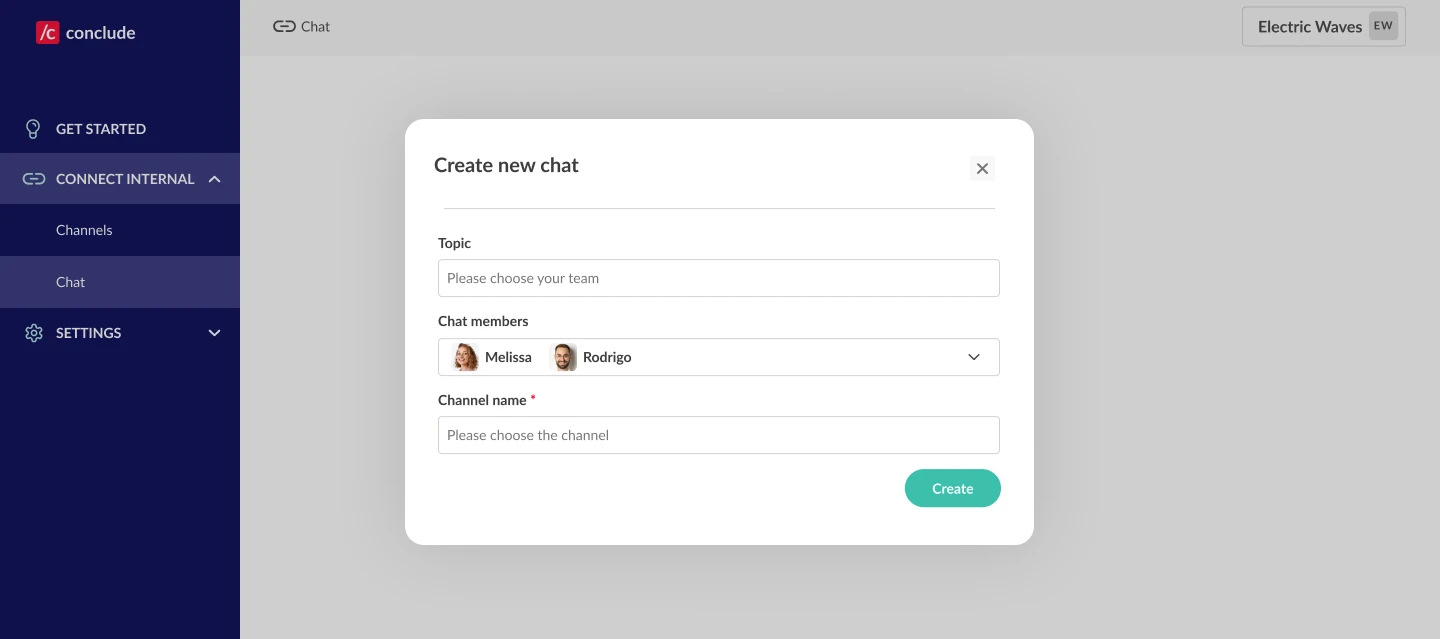
Click on the Create new chat button. In the dialog that appears, add the chat members and enter a name for the private channel. You can optionally describe the topic of the chat, then click Create.
Once completed, a chat on the Microsoft Teams side and a private channel on the Slack side will be created with the selected members. This allows you to message directly, share files, and collaborate seamlessly across both platforms.
Create a new chat connection from Slack
A new chat connection can also be created directly from Slack using a built-in command. Type /c chat in any Slack channel. When prompted, enter the following details:
- Provide a channel name
- Select the members to include in the conversation
- Add a Topic (optional)
This creates:
- A private channel in Slack
- A corresponding group chat in Microsoft Teams
Slack channels for this type of connection must remain private, since that format best reflects how Teams chats work. You can add more participants later if needed. After creating the connection, each participant receives a notification on their own platform and can start communicating immediately.
Step 7: Setting up an integration account
An integration account enables Conclude to post messages in Microsoft Teams. It acts as a fallback when no user account is available, ensuring consistent message delivery and synchronization across channels and chats. Follow the steps below or watch this guided video tutorial.
How it works:
- A Microsoft admin creates a special, generic user account (e.g. “Customer” or “External user”) that isn’t associated with any physical person in the Microsoft admin system
Important: Use a generic account, not a real user account, because messages will be posted under this identity when no user credentials are available. This helps maintain consistency and avoids confusion.
- In Conclude’s Admin settings, the admin selects the user account and signs them in
- Once configured, Conclude uses this integration account to post messages on behalf of the Conclude Bot
- This ensures that messages sync smoothly when user credentials aren’t available
To set up an integration account:
- Navigate to Admin console > Workspaces
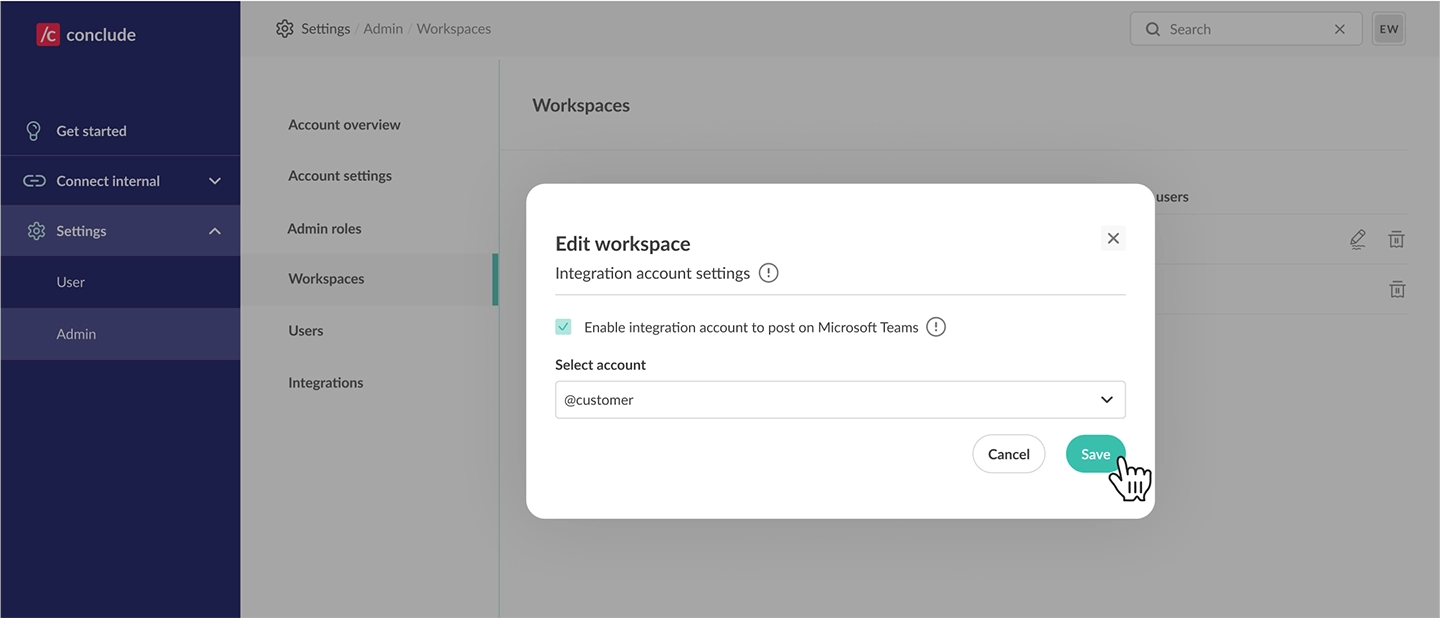
- Click the Edit (pencil) icon next to the workspace where you want to enable the integration account
- Select the pre-created integration account from the drop-down then click Save
The account operates across the entire Microsoft organization. It will post any messages that don’t originate from a user with credentials in the same Microsoft tenant signed in with Conclude.
Important information: If the integration account is not yet signed in to Conclude, you will see a prompt to sign in and authorize Conclude to post messages on the account’s behalf. The integration user must have a Microsoft 365 (Office 365) license that includes Teams. It is not enough to have:
- Teams (free) – not compatible with enterprise apps
- Azure AD / Entra ID only – cannot use Teams
- Shared mailbox/service account without a full license – cannot post
Additional tips:
- Ensure the Integration account is added to the team containing your connected channels. For private channels, manually add this account to the channel
- Once configured, messages from external users will be posted using the integration account
- This setup is recommended even when users exist on both sides, as it provides a fallback when credentials are not available for all users