Jira Integration Account
Jira and Conclude synchronization – integration account
To synchronize tickets between Conclude and Jira, Conclude needs the commenter’s credentials to post these in Jira. If the commenter is not logged in to Jira, Conclude will post those comments using the workflow app owner’s credentials if available.
To avoid this, Conclude offers an option to instead use a special Jira user account to post all comments for users that are not logged into Jira.
The configuration of this dedicated user account for your Jira Integration (workflow app) can be made from the Conclude Dashboard. When logged in, navigate to App Settings from the sidebar menu, select the app you want to edit then select Jira settings.
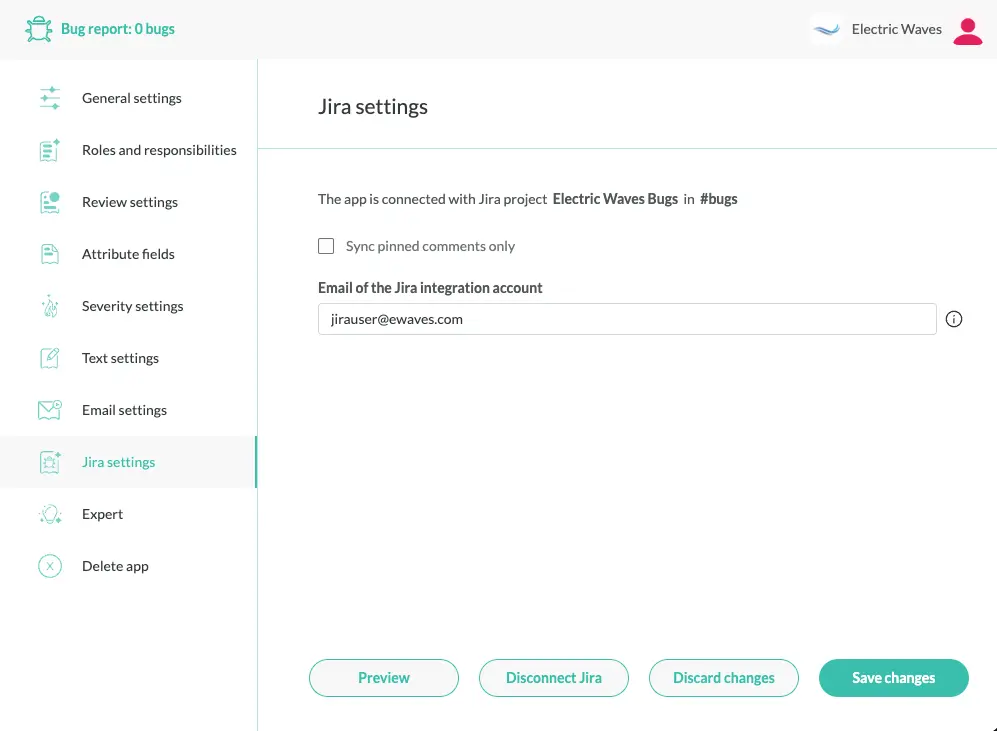
If your Jira project is configured, you will see the below option.
If not, you will see this message: The app is not connected to Jira. Please click Connect to configure a Jira project. This operation must be performed by a Jira administrator.
To connect to your Jira project, please go to Step 3 on our Jira Integration page.
Jira settings (the Dashboard)

In the field Email of the Jira integration account, add the email address (e.g. max@example.com) of the Jira account that you want to use to synchronize all Jira and Conclude tickets.
Please note that the account may be an existing Jira account or a new account (e.g. “Conclude Integration Account”) created specifically to use with Conclude. We recommend to set up a dedicated account to avoid potential synchronization conflicts between Conclude and Jira.
Save the changes
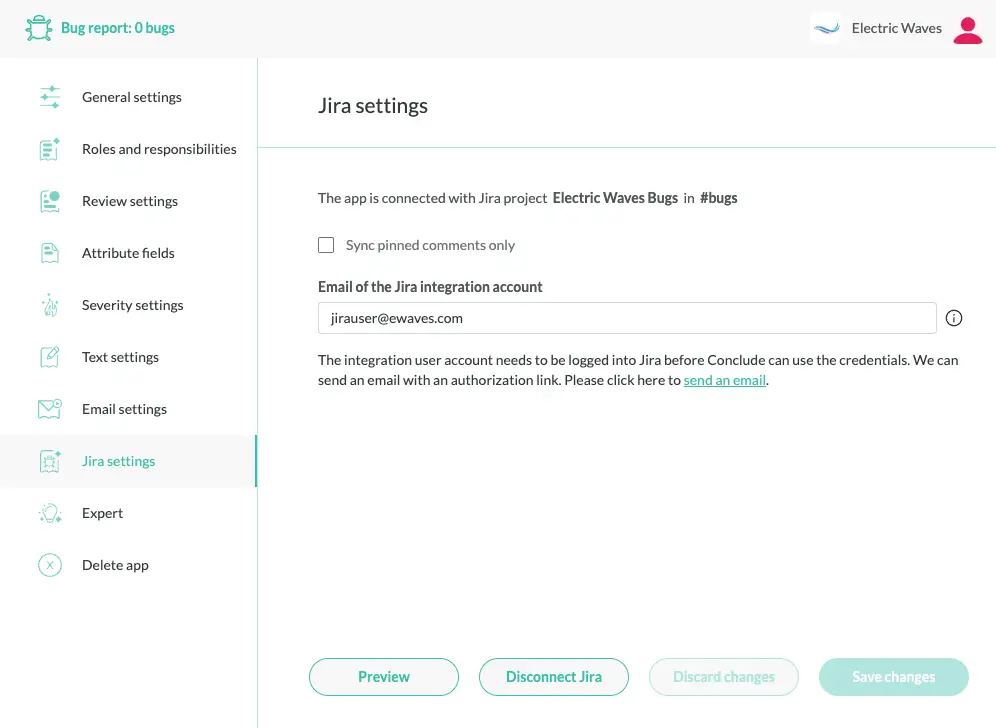
If the Jira user account is not logged in to Jira, you will see the following message: The integration user account needs to be logged in to Jira before Conclude can use the credentials. We can send an e-mail with an authorization link. Please click here to send an email.

As mentioned, Conclude needs permission from the user account to synchronize tickets. The account must be logged in to Jira for this to occur. Selecting “send an email” will then send an e-mail with an authorization link.