Connect with Jira
Connecting Slack with Jira
This page explains how to use Conclude’s Jira connector to connect Slack with Jira. The two-way connection works with Jira Cloud. If you would like to get started with Jira from the dashboard, see Jira Integration Quickstart Guide.
Important: to use the Jira integration, it must be activated from the Solutions page of the dashboard when logged in. Click Admin console > Solutions. Next, toggle on the Apps (ticketing and issue tracking) and the Integrations (Jira and Zendesk) switches.
In this guide you will find the following:
Step 1: Install the Jira workflow app in a Slack channel
Step 2: Modify the App Settings
Step 3: Setup Jira
Step 4: Authorize Conclude
Step 5: Configure a Jira project
Step 1: Install the Jira workflow app in a Slack channel
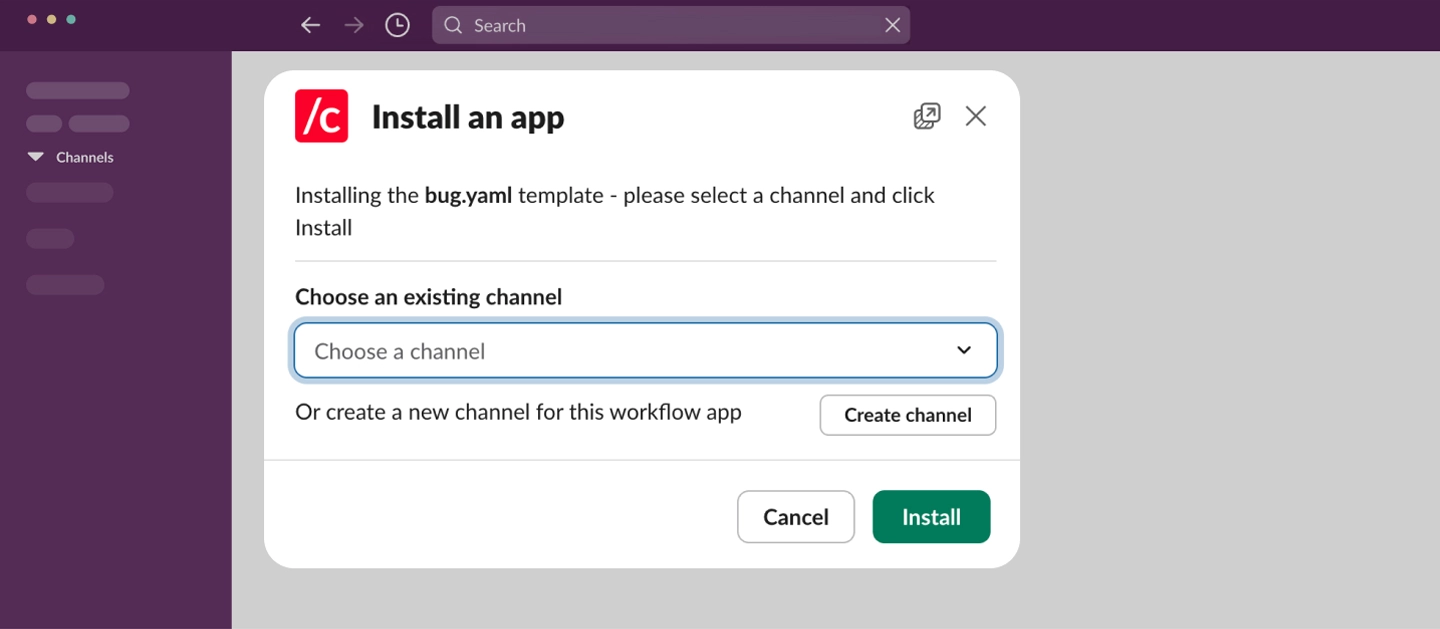
Select the Slack channel where you want to install the Jira workflow app. In this example, we are using the channel #issues. All Conclude apps are easily customizable.
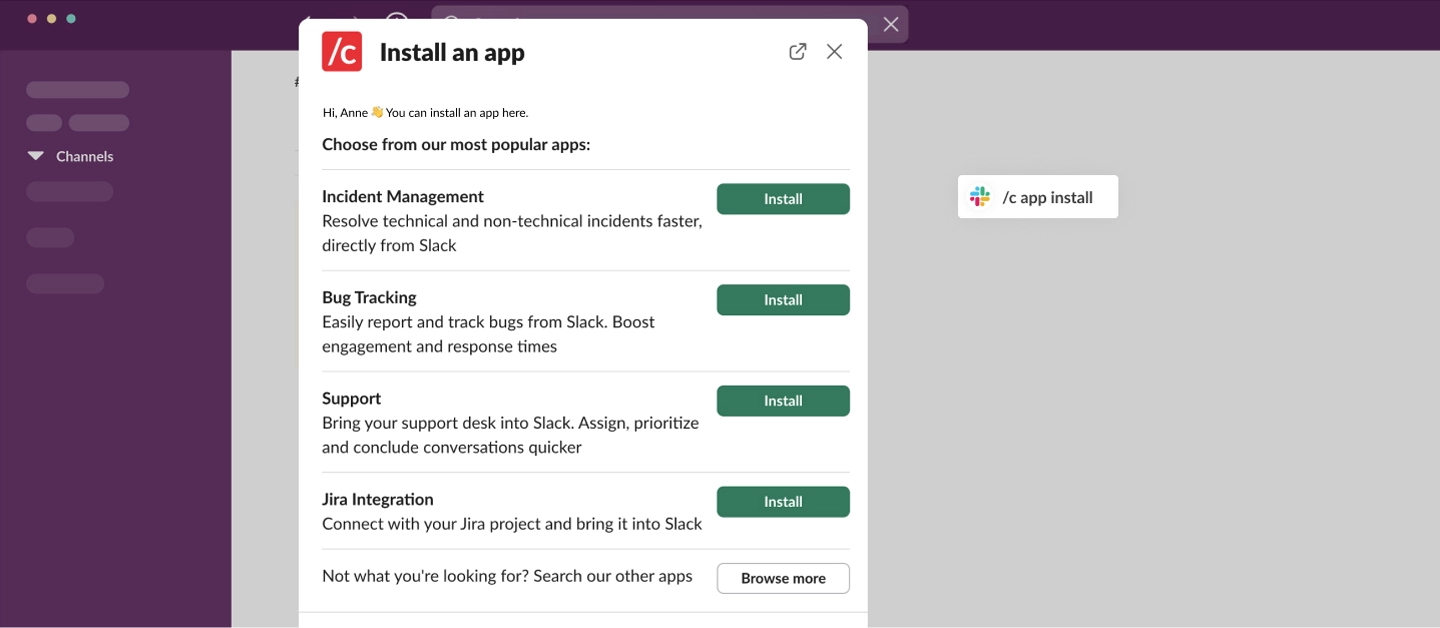
To install the Jira workflow app, run the command /c app install jira (see screenshot below) or, run the command /c app install and select Jira Integration from the list.
Choose the channel where you want to install the app.
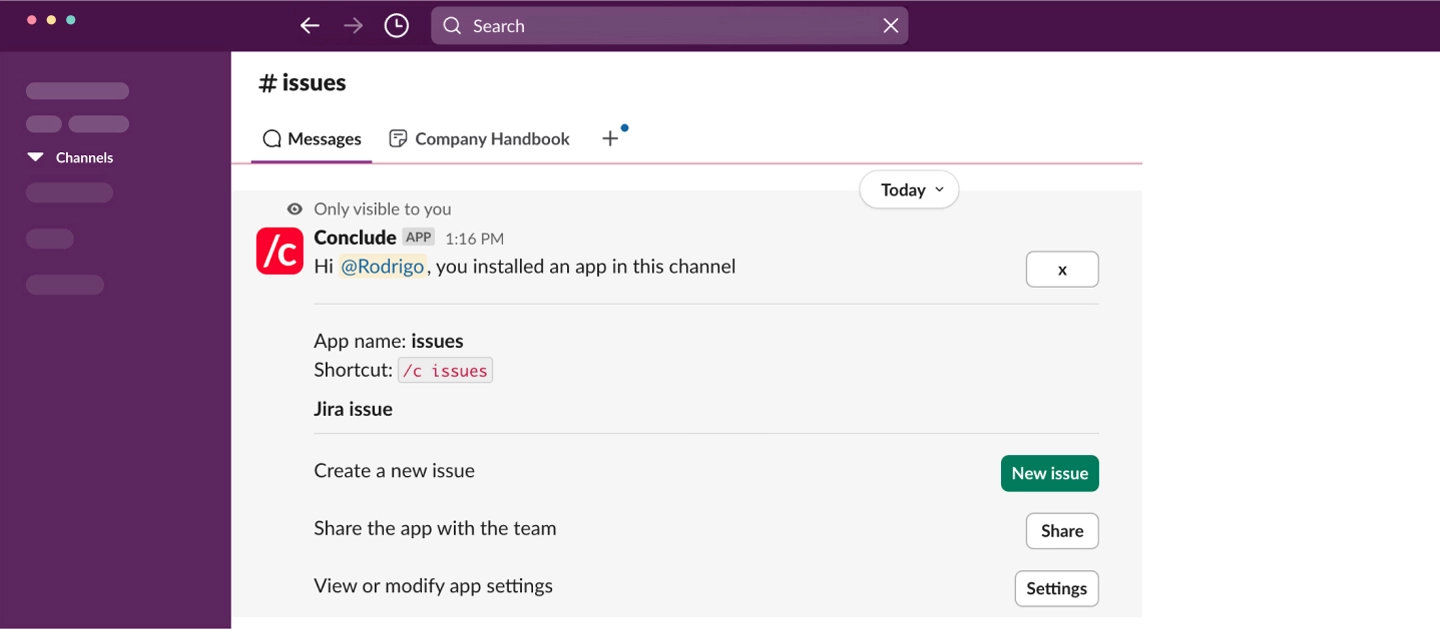
Once the app is installed, you will see the following message:
Step 2: Modify the App Settings
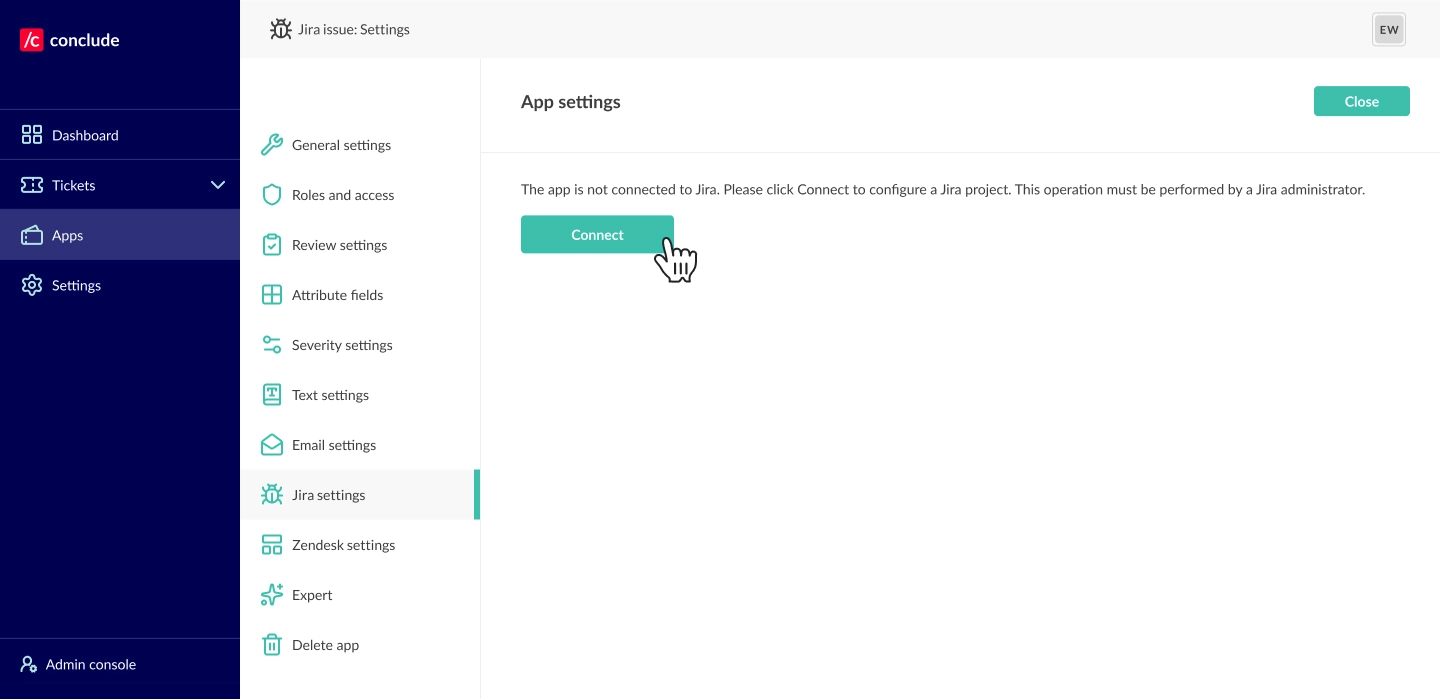
Click the Settings button (as shown in the screenshot above) which will take you directly to the Conclude Dashboard, our web-based UI. Navigate to the Jira settings tab on the left hand side under the App Settings. You will see the following with the text: “The app is not connected to Jira. Please click Connect to configure a Jira project. This operation must be performed by a Jira administrator”.
Step 3. Setup Jira
After clicking Connect, you will see the following prompt. In order to configure a Jira project, you will need to know the base URL of the Jira server, for example: https://ewaves.atlassian.net
Configure your Jira project by providing the Jira base URL as shown. You will then need to authorize Conclude to connect to your Jira Instance. If you are already authorized, you will be presented with the view shown in Step 5.
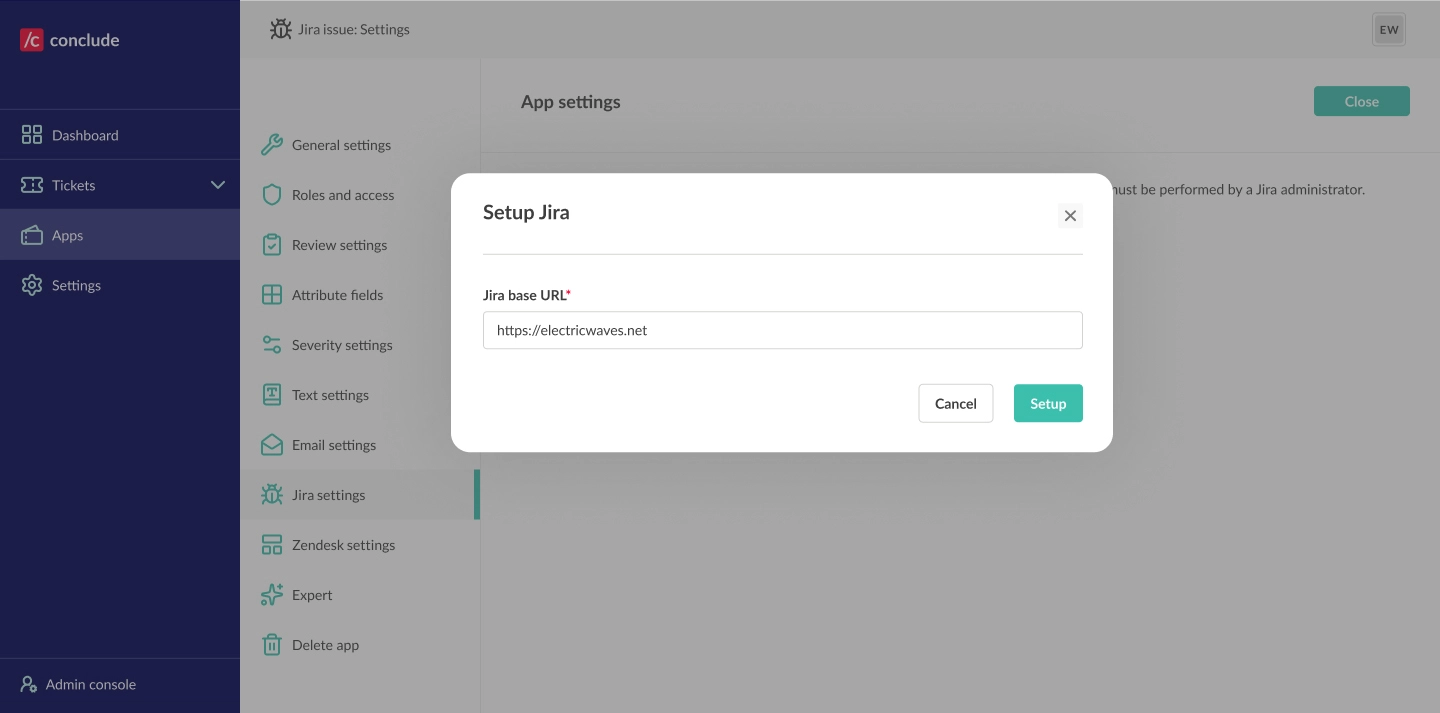
Step 4. Authorize Conclude
Click the Login button to grant authorization to Conclude. You will then be redirected to Atlassian’s website to authorize Conclude. If Conclude was successfully connected, you will be presented with the view shown in Step 5.
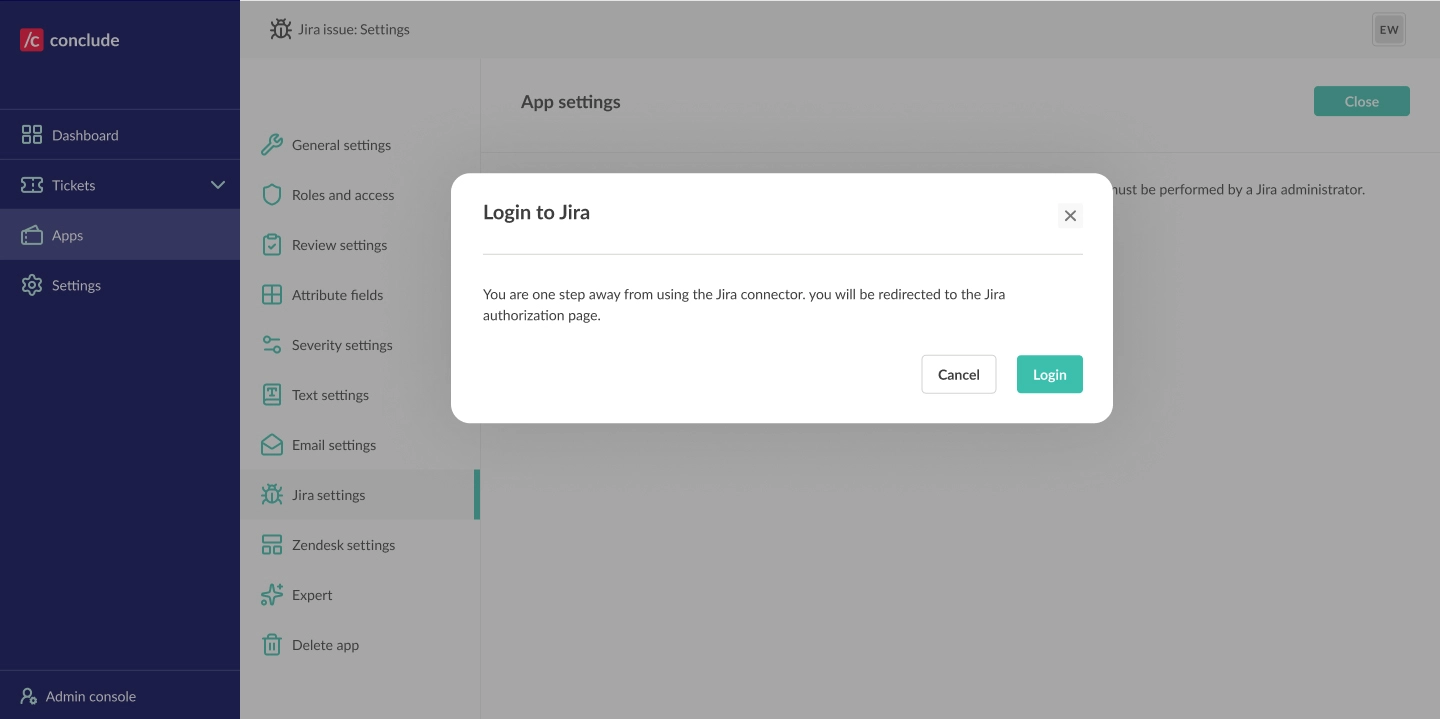
Step 5. Configure a Jira Project
Select a project that you want to configure from the dropdown menu then click the Configure button. Please note that projects that have already been configured will not be listed.
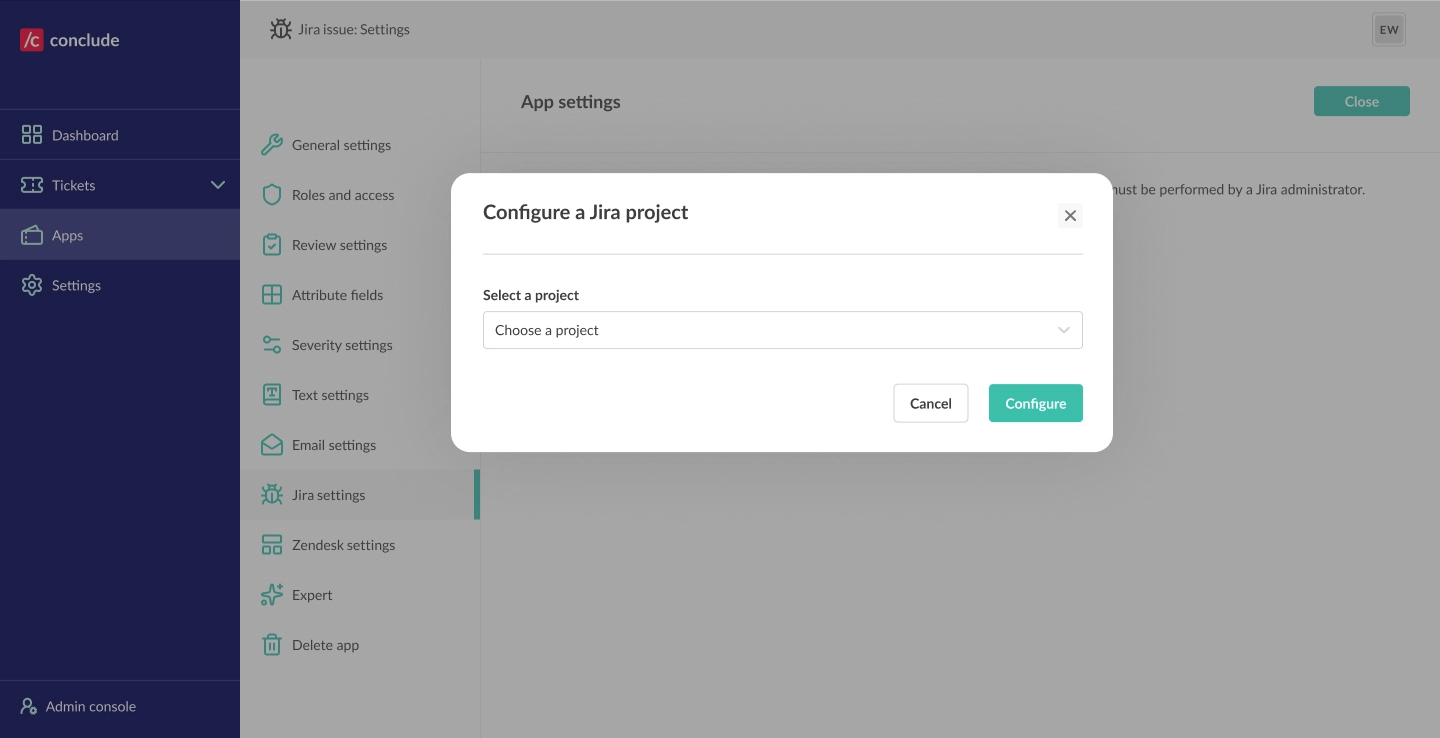
If the configuration was successful, you will be presented with the view as shown below.
Conclude will read the metadata of the Jira project and modify the attribute section of the app installed in this channel.
You can check the box Sync pinned comments only to limit synchronization to pinned Slack comments. Note that all comments will be synced from Jira to Slack, but only pinned comments will be synced from Slack to Jira.
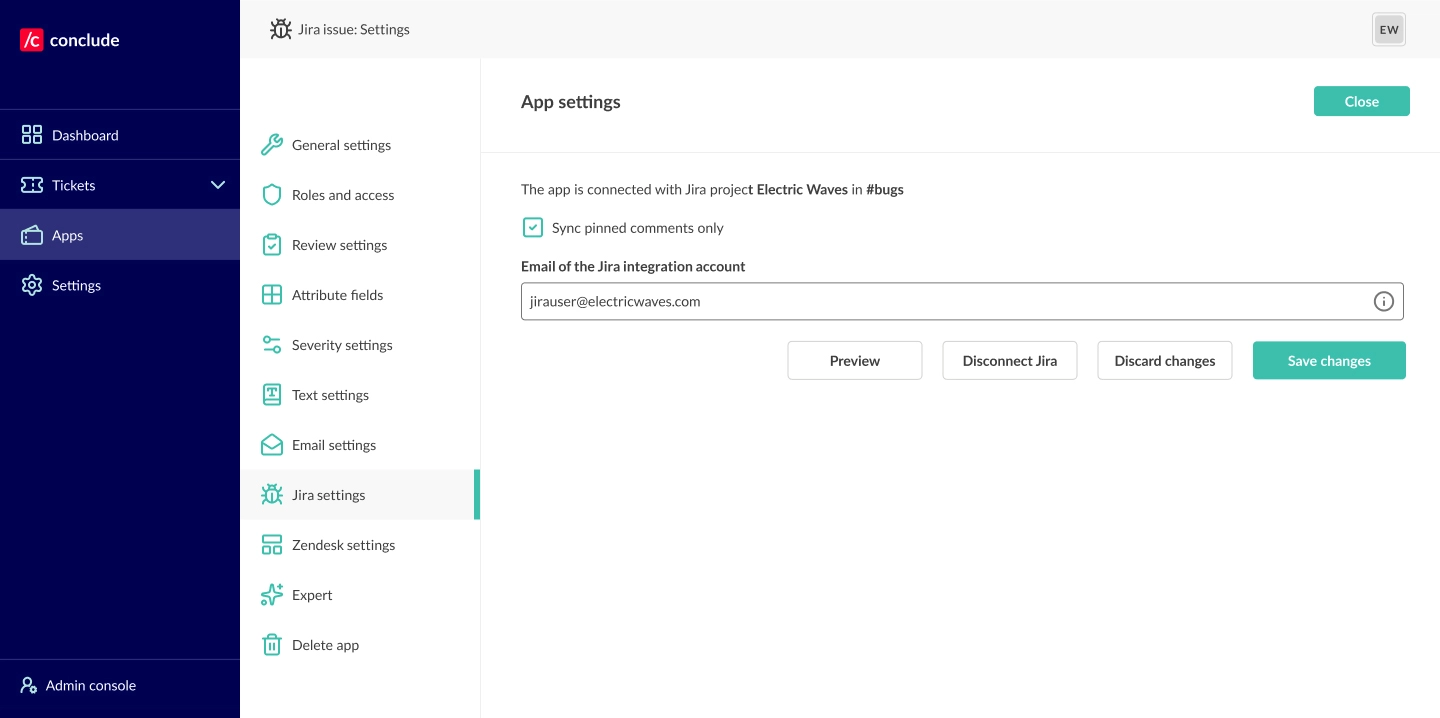
That’s it 👏 You have now connected Conclude with Jira.
Testing the connection
You should now be able to create a Jira issue from Slack. From Slack, create a ticket by typing the channel name where it was installed, for example /c issues, or you can use the command /c new when inside the channel and create a New Issue.
It should show up in Jira after 1-2 seconds, but you may need to refresh the Jira project page to see the new issue. Likewise, if you create an issue in Jira, it should show up in Slack immediately.
To check the Jira connection and your login status, use the following commands:
/c jira connectionsdisplays all active connections./c jira statusdisplays your login status.
A note about user accounts
In order to synchronize comments and actions between Slack and Jira, Conclude needs to match Slack users with corresponding Jira users. For example, if @Susan comments on an issue in Slack, Conclude will create a comment by the same user in Jira, which may be called @Susan Lim.
See the Jira Integration Account page for more information about how Conclude maps user accounts between Slack and Jira.