Web connector
Conclude apps are installed in your team’s Slack workspace and only available for the members of the workspace.
You can use the web connector to let people outside your Slack team interact with your app via a website. For example, the web connector lets external users submit incidents, bug reports, or general inquiries etc. that will get channeled to your Slack workspace.
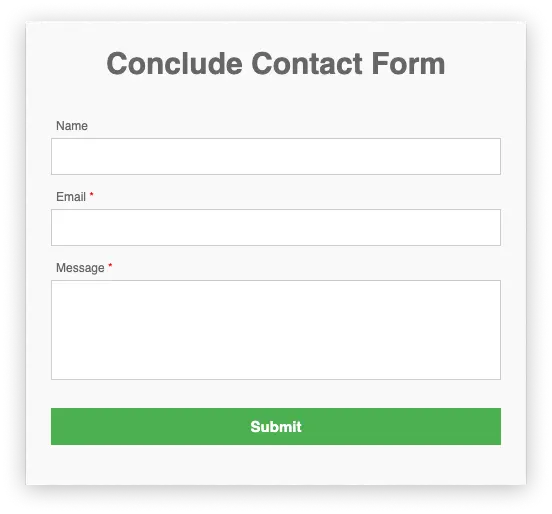
We will use a contact form to illustrate how the web connector works. This is a fully working contact form, which you can easily adapt for your own organization.
The complete HTML, CSS and Javascript is available as a live demo on CodePen and on GitHub. Feel free to use and modify this code for your own webforms (MIT license).
What is a web connector?
A web connector contains a unique identifier, generated by Conclude, that is used to connect a webform to your app. It also contains an optional mapping of webform input fields to your app’s attributes.
webConnector:
  id: 5765sg0zx2jpmx445mm4kh7lxodqn
  attribute_map:
    - internal: title
      defaultValue: Message from ${name} ${email}
    - external: message
      internal: body
In this connector, we map the external message field (an HTML textarea named “message”) to our app’s body attribute. We also set our title attribute to a text composed from the webform’s name and email fields by using macros.
You will need to edit the app source from the web-based UI (Dasboard) to work with web connectors. Click Edit App under the app’s context menu.
Connect the contact form to your Conclude app
Here we will go through the steps of connecting the contact form to your Slack workspace.
1. Create a channel for incoming inquiries
Create a new Slack channel called #ext-contact-form, where you will process incoming messages from the contact form.
2. Install the contact-form app
The contact-form app processes input from the example webform, and contains a web connector as shown above.
/c app install contact-form #ext-contact-form
3. Connect the webform to the app
Your app will need a unique web connector ID to receive input from the webform. Add these two lines to your app:
webConnector:
  id:
When you save the app Conclude will generate in a unique identifier:
webConnector:
  id: 5765sg0zx2jpmx445mm4kh7lxodqn
Alternatively, you can use this Slack command /c app web-connector in the channel where you installed the app. This will display the value of the web connector ID (and create it on demand).
Now, insert your actual ID (not the one in the example above!) into the javascript code.
In the CodePen’s JS section, on the first line, or the GitHub’s form.html, near the end:
const connectorId = '<insert it here>';
That’s all it takes to connect a webform to your Slack workspace using Conclude. Enter some information and click Submit. If everything works the webform will display a “thank you”-message.
How it works
The web connector logic on the frontend is handled by a small javascript module, activityform.js, which validates and submits the form data to https://api.conclude.io/v1/activity.form.
All you need to do is to connect the form to your Slack app by calling a javascript function:
  activityForm.connect(
    connectorId,            // your unique web connector ID
    formId,                 // the webform identifier ('conclude-form')
    buttonId,               // submit button identifier ('submit-button')
    reCaptchaSiteKey        // Google reCAPTCHA V3 site key (optional)
)
Handling web connector responses
The activity.form API returns the status code “ok” or an error response (e.g. “validation_error”). The frontend displays a response based on this response. You can customize the frontend messages by calling activityForm.setResponses() and pass an object of responses as shown in ** activityform.js**.
Attribute map
Conclude apps have attributes named title, body that may not correspond to webform field names.
The attribute map translates external webform fields to internal attributes. In some cases you may want to set a default value in case the external attribute has no value.
<input type="text" name="subject" id="a1" placeholder="Enter a subject">
<textarea name="message" id="a2" placeholder="Enter a message"></textarea>
These webform fields subject and message are mapped to our title and body attributes with this map:
  attribute_map:
    - external: subject
      internal: title
    - external: message
      internal: body
      defaultValue: <no message>
The body attribute will be set to "
You can also use macros to compose content from webform fields.
  internal: title
  defaultValue: "Message received from ${name} on ${MM}/${DD} at ${hh}:${mm}"
Webform security
Opening up your app to external users also opens it up to bots that potentially can flood your app with spam and junk. Conclude offers several ways to deal with this.
Rate limitation
You can set rateLimit to limit the maximum number of submitted forms per minute. The app will return the error code rate_limit_error if the rate limit is exceeded.
Domain verification
You can set domain to tell the web connector to only forward requests from specific domains. Any attempt to submit a webform from any other domain will result in a domain_error. Please note that it’s still possible to use low-level tools such as cURL to override the domain.
rateLimit: 6/min
webConnector:
  id: ...
  domain: mycompany.com
Google reCAPTCHA
The best way to protect your app is to implement Google reCAPTCHA, which can identify and block automated access to your webform (also known as bots).
Conclude works with reCAPTCHA version 3, which works without any direct user interaction. In order to use reCAPTCHA, you will first need to get your own keys.
First, get your reCAPTCHA v3 keys on google.com/recaptcha/admin/create. You will get a public site key, and a private key that is secret.
Insert the public site key in the HTML and the javascript
Locate this line in the HTML:
<!-- script src="https://www.google.com/recaptcha/api.js?render=..."></script-->
Change it to:
<script src="https://www.google.com/recaptcha/api.js?render=reCAPTCHA_site_key"></script>
Replace reCAPTCHA_site_key with your public sitekey.
Then set reCaptchaSiteKey in the javascript (at the same place where you set connectorId):
const reCaptchaSiteKey = 'reCAPTCHA_site_key';
Register the secret private key with the app
The private key should never be shared with unauthorized people. Conclude stores such private app keys in a protected place with strict access control; app secrets.
Open the app secrets with /c app secrets #ext-contact-form and register your private key.
Your contact-form app will now return the error recaptcha_error if Google reCAPTCHA believes the submitted form came from a bot.
Create a review process
You can set up a review process where a smaller group of people review incoming requests before sending them to the team. Reviewers act as a filter that can accept or reject incoming requests, or even modify, classify or triage these requests.
Create a new Slack channel #ext-contact-review where incoming requests arrive to be reviewed before they are sent to the team. Then add these lines to your app:
review:
  members: "#ext-contact-review"
  alert: "#ext-contact-review"
This will invite the members of #ext-contact-review to accept or reject incoming form requests. The reviewers can click a button to accept or reject the request, or modify it. When a reviewer accepts the request it will be sent to the #ext-contact-form channel as before.
As an alternative to adding the lines above to your app, you can use Slack developer commands:
/c app set review.members #ext-contact-review/c app set review.alert #ext-contact-review